As an Amazon Associate, I earn from qualifying purchases. In addition, I participate in several other affiliate programs that allow me to earn while I recommend products I love.
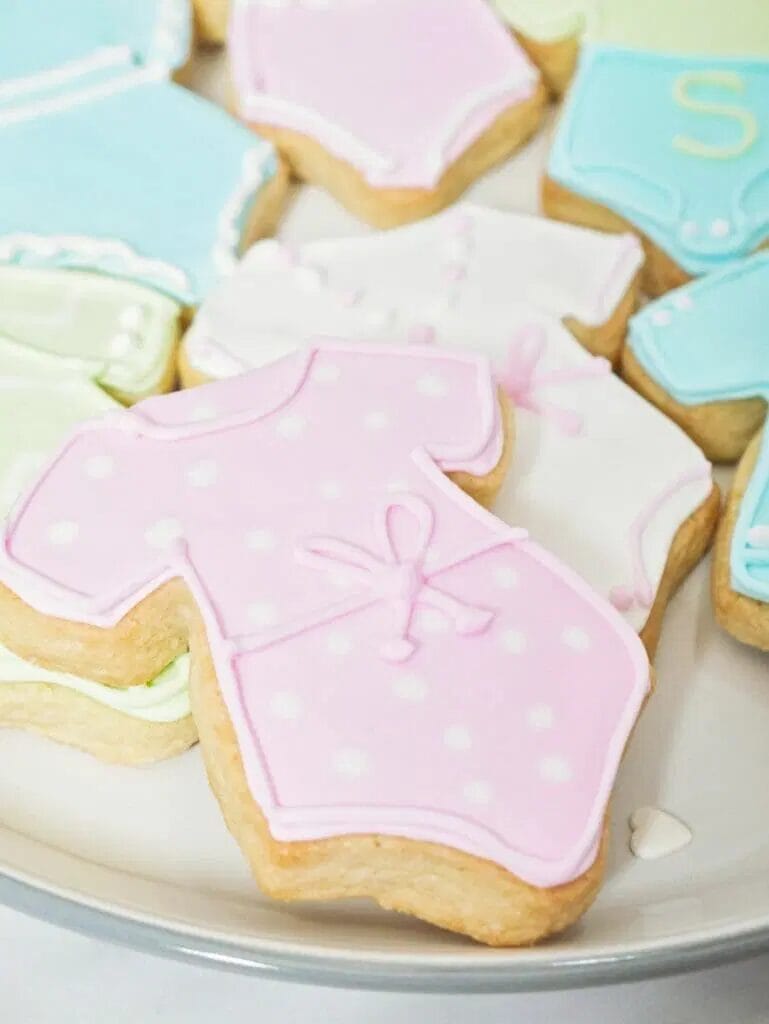
Whether you’re going to a baby shower or just want to make these cute baby onesie sugar cookies for a friend, this baby onesie cookie recipe is easy to do yourself at home with my favorite cut-out sugar cookie recipe and some royal icing.
Making themed cookies can look difficult, but it’s not at all if you’re willing to take a little bit of time to learn.
After a few practice rounds, you’ll be able to apply the same techniques to do whatever themed cookies you want like flamingo cookies and elephant cookies!
These adorable baby onesie cookies are:
- super cute and sure to impress
- perfect for a baby shower or mom-to-be
- easy to personalize with the baby’s name or parent’s favorite colors
- able to be stored at room temperature
All you need that’s out of the ordinary for these baby onesie cookies is a baby onesie cookie cutter, any size you want.
They are so easy to find on Amazon or at your favorite craft store, and I usually buy cookie cutters in sets so I bought an entire set of baby themed cookie cutters here so I could make other baby shower cookies like baby bottle cookies and rocking horse cookies and baby bib cookies and baby feet cookies.
The rest of the ingredients, you should have at home, or if not, they’re easy to source, and you don’t need a stand mixer, but just a regular hand mixer.
I even do it without a mixer at times when my mixer is broken, which just takes a bit more elbow grease when it comes to the creaming of the butter and the egg.
Baking Tips for Baby Onesie Cookies
To make this recipe, I use my perfect cut-out sugar cookie recipe, which produces cookies that don’t lose their shape.
That is perhaps the most important part of making baby onesie cookies, as when you choose the sugar cookie recipe, you don’t want to choose one that spreads.
You also want to make sure you’re following the instructions regarding chilling time.
I like to leave my dough to chill overnight, and then again after I roll it out, and then finally the shapes themselves.
This does add extra steps, but when you see how perfect the cookies keep their shape, that extra chilling will be worth it.
If you try to skip and go without the chilling, you’ll just end up with unusuable cookies that are spread way too much anyway.
Trust me, been there, done that, cried in my kitchen.
How to Get the Royal Icing the Right Consistency
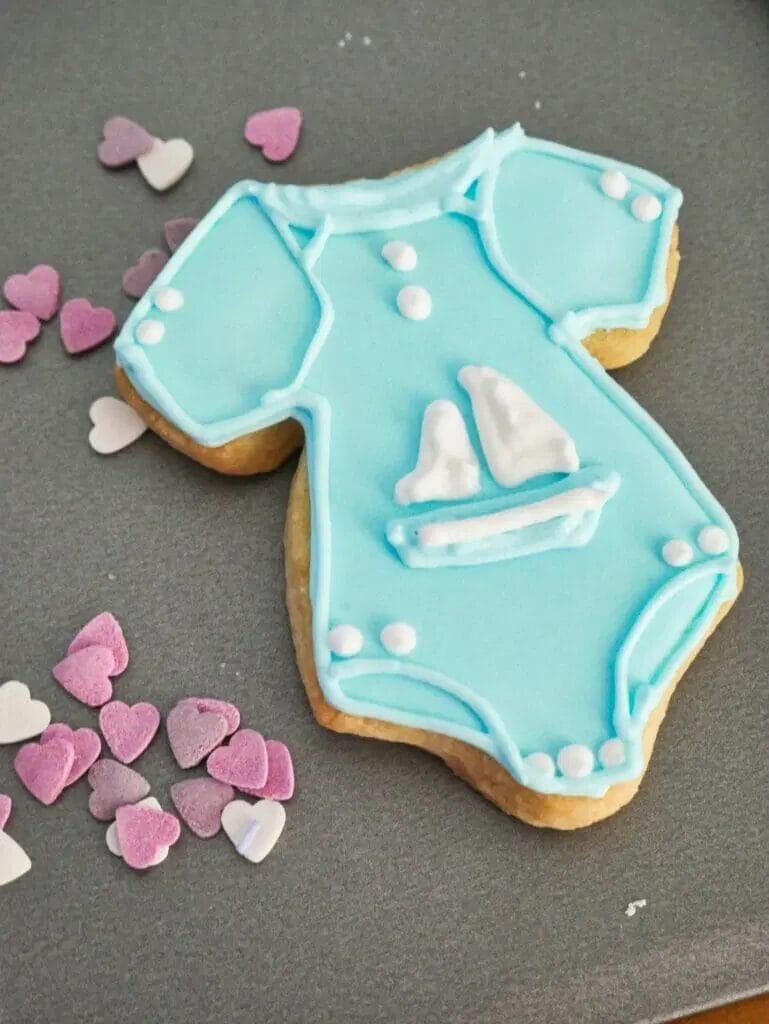
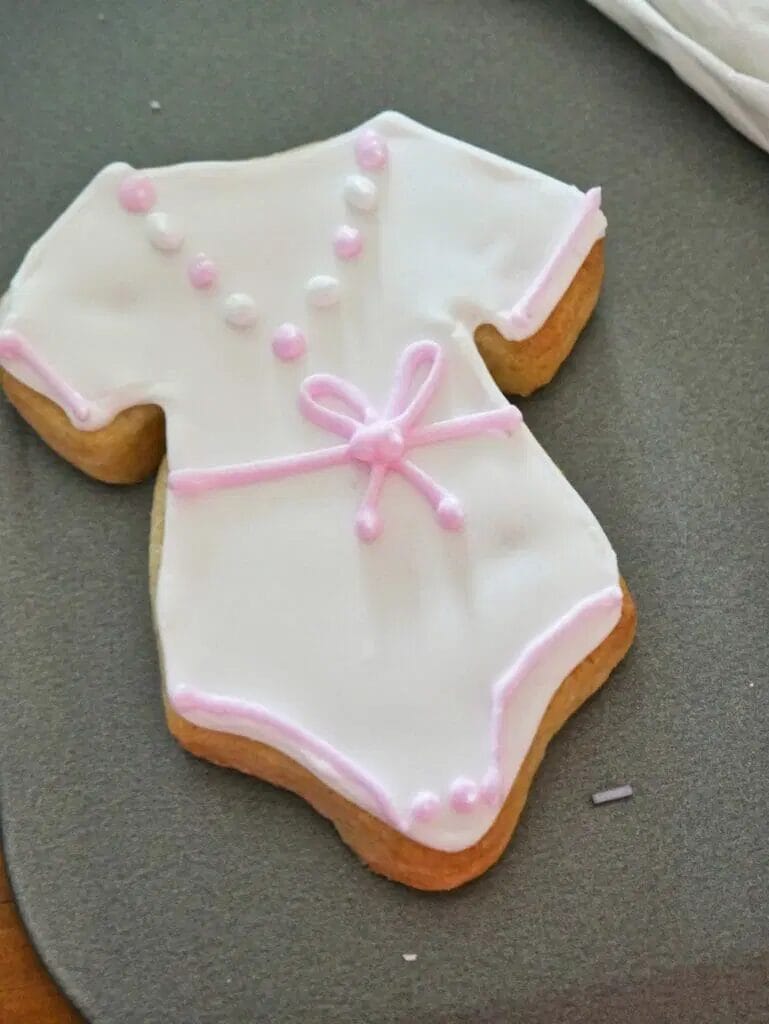
The second part of making baby onesie cookies after you have the actual sugar cookies made is decorating.
The best icing to use is royal icing, as that is what is going to give you the control to make the designs and details you want.
Use my royal icing recipe to make the best royal icing, and pay special attention to the consistency.
Unlike other recipes, this icing isn’t ready as soon as it’s mixed.
It takes time, about 8 to 10 minutes using an electric mixer, to get the kind of consistency you’re looking for.
You want “firm” peaks, which is a bit similar to toothpaste and means that when you pull up one of the beaters, the peaks of icing stay as they are with perhaps a fold at the top after a second or two.
If your icing looks soupy or easily drips down, you’re not there yet.
I usually like to test this by, when the icing looks ready, tipping the bowl upside down.
If the icing doesn’t make any move to drip down, you’re good! (yes, this is a dangerous technique if you’re not sure what you’re looking for, so tip it over slowly and keep watching it from underneath!)
Decorating Tips when Using Royal Icing
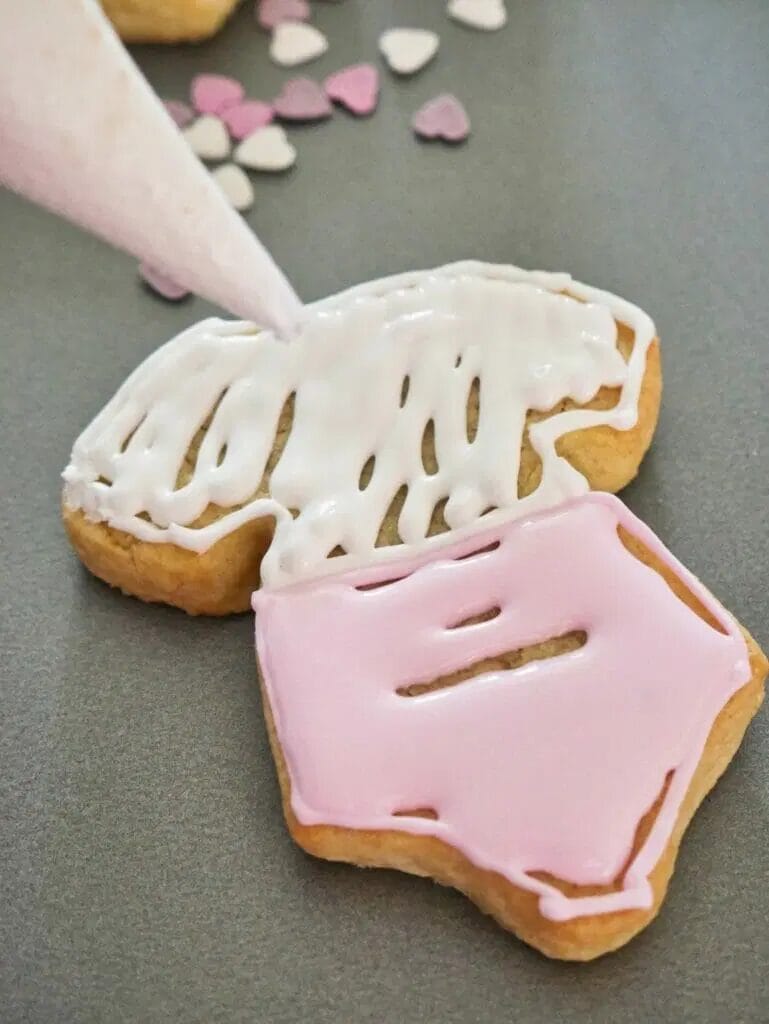
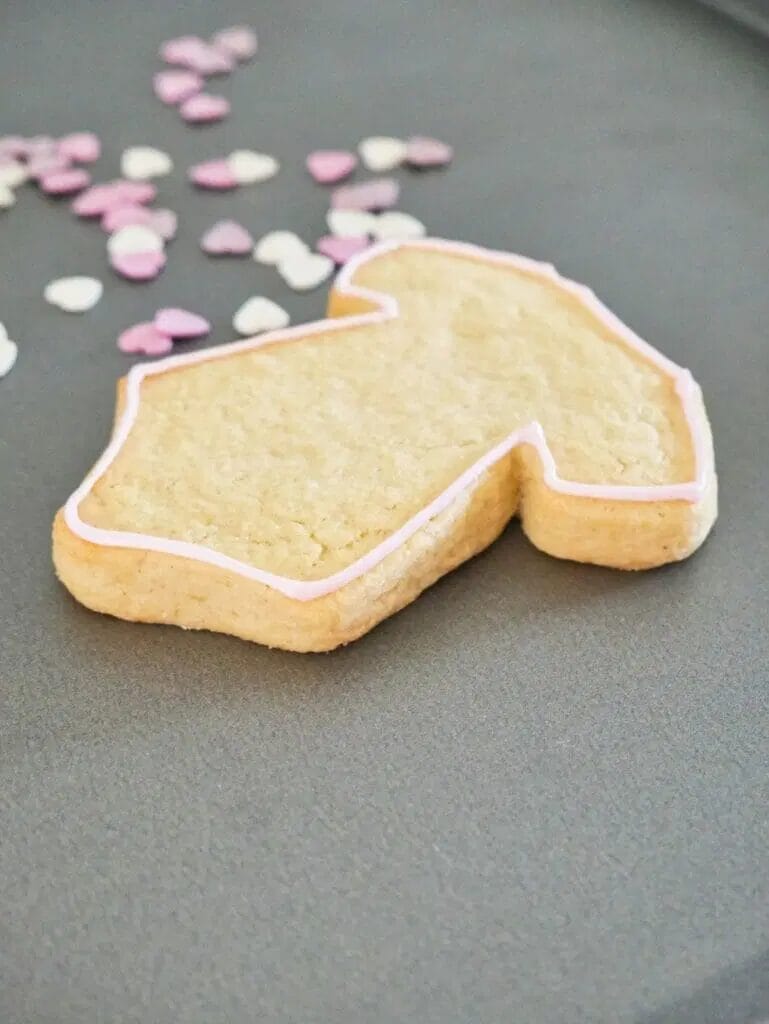
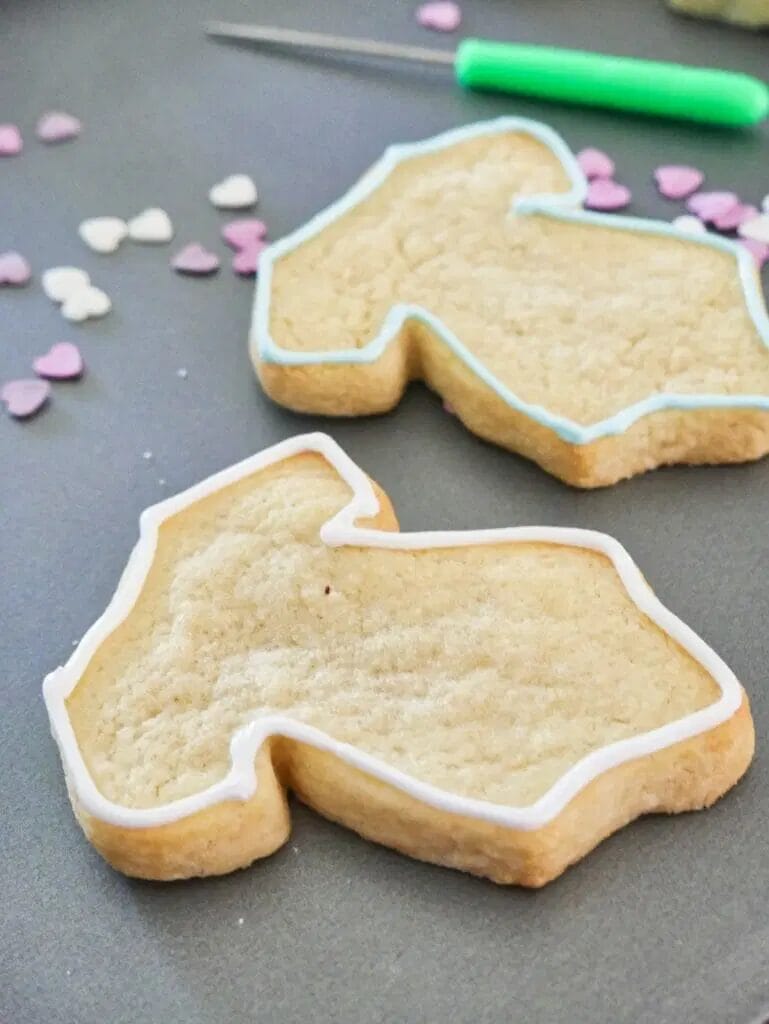
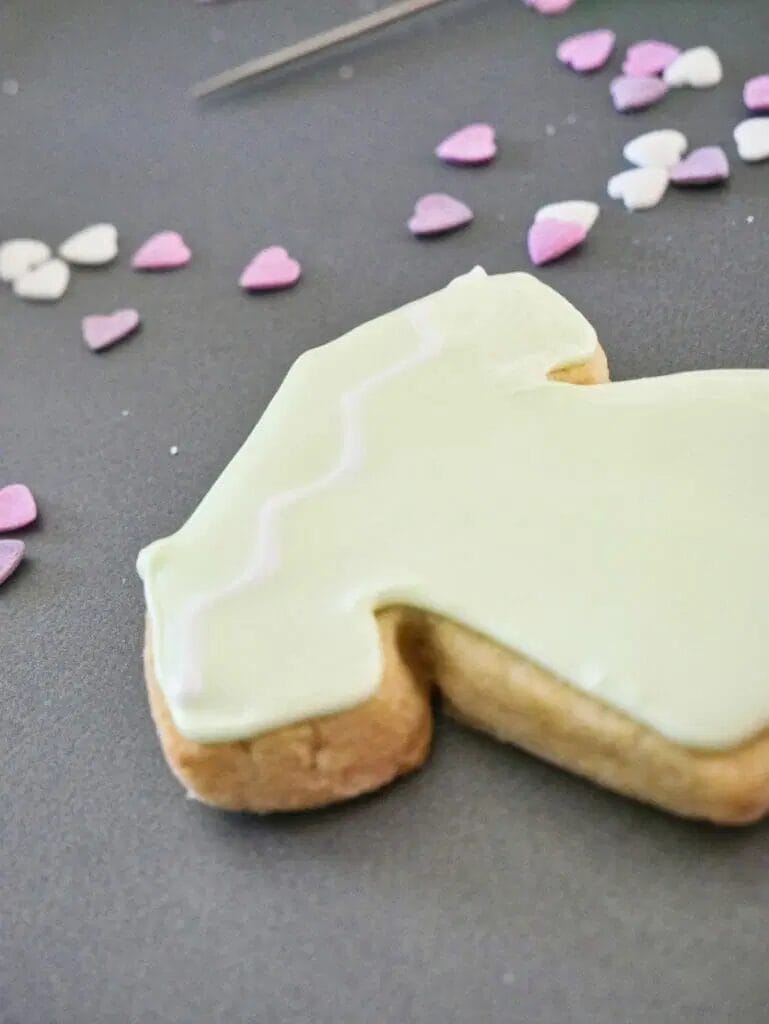
If you haven’t decorated with royal icing before, the basics you need to know are that you first need to outline the cookie with the thicker consistency of royal icing that you first created.
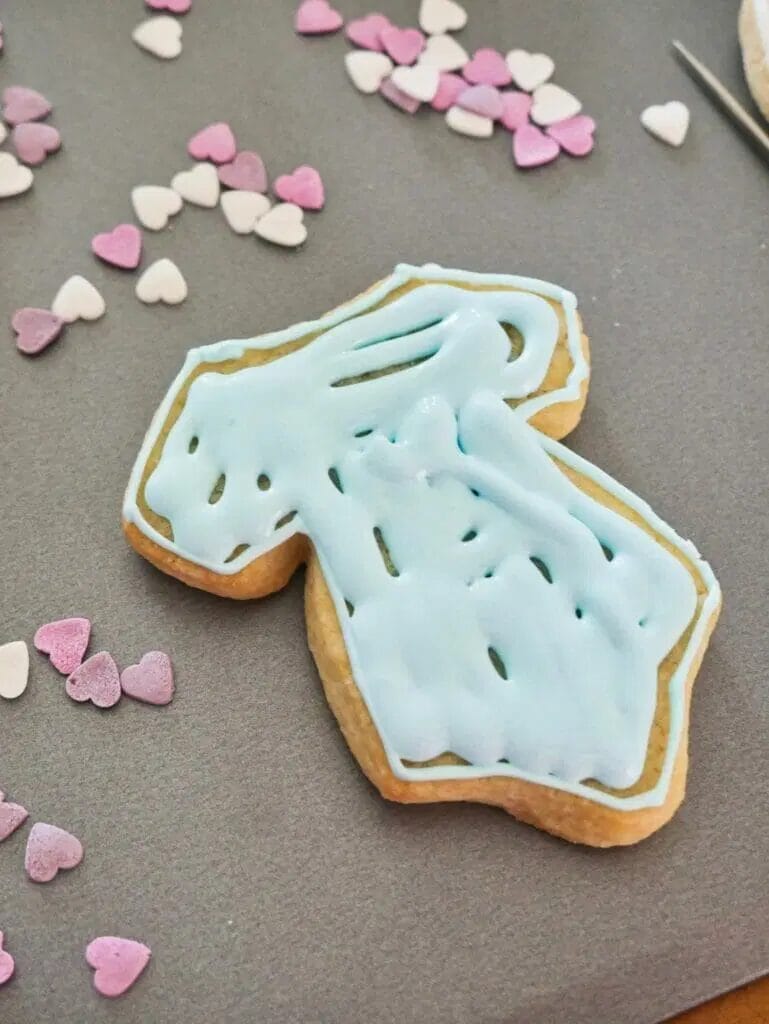
Then, after a few minutes, you can “flood” the inside of the outline with thinner icing that you create by adding a little bit of water to the thicker icing to make it more like honey than toothpaste.
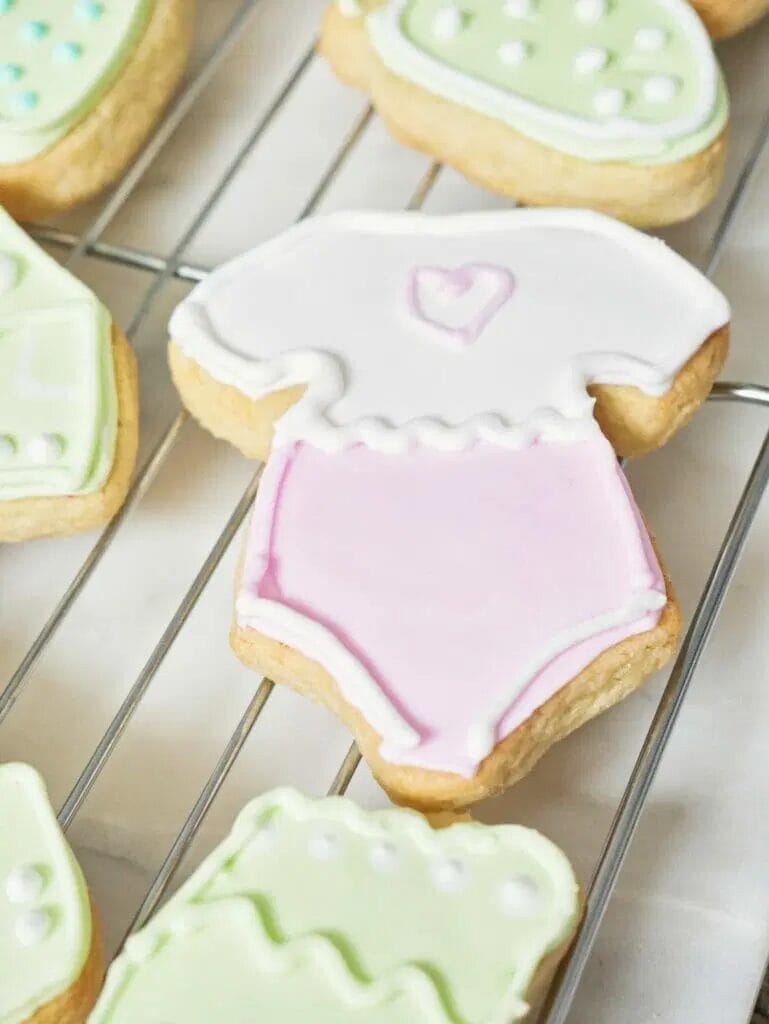
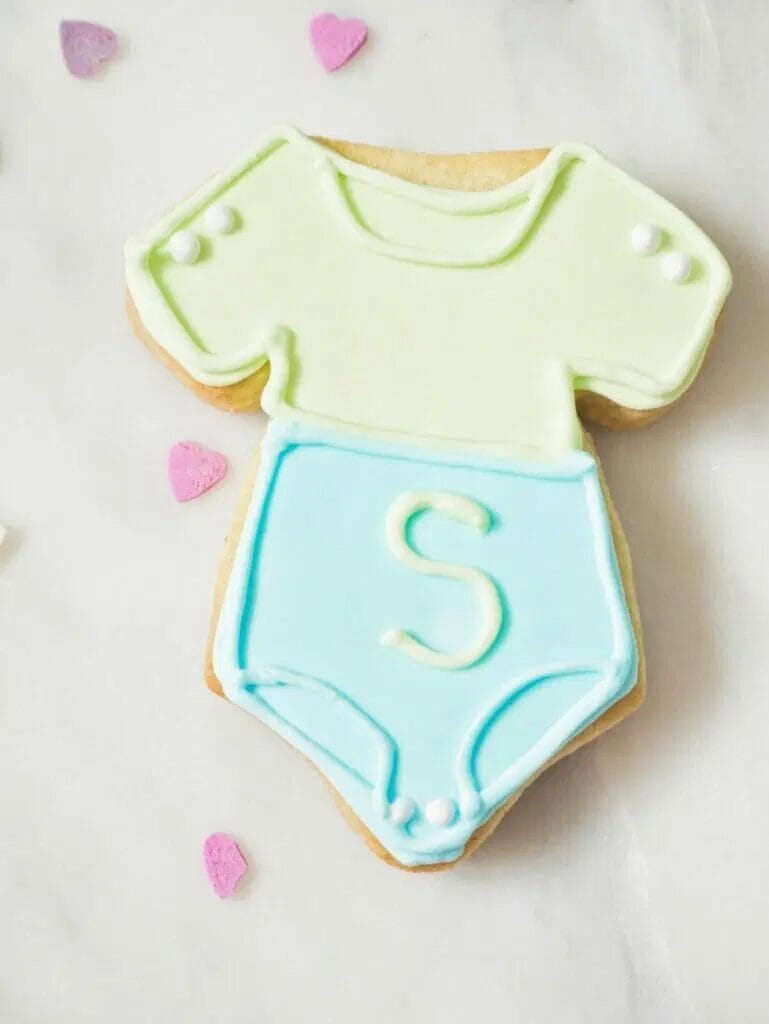
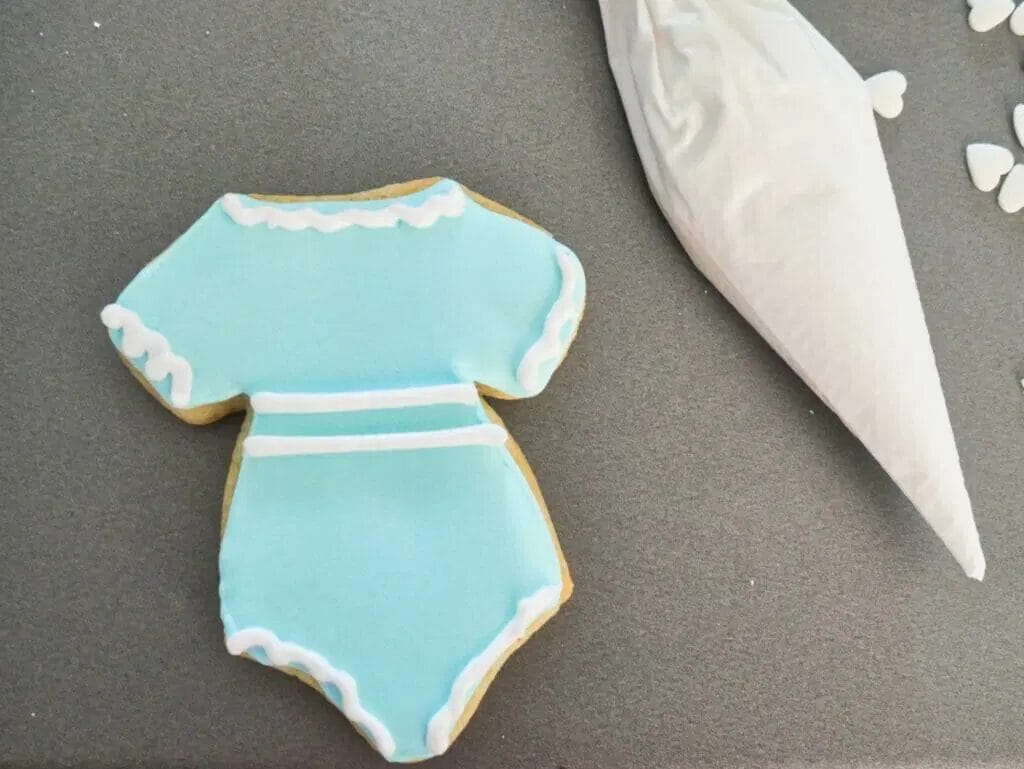
You can then let that dry entirely for 6-8 hours and then add detail on top by outlining the cookie again, writing a name, adding lines, or whatever else you like.
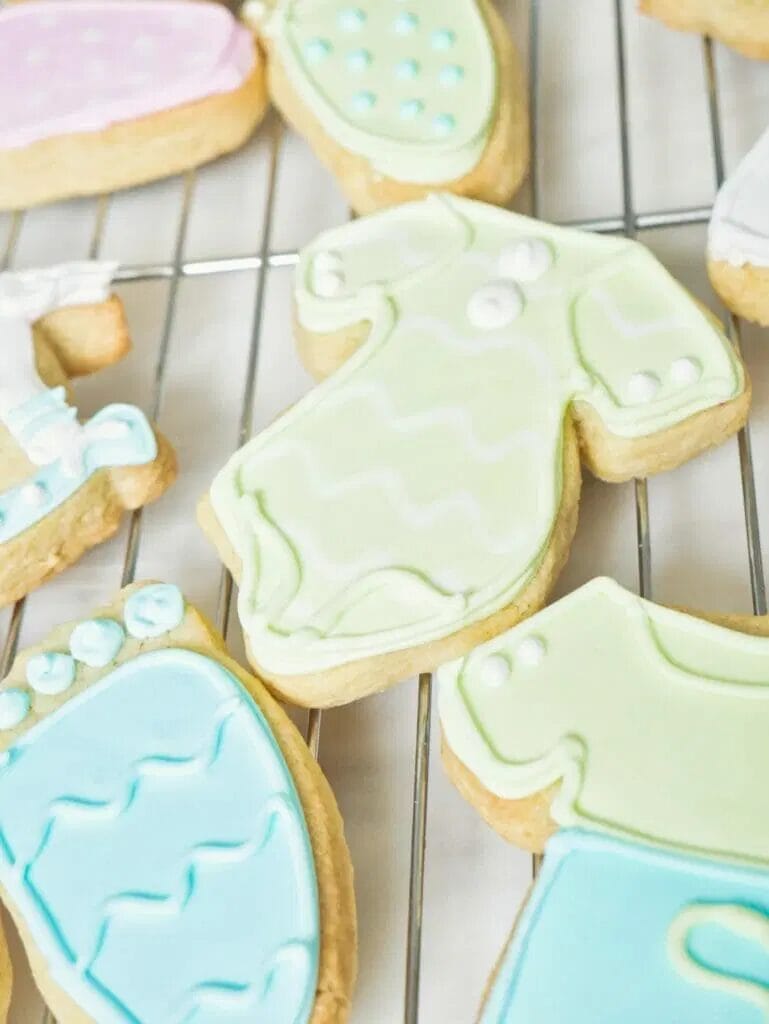
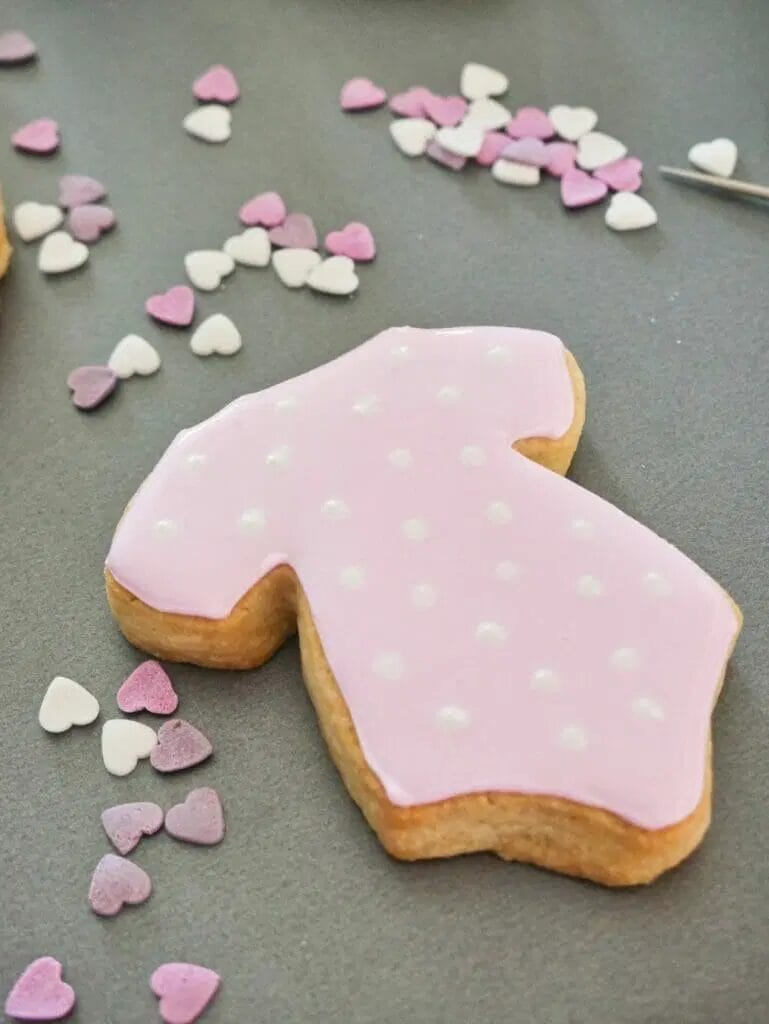
Alternately, you can add more design in this stage right after you flood the cookie by using another color of flood consistency icing and either making polka dots or lines within the existing flood.
These will basically make it so that they become one “layer” with the original flood rather than detail that sits on top of a layer of dried icing.
I like the polka dot look with these baby onesie cookies.
Just make sure to do it as soon as you finish the first layer of flood as once the icing starts setting, you won’t have as much success as you want it to sink in completely.
Can Baby Onesie Cookies Be Kept at Room Temperature?
Yes!
I love these cookies because the royal icing is made with meringue powder and you can keep the cookies at room temperature for up to 2 weeks after you make them if they’re stored in an airtight container.
Can You Freeze Baby Onesie Cookies?
You can freeze the cookies for up to 3 months once you make them, but royal icing doesn’t freeze well and you wouldn’t want to freeze the decorated cookies, so make sure if you’re going to freeze you just freeze the cookie bases.
Can you Refrigerate Baby Onesie Cookies?
Yes, you can refrigerate them, but I prefer them at room temperature and there’s no need to take up room in your fridge.
How to Make Baby Onesie Cookies
First, use the cut-out sugar cookie recipe to make the best cut-out sugar cookies.
You can make these quite a few days in advance if you’re not ready to decorate yet.
Make sure that the cookies are completely cool before you start decorating.
While the cookies are cooling, make the royal icing using the best royal icing recipe.
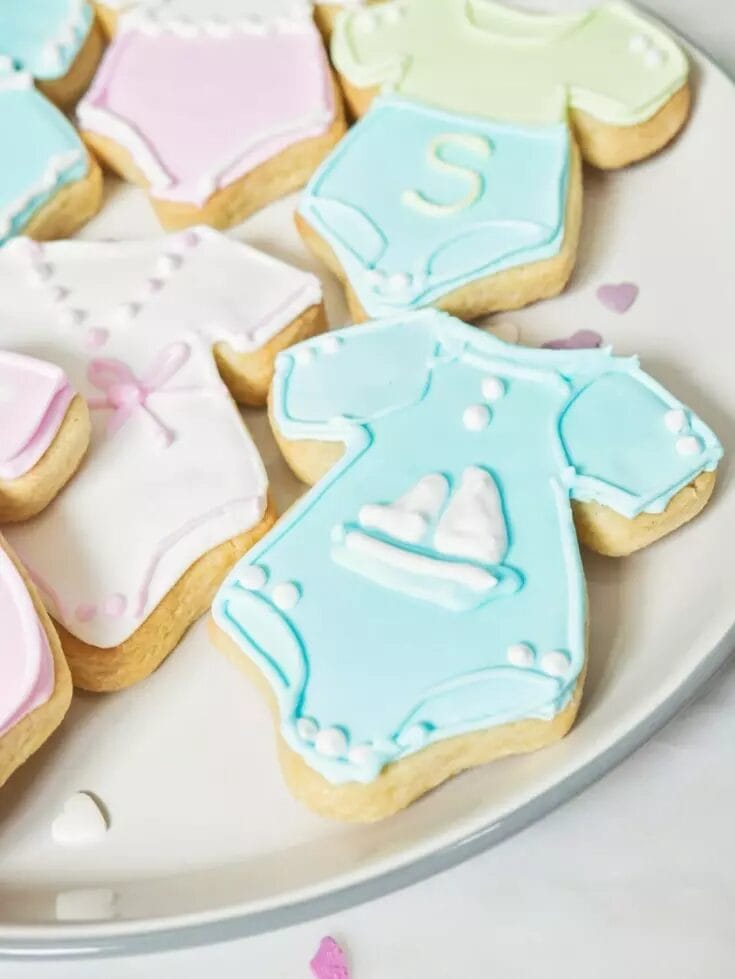
You’ll want to decide how many colors you want to use to decorate (I usually choose 3) and then make sure you have both “line” and “flood” icing for both (the royal icing recipe explains this).
Then, create an outline on the cookies using the thicker icing.
With the same color, flood the baby onesie cookie.
Either let this set completely (at least a couple of hours) or add more design choices using other flood icing.
Once you have the base layer dried, you can then add details on top which could include outlining the baby onesie, writing the baby’s name on it, adding polka dots, adding a checked pattern – the list is endless!

Let the cookies completely dry again, about 6 to 8 hours and enjoy!