
As an Amazon Associate, I earn from qualifying purchases. In addition, I participate in several other affiliate programs that allow me to earn while I recommend products I love.
These baby feet cookies are insanely adorable and the perfect baby shower recipe, or they make a delicious gift for new parents celebrating their recent arrival.
When it comes to baby themed cookies, baby feet are some of my favorite (find baby feet cookie cutters here).
Who doesn’t love baby feet with their squishy toes and adorable little footprints?
These should more accurately be called baby footprint cookies, as the final result also resembles a footprint rather than the actual foot (and maybe that’s a good thing as eating a baby foot sounds much less appetizing than a baby footprint!)
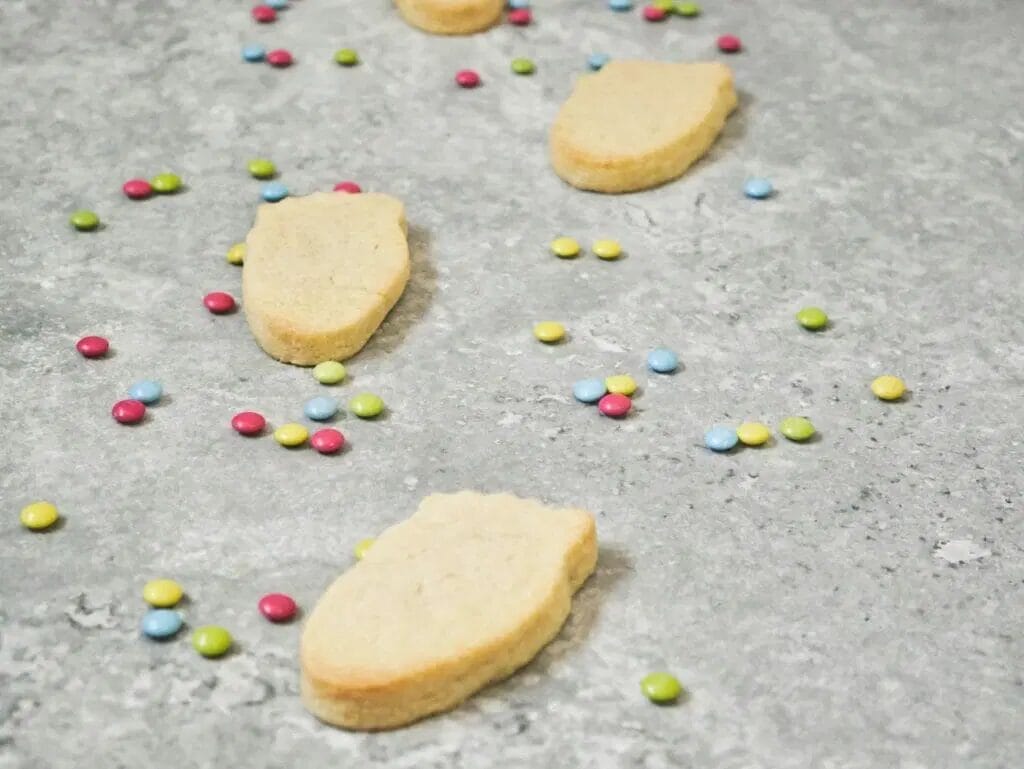
The base I use for them is a cut-out sugar cookie, but you could do them in the cut-out flavor of your choice.
The topping is royal icing, which can be an intimidating icing to use when you’re not used to it, but a little bit of practice and you’ll be able to make these homemade baby feet cookies with absolutely no problem – there is no intricate detail required.

These baby feet cookies:
- taste great while also looking impressive
- are perfect as a baby shower cookie
- are easily personalized with color and design
- have a softness to them while still being sturdy enough for the icing
How to Make the Baby Feet Cookies

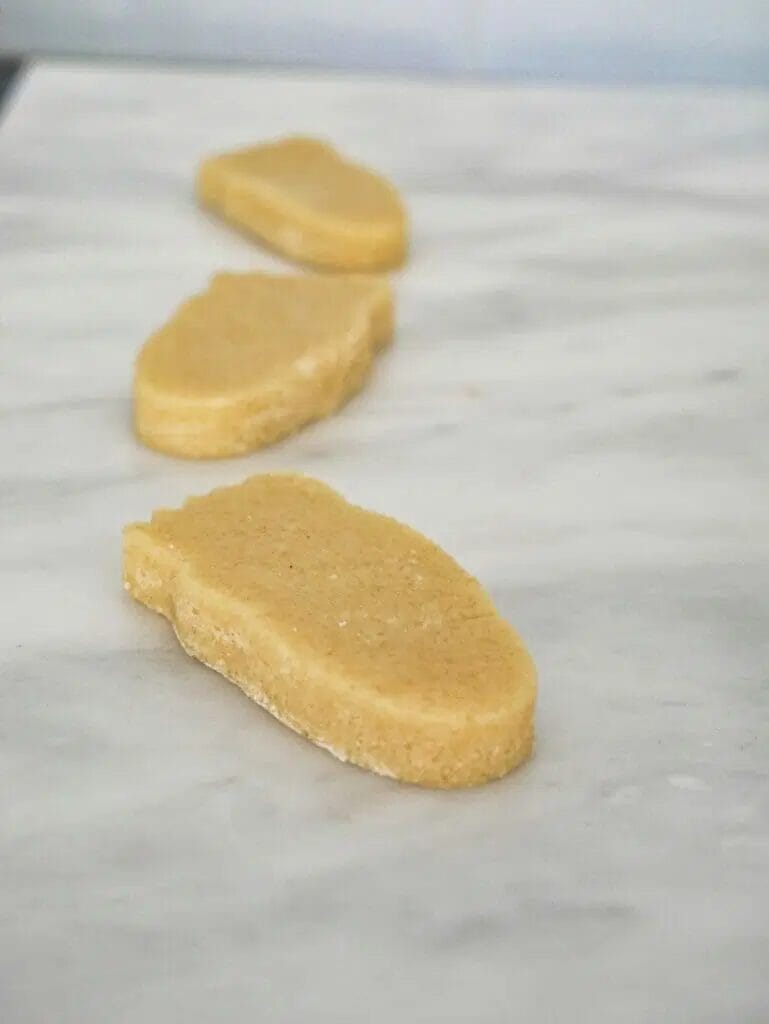
To make the cookies themselves, follow my sugar cookie recipe that is great for cut out shapes.
You’ll want to make sure you have room in your fridge for the cookie chilling process, as this is a really important part of making sure the cookies don’t spread in the oven.
It does require some extra steps to make these come out perfectly, but the result is worth it.
When you make cut out cookies, you really want to be able to keep that definition and not just have blobs to decorate, so follow step by step and you’ll be absolutely fine!
Can You Refrigerate Baby Feet Cookies?
Yes, you can refrigerate baby feet cookies, but I don’t recommend it as I think the cookies are nicer at room temperature.
Can You Freeze Baby Feet Cookies?
You can freeze the cookies before you decorate them, but royal icing doesn’t always freeze well and so you shouldn’t plan on freezing finished baby feet cookies – and of course, you really run the risk of messing up your decorating job if you do that.
How Long do Baby Feet Cookies Last?
Baby feet cookies will last at room temperature for up to a couple of weeks.
They’ll be fresher and nicest to eat in the first few days, but store them in an airtight container and use meringue powder for the royal icing instead of egg whites and it will be safe to keep them at room temperature.
Tips for Decorating with Royal Icing
Decorating with royal icing is always the hurdle for many people when it comes to making sugar cookies.
It can feel foreign and unfamiliar and difficult, but it’s really not.
I’ll talk about some specific techniques for the baby feet cookies below, but in general, make sure that your “line” icing or stiffer icing is about as thick as toothpaste, as you don’t want this runny or you’ll end up with the icing running all over your cookies.
The second type of icing that you create, the “flood” icing, should be like honey – not too watery, but able to easy spread.
This is what will give the finished cookie that nice smooth surface.
Follow my royal icing recipe to learn how to make the icing yourself at home, as you only need three ingredients, one of which is water!
You should also remember to decorate by touching the tip of the piping bag down onto the cookie then lifting up and letting the icing sort of fall onto the cookie rather than keeping the tip right next to the cookie throughout the outlining process.
You actually have more control when you pull the tip up an inch or so and let it drop onto the cookie, believe it or not!
How to Make and Decorate Baby Feet Cookies
Once you’ve made the sugar cookies in the shape of baby feet, make sure they are completely cooled before touching them with icing.

If they are still warm, the icing will melt and you’ll be in for a messy cookie.
I prefer to use about 3 colors, usually in pastels for baby feet cookies, like pink, blue, and green.
You can use whatever colors you want, but make sure when you’re making your royal icing to make sure you make both the thicker “line” icing and the thinner “flood” icing – these come from the same batch of icing, but it just means that you add a bit of water to the thick icing once you’ve portioned out how much you need of it to be thin.
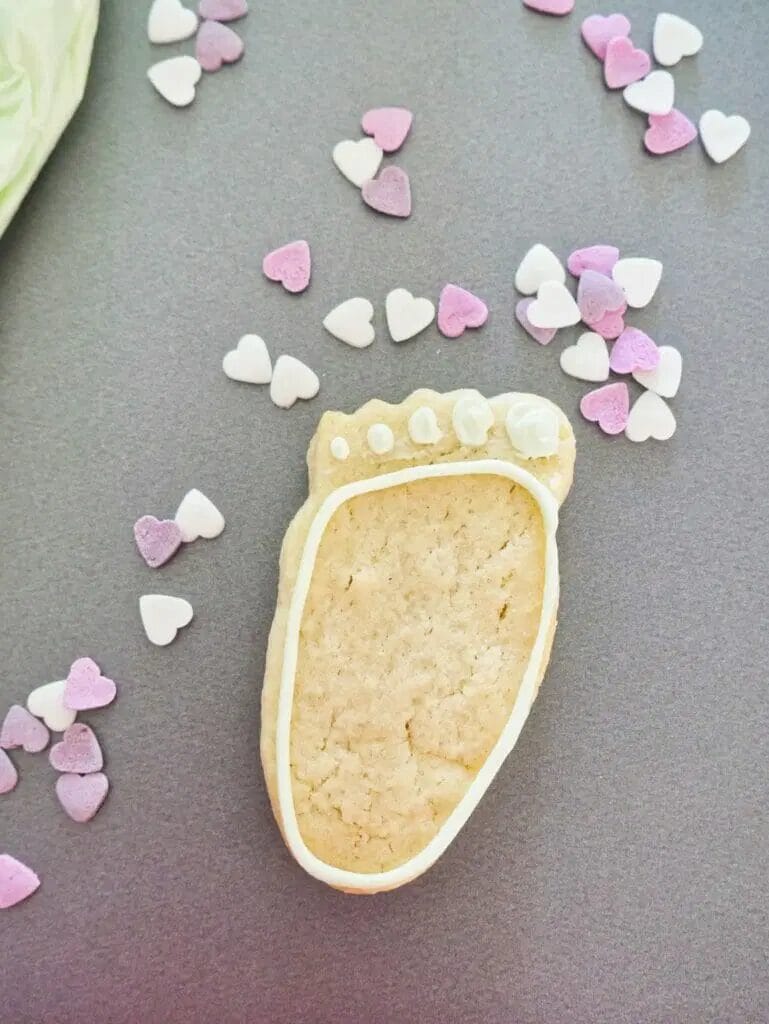
Start by outlining the cookie with whatever color you prefer of the thicker icing, stopping below the toe areas, much like how a footprint would come out.
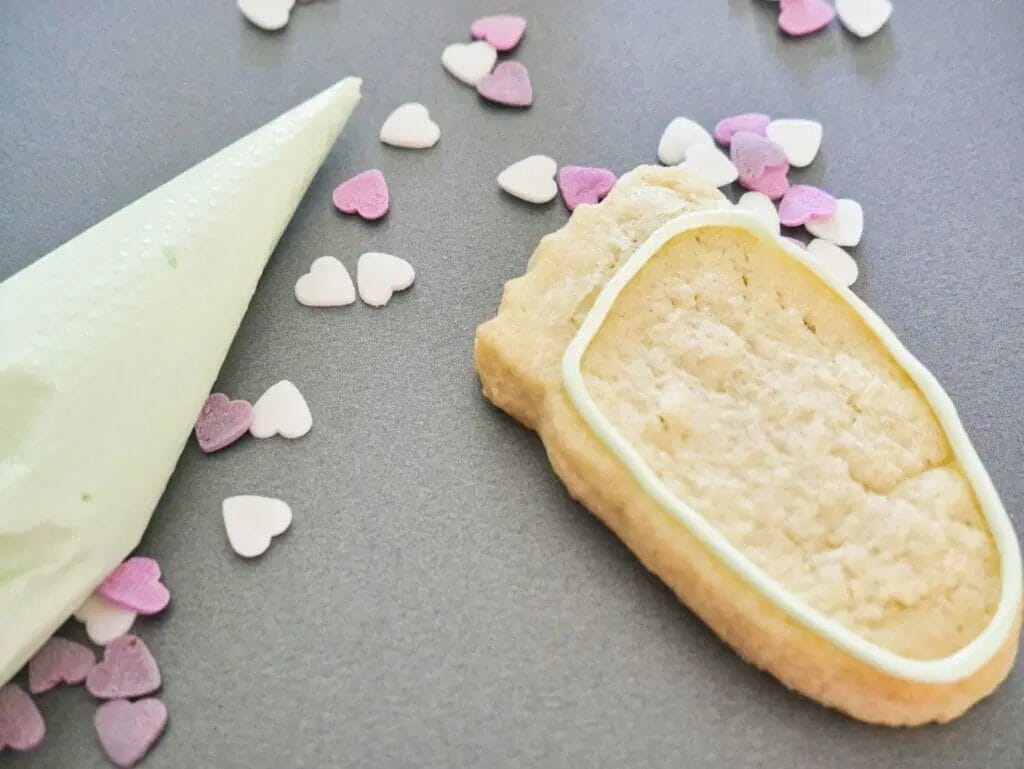
With the same color of the thicker icing, do 5 circles for the toes, getting increasingly smaller as you get to the smallest toe.
Give this about 5 to 10 minutes to dry, and then you can go in with your thinner, flood icing, in the same color to fill in the middle of the footprint.
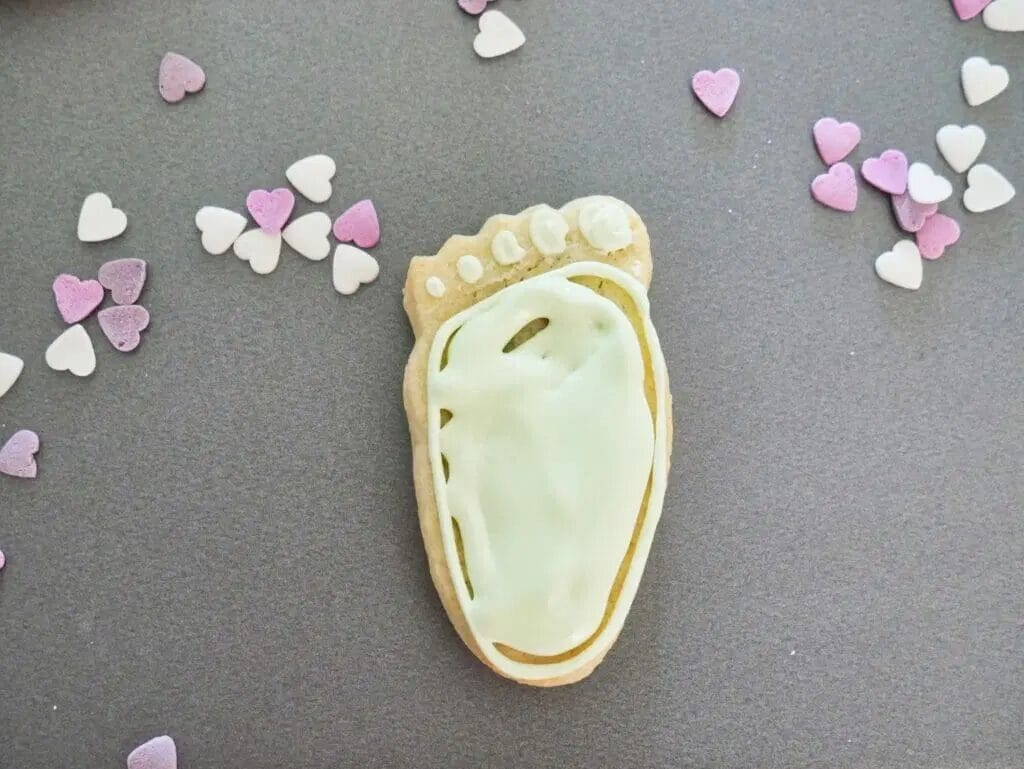
You want to fill it in enough that it is covered, but not so much that it’s going over the edges and spilling out.
Start slowly and work your way up to adding more.
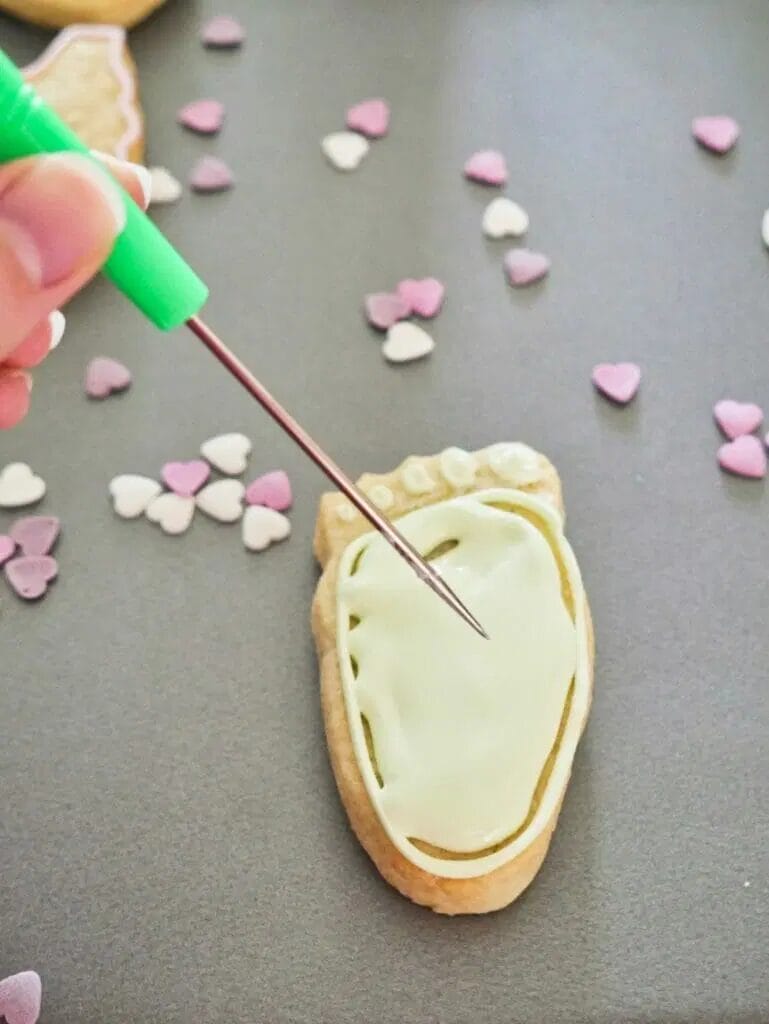
Once you’ve done that, pop any air bubbles with a scribe or toothpick and you can gently shake the cookie as well to even out the coverage.
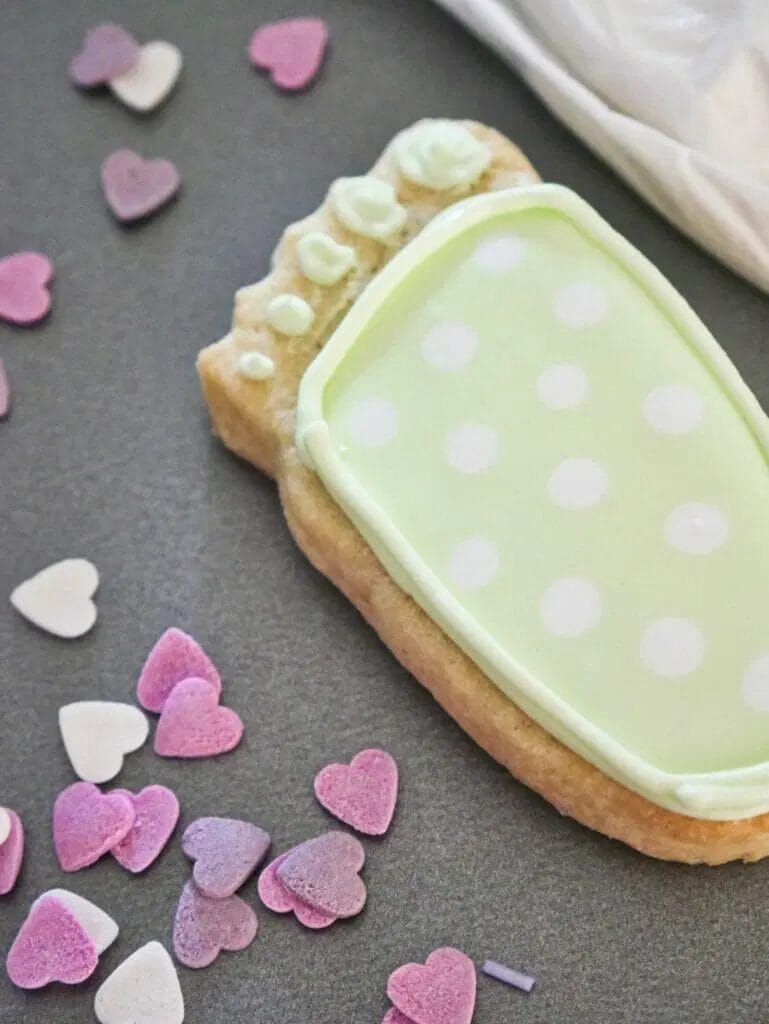
At this stage, you can leave it how it is, or you can add detail like stripes or dots within the base layer using the thinner, flood icing (but in a different color).
By doing this, the icing will sink into the base (on purpose) and it will create a nice effect.
Don’t try and get too detailed though, as anything you add at this stage will have less definition than if you do it as a detail layer.
Sometimes, you want this effect, and other times you want the precision.
You’ll want to let this dry for 1 to 2 hours, really making sure that the base layer has set.
If you try and go in too early, the detail icing on top will just sink into the existing icing. Go and do something else and then come back to it later to finish.
When you’re ready to finish it up, you can use the same color or a different color to basically outline the footprint shape to create some definition and add any other details you might want, such as hearts or polka dots if you hadn’t added that into the main layer.
You’ll use the thick, line icing for this.
It takes about 6 to 8 hours for the royal icing to dry fully, so put it aside and soon you’ll be ready to take the baby feet cookies to a baby shower or a mom-to-be!