
As an Amazon Associate, I earn from qualifying purchases. In addition, I participate in several other affiliate programs that allow me to earn while I recommend products I love.
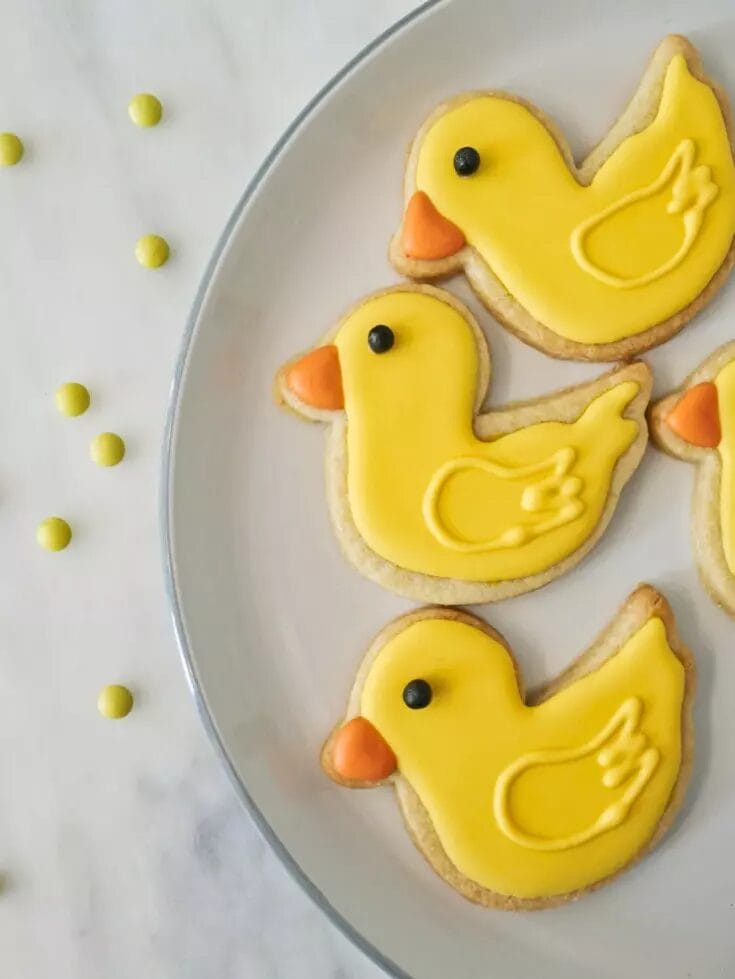
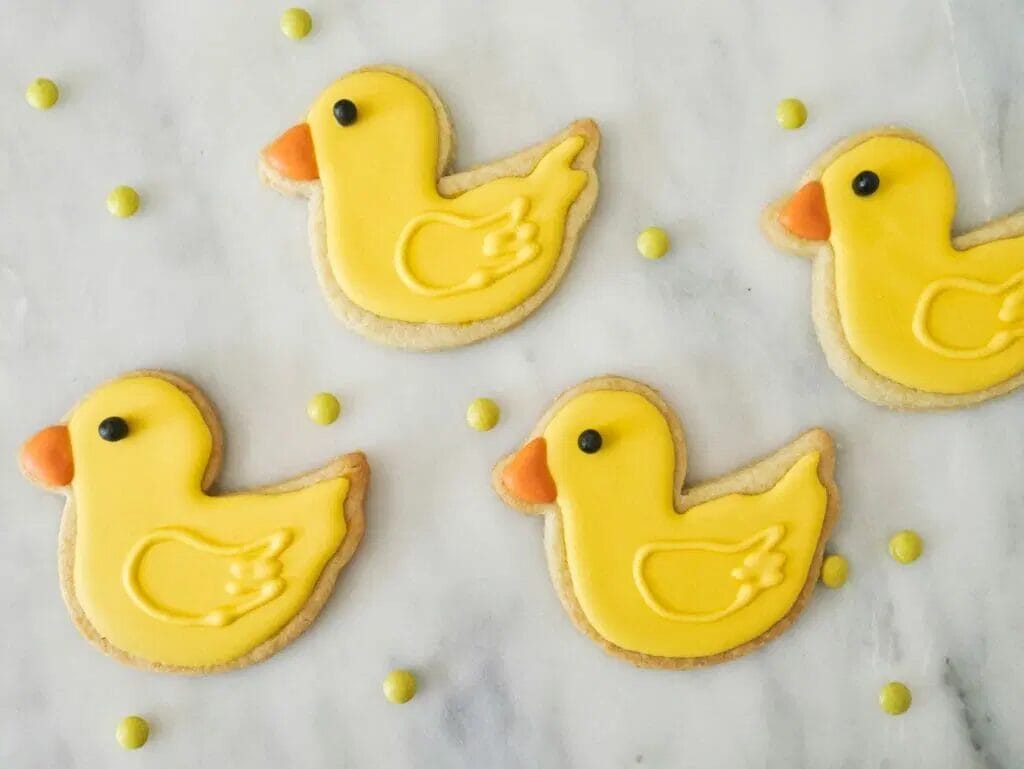
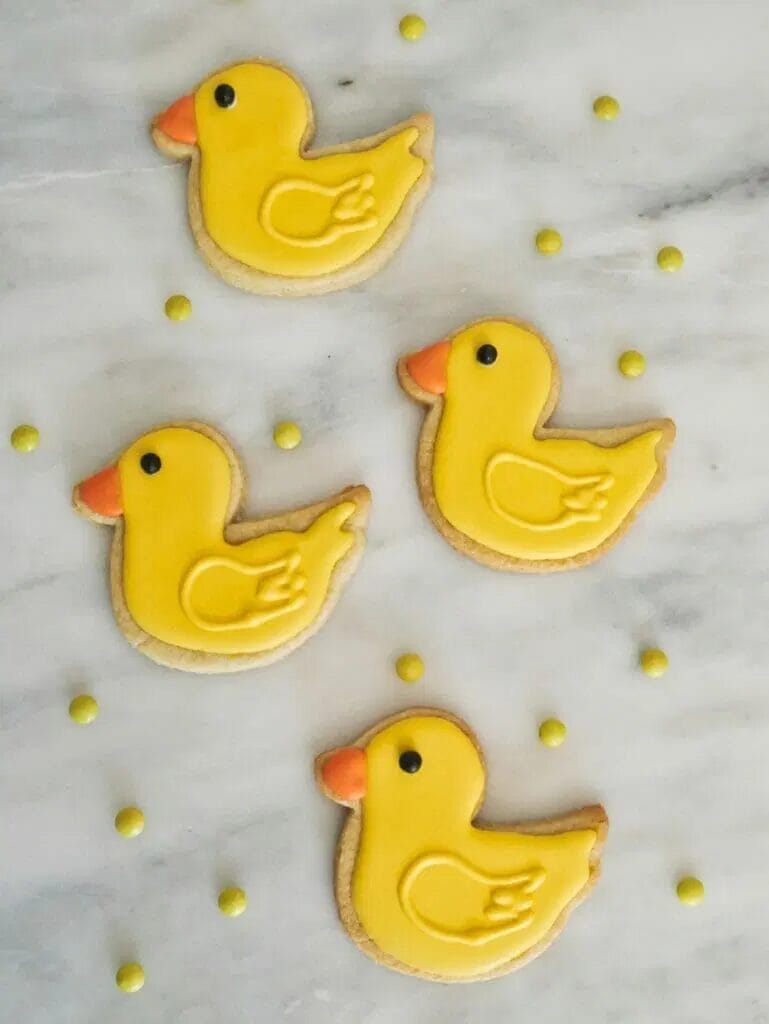
These duck cookies are great for baby showers or animal themed birthday parties. Made with royal icing and a cut-out sugar cookie dough, they hold their shape and taste great in addition to looking adorable.
Not only are they incredibly easy to do for royal icing beginners without too many steps, but they are great for special events and will impress your friends.
In this duck cookie tutorial, I’ll teach you how to decorate duck cookies, how to make duck cookies, and how to use royal icing on these duck cookies.
Ingredients You’ll Need for Duck Cookies
To make duck cookies, you’ll need the ingredients for both the royal icing and the sugar cookie dough.
The sugar cookie dough uses the following ingredients to make its no spread, wonderful sugar cookie taste: powdered sugar, flour, granulated sugar, vanilla extract, eggs, and butter.
In my cut-out sugar cookie recipe, you’ll learn exactly how to combine them together to make for the best sugar cookie base around.
For the royal icing, I use meringue powder, water, vanilla extract, and icing sugar.
Royal icing really isn’t that difficult to make or use, which I’ll talk more about below.
Tools You’ll Need for Duck Cookies
After you’ve rounded up the ingredients for duck cookies, you’ll want to make sure you’ve got the right tools on hand. These include:
- a baking sheet
- reusable silicone baking mat – this is the best brand
- yellow food coloring – always use gel food coloring instead of liquid food coloring
- orange food coloring
- black edible sprinkle or pearl for the eye – these are great
- piping bags for the icing (I don’t use tips, just disposable icing bags) – I use these piping bags
- a scribe or toothpick (this is for adjusting the icing or popping air bubbles) – use this one
- duck cookie cutter – this is a great one
Tips for Making the Dough for Duck Cookies
When you use the recipe to make the no spread sugar cookies, you’ll want to make sure you follow it exactly when it comes to chilling the dough.
I know this can be the most annoying part about making cookies because you just want to get on with it, but the crisp edges that come with these cookies and make them look nice really depends on the cookie dough not spreading out past the shape you cut it in.
By keeping the dough in the fridge at certain steps along the way, you’re making sure the butter doesn’t melt before the rest of the ingredients can catch up, which can cause spread in the oven.
I use a hand mixer to combine the ingredients and then dump it all out on the counter at the end to knead with my hands.
This can help crumbly dough come together even better.
When you go to roll out the dough, I use these handy rolling guides to help me roll it to an even thickness.
You can also use wooden dowels or you can get rolling pins that have built in guides.
This is important as unlike a drop cookie or cookie that you want to spread, you want these to be as uniform as possible, both depth wise and length and width wise.
Tips for Making the Icing for Duck Cookies
Royal icing can be something that newer bakers shy away from.
It feels inaccessible as you need piping bags and can’t just slop it on like you can with other types of icing.
But don’t be afraid!
I was a completely new beginning baker, and after just two times practicing, I was starting to get the hang of it and could make basic royal icing cookies that looked like a professional did them.
You just need to jump in!
When you make the royal icing using my royal icing recipe, you’ll want to make sure you pay attention to the consistency you’re creating.
For these cookies, I both outlined and flooded (filled in the middle) of the cookie with the same exact icing from the same bag.
Sometimes, people create a stiffer icing and a thinner icing of the same color to outline with the stiff icing and flood with the thinner icing, but I prefer to use an in-the-middle version that you can do both with because it saves time, piping bags, and is just less hassle.
I also prefer the more seamless look that it creates on the cookie.
The consistency of icing I used for these cookies is about 12 seconds, which you can count by pulling a knife through the icing and counting how many seconds it takes for the line to completely disappear.
You can actually freeze royal icing if you make too much, but in my opinion it’s never as good as when it’s first made, so try to make just as much as you need or have a lot of cookies to decorate so you can make sure to use the icing up.
Food Coloring with Royal Icing Tips
You’ll want to use food coloring to change the white royal icing into yellow for the duck.
You can get liquid or gel food coloring, but I much prefer gel food coloring as it creates a deeper color and doesn’t add too much liquid to your icing, messing up the consistency you just achieved.
Add a drop at a time until you get to the shade you want, which can really be any shade of yellow you want.
How to Decorate Duck Cookies
The best thing about these duck cookies is how uncomplicated they are, while still looking super cute.
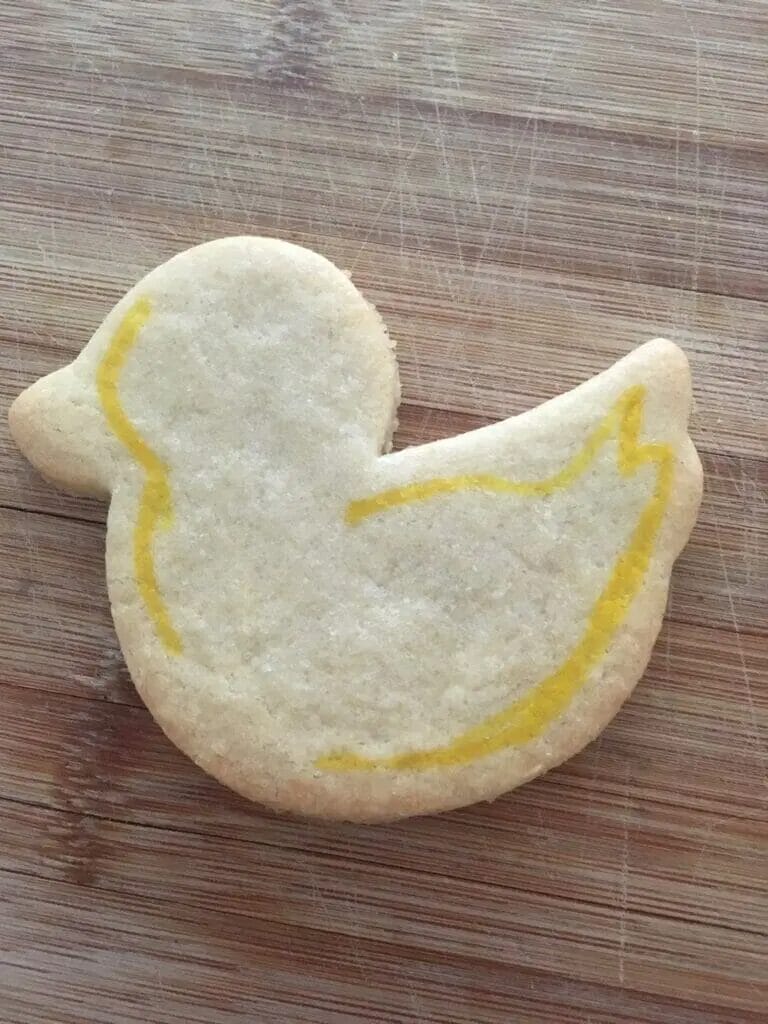
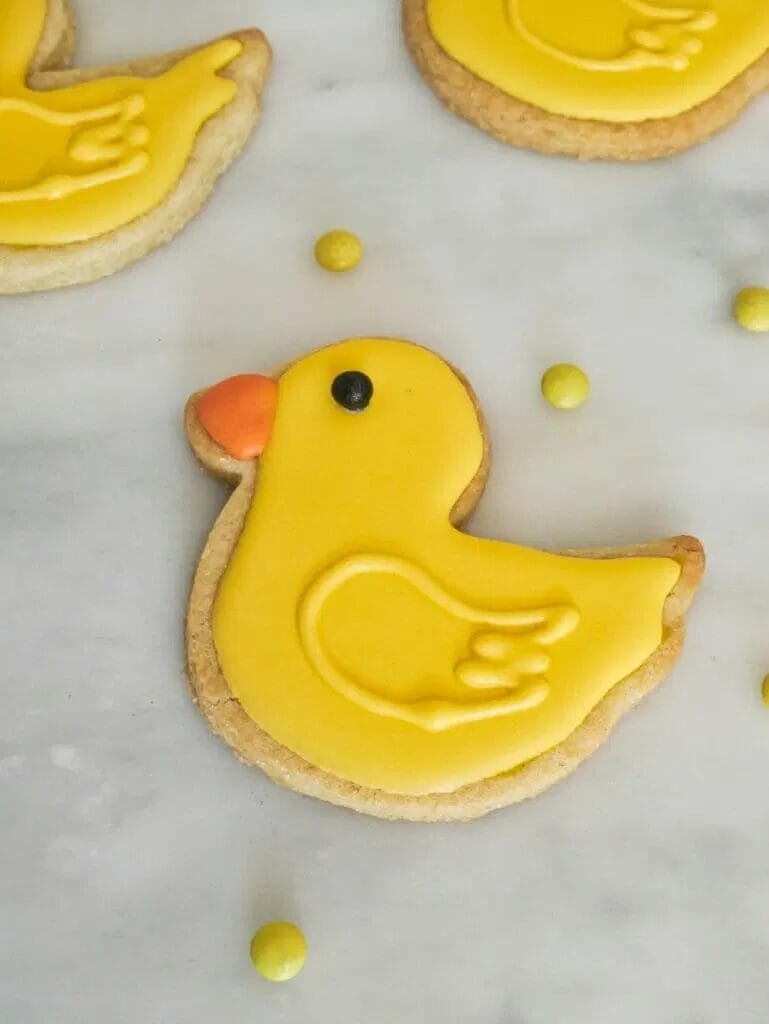
First, outline almost the entire duck in yellow icing, creating a feather effect at the back by just making jagged lines instead of straight.
Leave a tiny bit for the orange beak at the front of the beak.
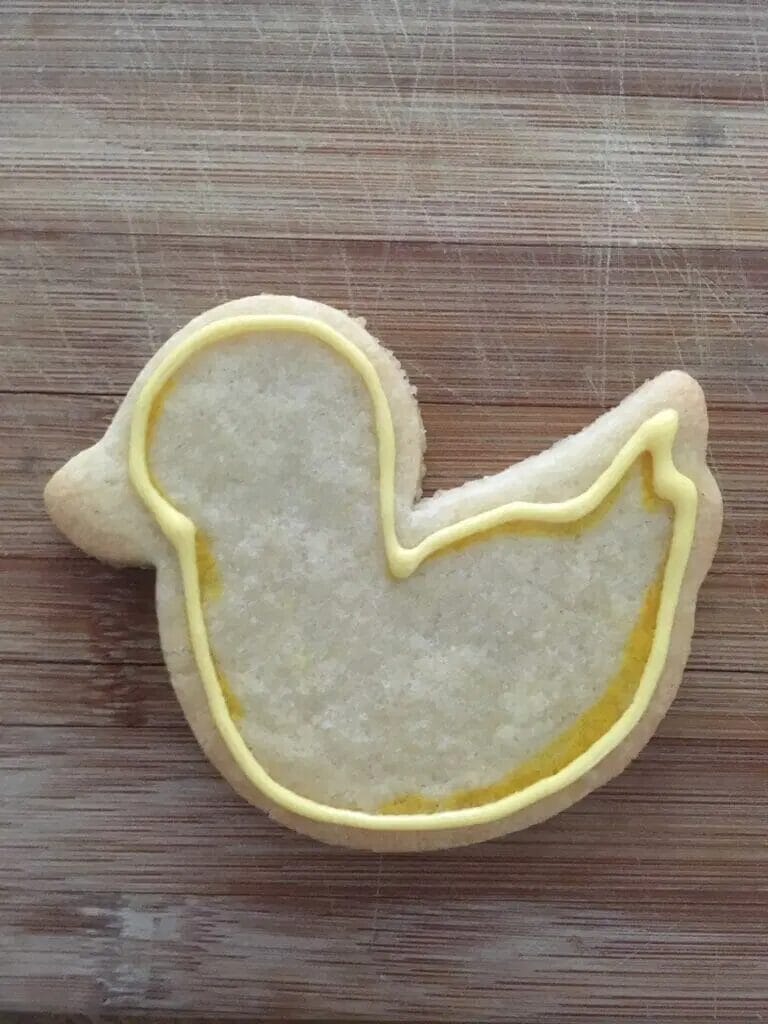
Then, fill in the entire yellow outline with yellow icing.
Let the icing settle a bit and poke any air bubbles out if you need to.
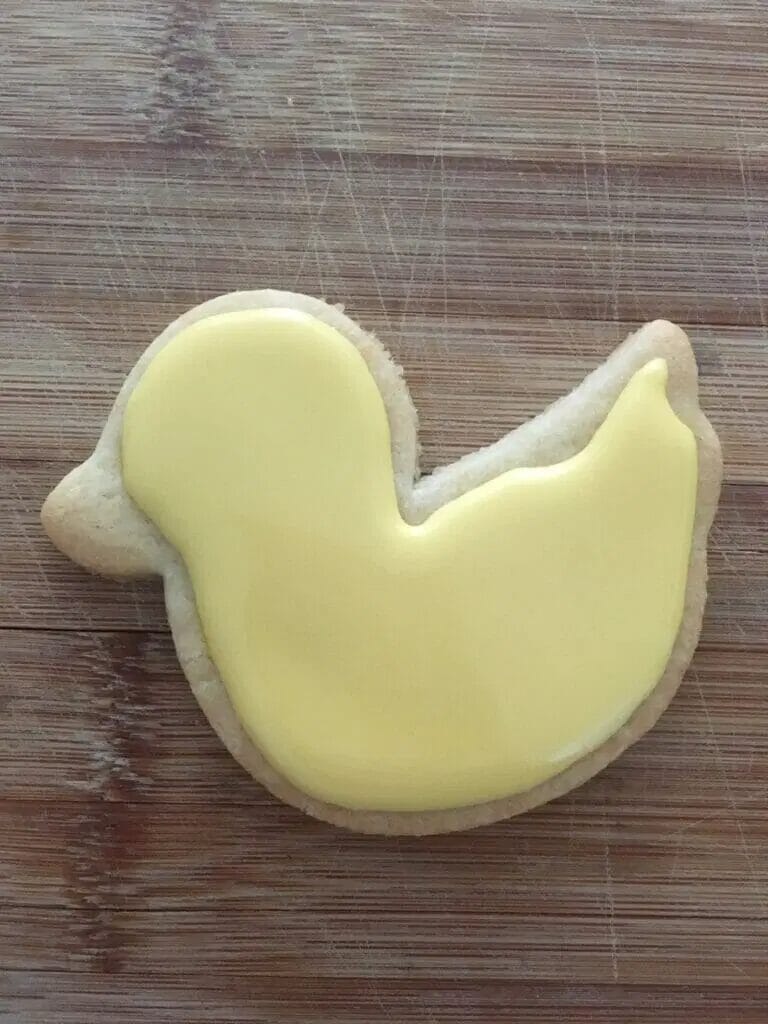
Give it about 30 minutes to dry, and then pipe on an orange beak on in a triangle shape.

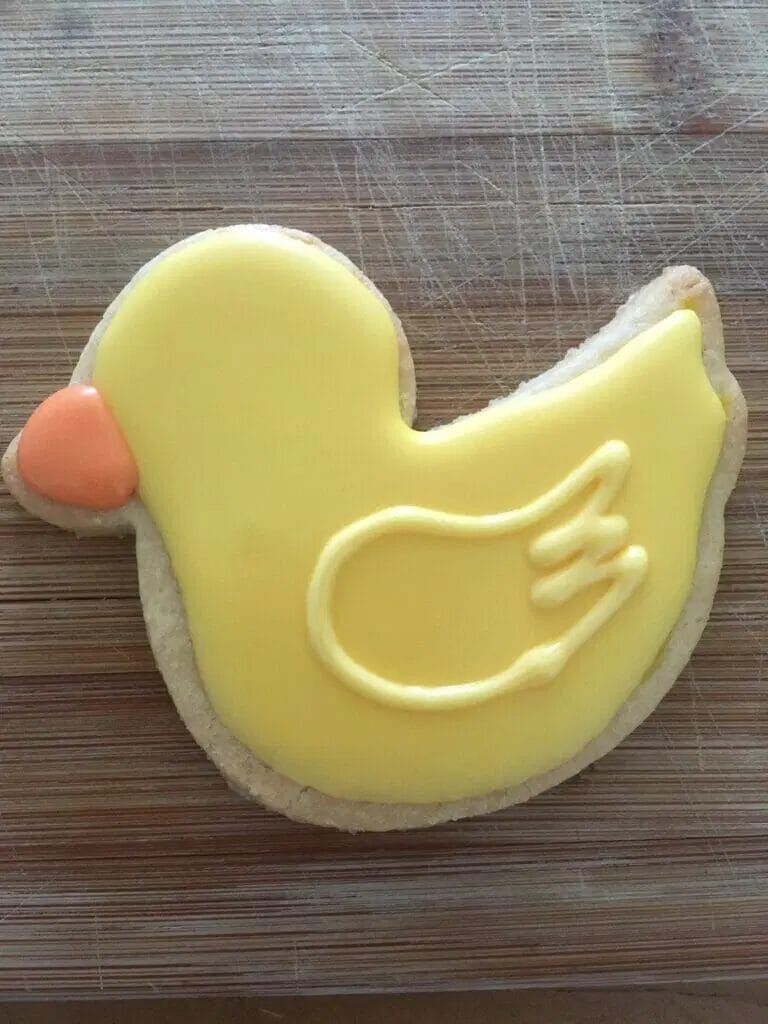
After letting the cookie dry for a good 6 or so hours, you can pipe on the detail wing, which is an enclosed shape that starts with a half moon in the front of the duck and then ends up with some jagged lines towards the back.
Finally, use a dot of royal icing to stick on an eye.
There you go, the cutest duck cookies you’ll ever see!