
As an Amazon Associate, I earn from qualifying purchases. In addition, I participate in several other affiliate programs that allow me to earn while I recommend products I love.
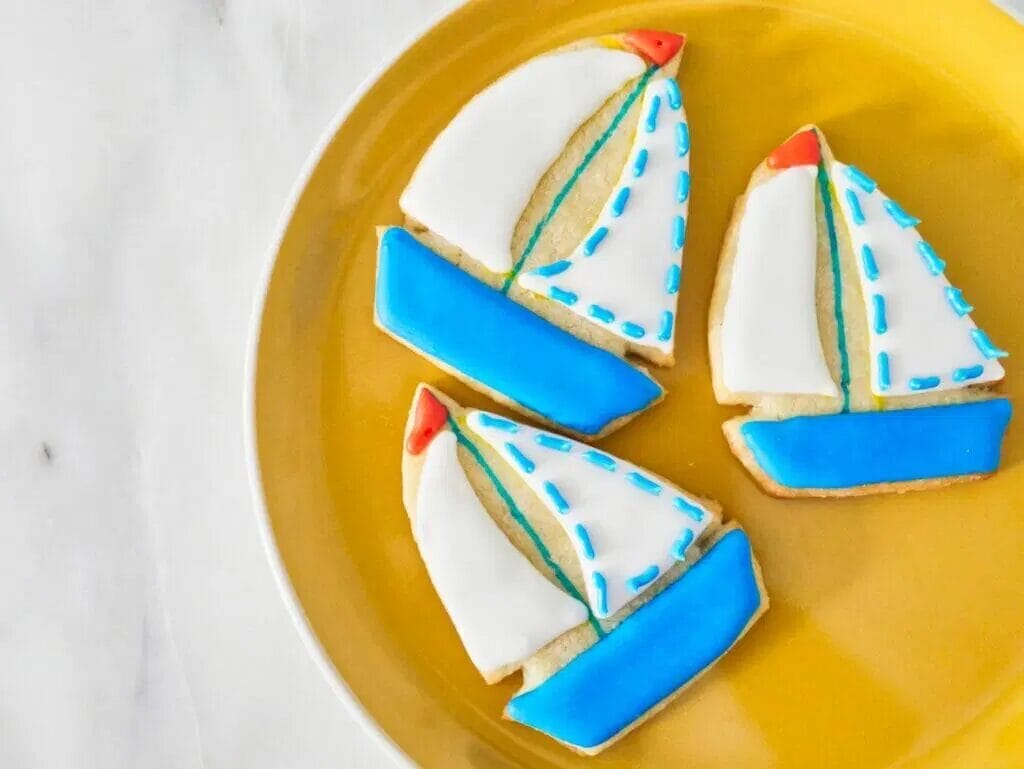
Ahoy, sailor! These sailboat cookies are perfect for any nautical themed party or your favorite boat lover. Made with royal icing and cut-out sugar cookies, they are fun to make with kids and delicious no matter how you decorate them.
Set sail with your latest decorated cookies, these amazing sailboat cookies that are simple enough for beginning bakers and really fun for anyone wanting to add an extra bit of excitement to a sailing themed event or party.
The bases are made with sugar cookie dough, and you can take them out of the oven just as they’re turning golden, which makes them incredibly soft and chewy – not hard as a rock.
Hard cookies are the worst. Fact.
This guide to sailboat cookies will teach you how to make sailboat cookies, how to decorate sailboat cookies, and how to prepare for a sailboat themed party.
What You’ll Need
You can make the sailboat cookie with any cut-out sugar cookie recipe of your choice, but I prefer to use this sugar cookie recipe.
The emphasis has to be on the “cut-out” version, which means that it’s made for you to be able to cut shapes from the dough that hold their edges.
You don’t want the edges spreading during baking, because you’ll end up with a blobby mess of sailboats rather than actual sailboat cookies.
You can find the ingredients for that dough on its recipe page, and you should also check out the royal icing recipe page for more information on the ingredients you need to make royal icing.
As far as tools go, you’ll want:
- sailboat cookie cutter, or you can make your own with a piece of paper and cut around it with a knife
- baking tray for the cookies
- silicone baking mat – this one is awesome
- piping bags – I use this brand for best results
- gel food coloring – this brand is great – always use gel over liquid for icing
How to Make the Dough
Follow the cut-out sugar cookie dough recipe step-by-step to make sure that you chill the dough at the right times and put the ingredients together in the right order.
When you’re baking, it’s important to stick to the recipe rather than going off grid, particularly if you are new to baking, as there are certain ways the ingredients need to be combined in order to end up with the final result you want.
The butters and sugars are always creamed together first, and then you add in the other ingredients in steps afterwards.
I’ve tried to add them all together at once just as an experiment, and uh – never again!
When you bake the sailboat cookies, make sure to go straight from the fridge to a cool baking tray and into the oven.
If you leave the dough out at room temperature for too long before putting them in, the cookies can spread.
Another threat to spreading is putting them on a warm baking tray as the butter then melts faster than the cookie can set.
Making Royal Icing
If you’re afraid of royal icing because you’ve never used it before, don’t be!
Unlike icings like buttercream or glaze which most bakers have used before, royal icing can be associated with being a bit more difficult.
Royal icing goes on “wet” and dries hard, unlike some icings which never harden up.
This stiffening up is what creates the ability to make stunning designs that you can transport easily.
Follow the royal icing recipe, which only has 4 ingredients: meringue powder, water, vanilla extract, and powdered sugar.
It really is super easy to make with a handheld mixer, and you’ll find plenty of royal icing tips and tricks in the recipe.
Step-by-Step Decoration Instructions
Let’s get to decorating!
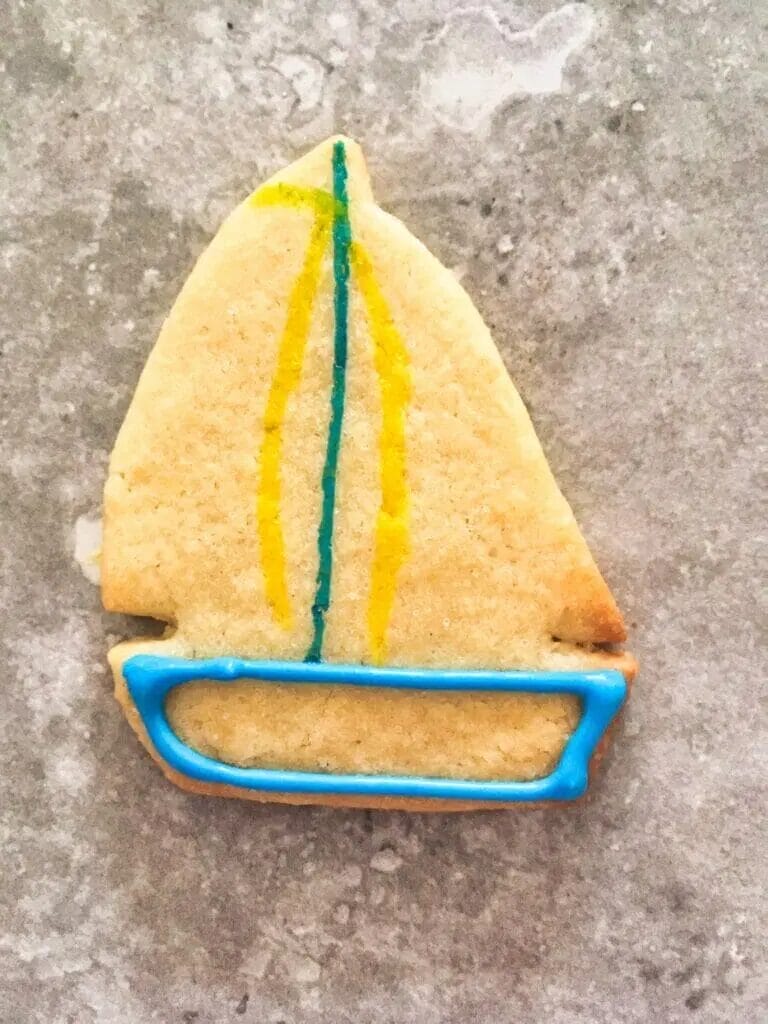
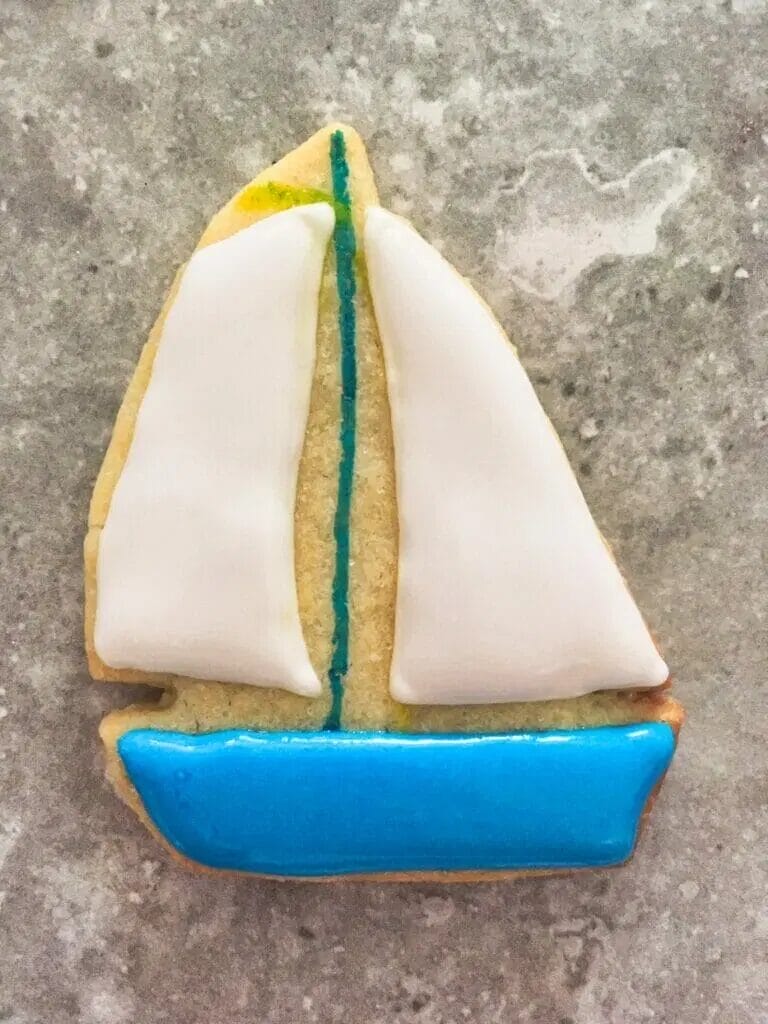
Start with a blank cookie, and using an edible marker, draw a line from the top down to the base of the cookie.
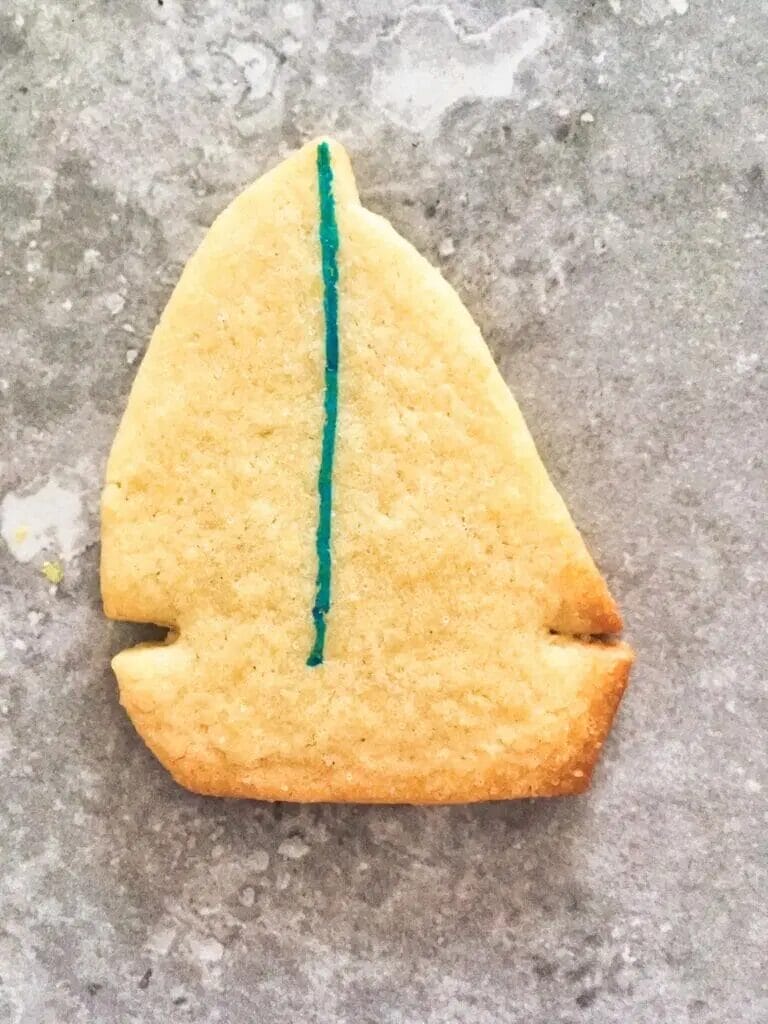
I like to use a marker to draw out where the sails will go, as you want to leave a space between them and this line, which is now your mast, but you don’t have to.
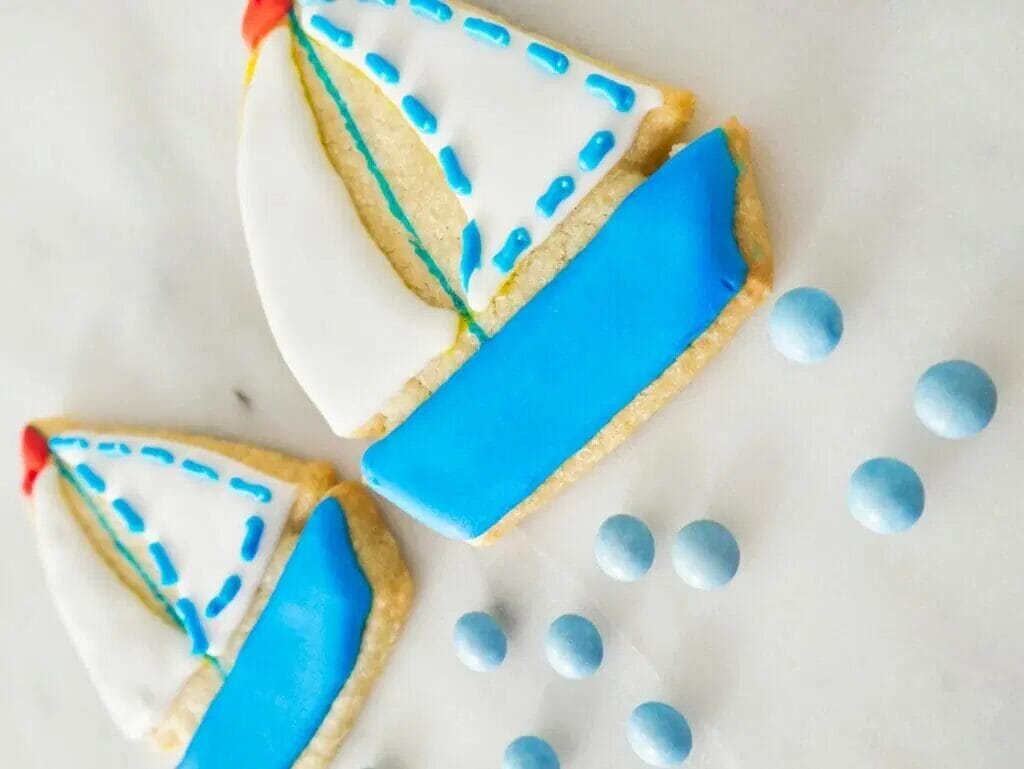
Outline the bottom in blue, and then immediately fill it in with blue icing.
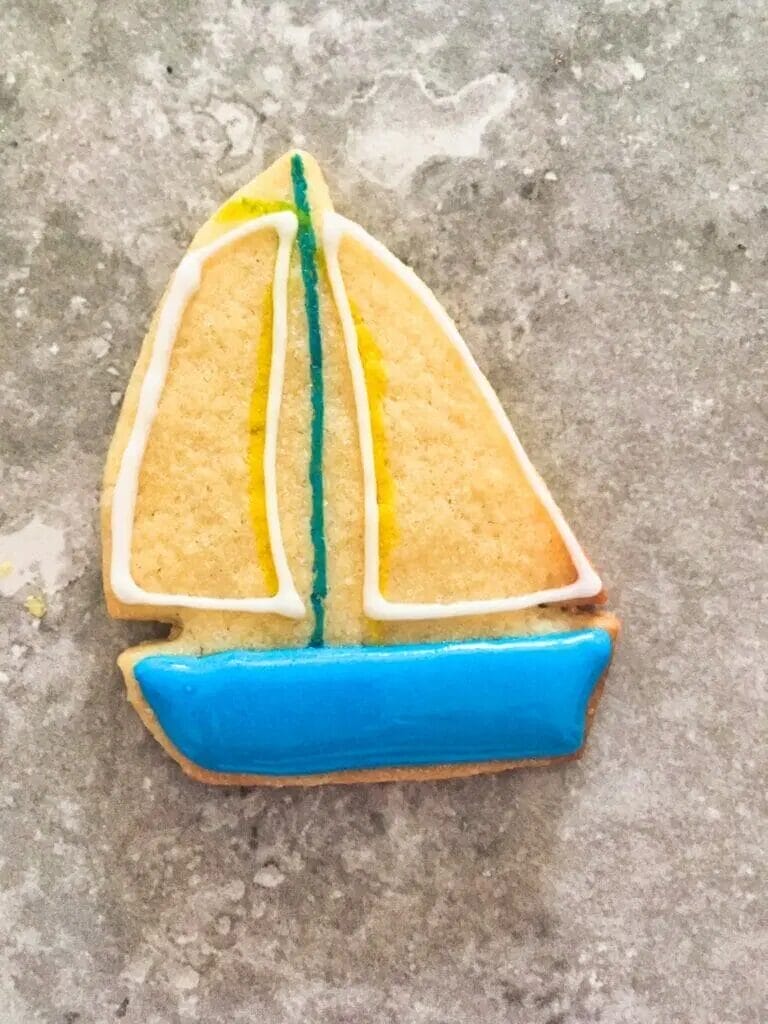
You can then immediately outline the two sails in white, and flood those in with white – no waiting needed, as the icing isn’t touching.
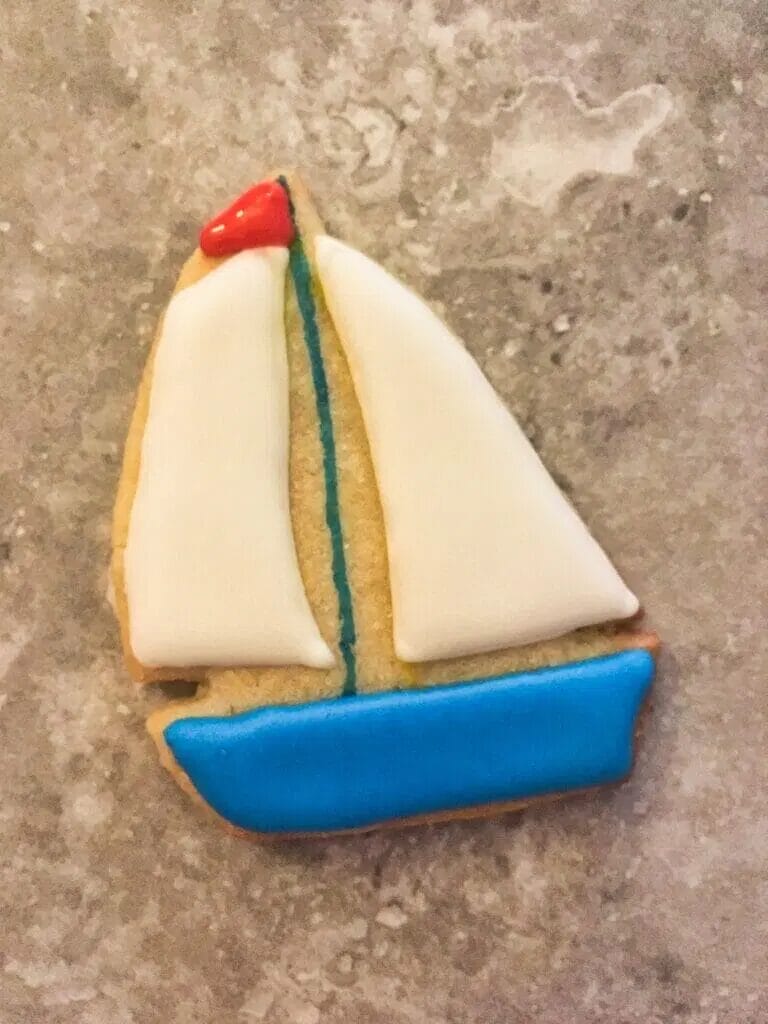
Wait about 30 minutes, and then use a triangle of red icing at the top to finish off the main layer of icing.
Finally, after about 2 to 3 hours, you can add some blue stitching around one of the sails for a bit more depth.
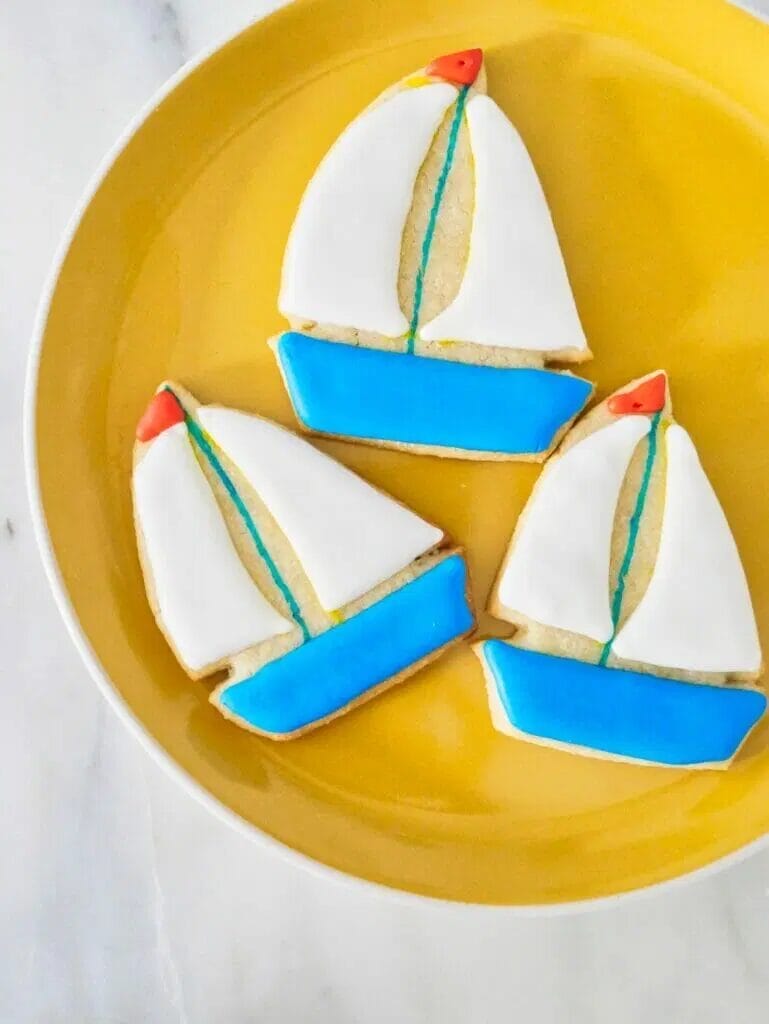
You can write a name at the bottom of the boat or carry on decorating to fit your theme.
Tips and FAQs
How do I store sailboat cookies?
Because these cookies are made with meringue powder and not egg whites, they’re perfectly fine to store at room temperature in an airtight container for about 3 weeks.
This is amazing if you’re making them for a party so you can plan in advance and make them ahead of time.
Can I freeze these cookies?
I always recommend either freezing the actual sugar cookie dough before baking or freezing the bases once made.
You can freeze cookies with royal icing, technically, but it doesn’t always work out based on the temperature they thaw at, and you run the risk of damaging them in the freezer.
How long will they last?
These sailboat cookies will be at the best for a week after making them, but as long as you keep them airtight and sealed, they can last a good 3 to 4 weeks and retain enough of their quality.
Can I substitute ingredients?
No!
Don’t substitute ingredients in baking unless you’re happy to experiment.
If you need substitutions because of a dietary need, find a recipe that is suited to that diet and then follow my decorating instructions.
Related Recipes and Party Decorating Ideas
Nautical themed parties are so cute.
These cookies will be a huge hit, but you should also consider other dessert options.
I also love these nautical party themed ideas for decorations and more.