
As an Amazon Associate, I earn from qualifying purchases. In addition, I participate in several other affiliate programs that allow me to earn while I recommend products I love.
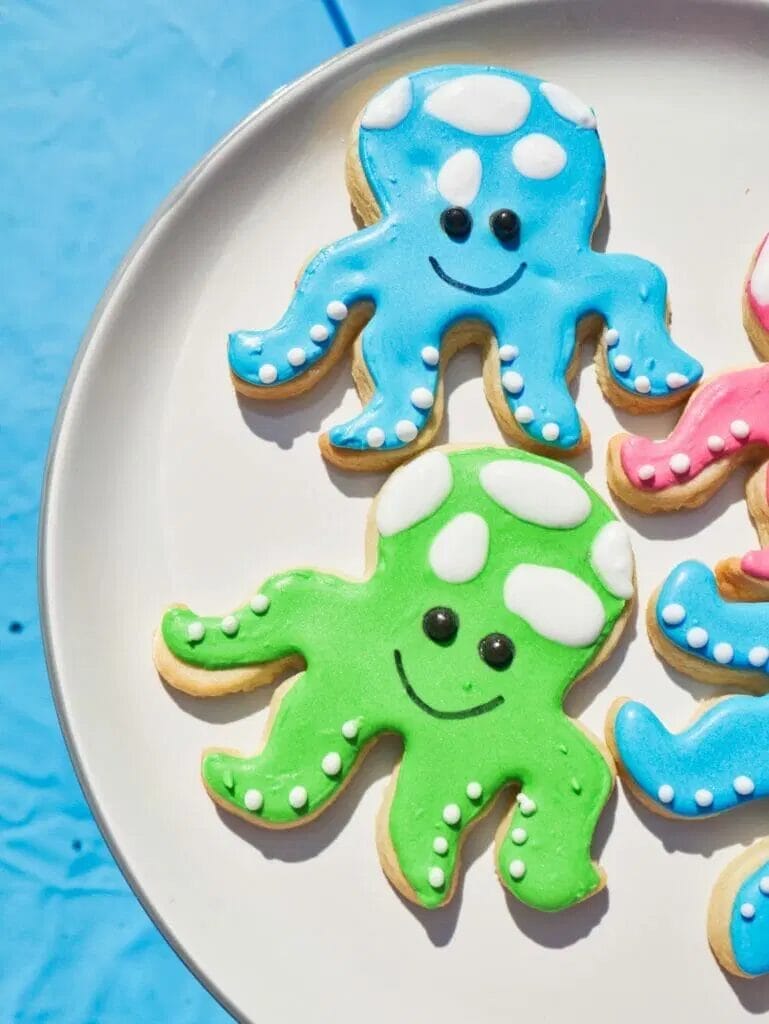
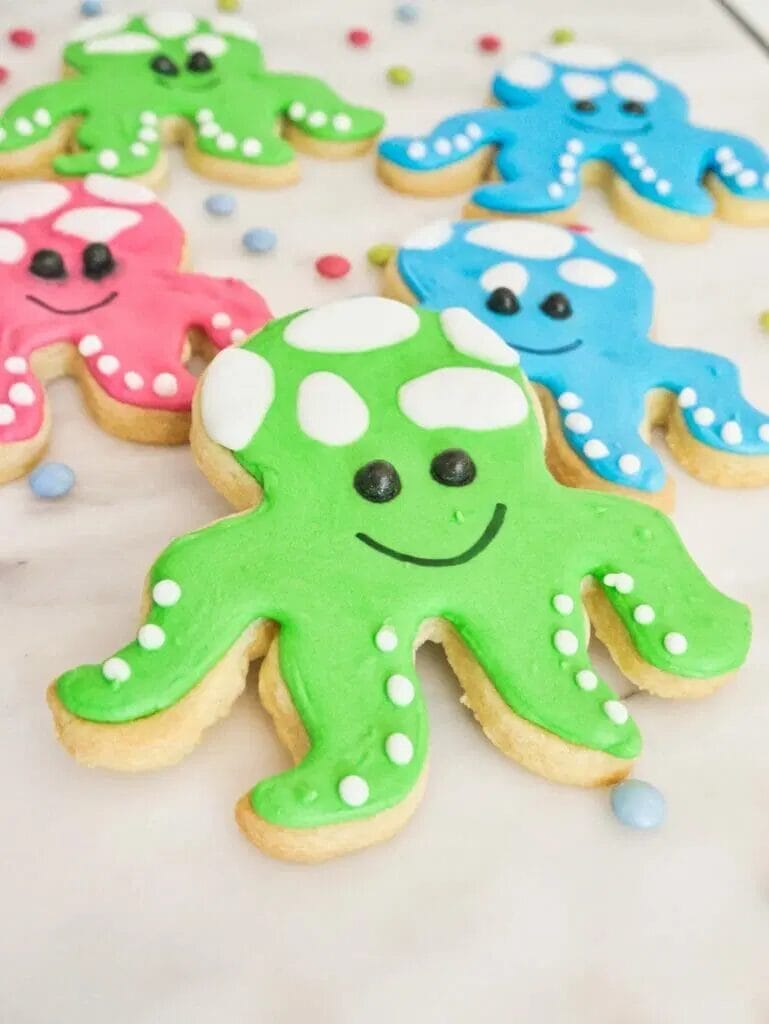
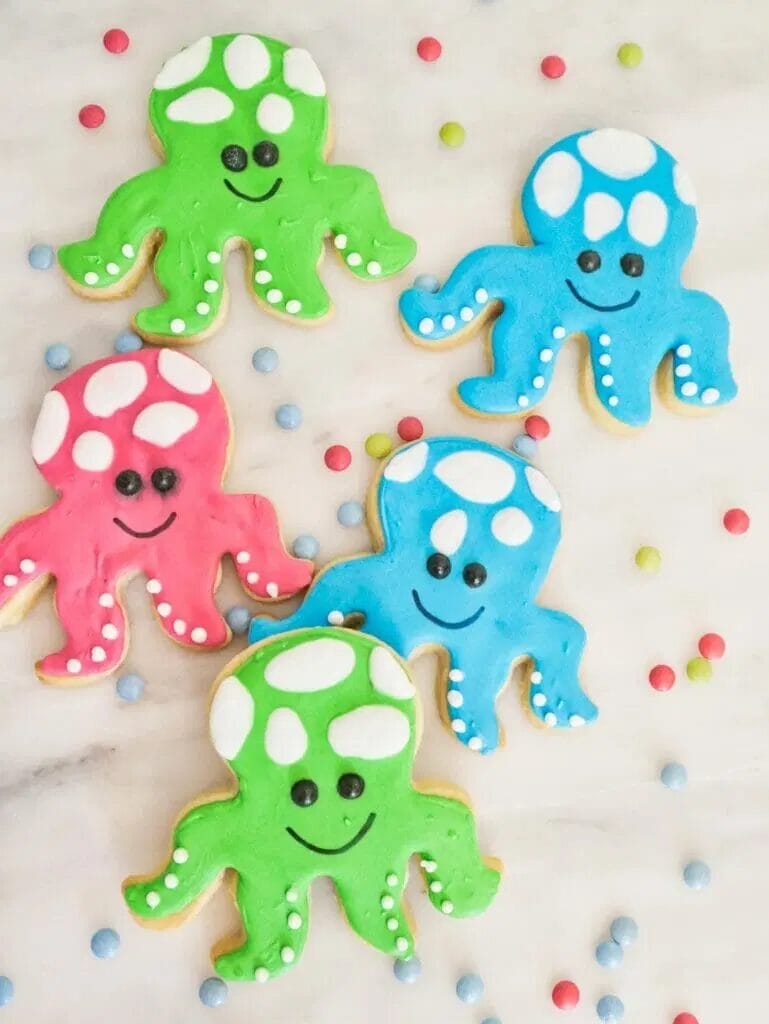
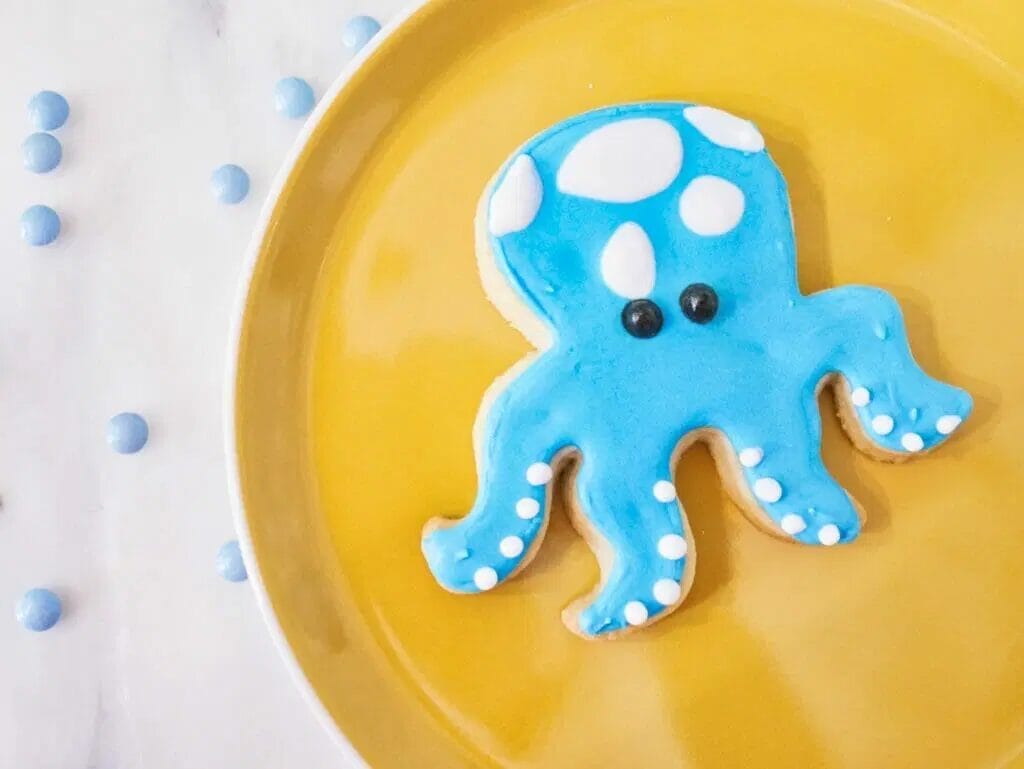
These octopus cookies are so adorable and easy to make that you can make them with royal icing and sugar cookies for a kid’s birthday party or just try your hand at decorating them for a fun cookie making day.
The great thing about octopus cookies is that there isn’t much detail involved.
You can make them look awesome with not too much design work, which is great for a beginner with royal icing.
Pair with an Octopus cake for even more fun.
In this tutorial for octopus shaped cookies, I’m going to walk you step by step through what you will need, how to make them, and how to decorate these octopus sugar cookies.
These octopus cookies are:
- super adorable
- easy to make for beginners
- delicious
- not crumbly
- perfect for birthday parties
What You’ll Need to Make Decorated Octopus Cookies
To make octopus cookies, you’re going to need both the ingredients for the sugar cookie bases as well as the decorating tools and ingredients.
I use the same sugar cookie bases for all of my decorated cookies, so you’ll want to follow the ingredients list you can find in this sugar cookie base recipe.
You’ll also need royal icing, which is made with powdered sugar, meringue powder, water, and vanilla extract.
You can find the royal icing recipe here.
As for the tools and colors you’ll need, I recommend:
- any food coloring that you want – gel food coloring like this is the best over liquid though
- black or silver “edible pearls” for the eyes – I use these
- piping bags – this is the best brand
- a scribe or toothpick – find my scribe here
- octopus cookie cutter – find it here
Can I Make these Gluten Free/Keto/Low Calorie?
People often wonder about substitutions in cookie recipes, but for these, you really shouldn’t substitute too much because otherwise you’ll lose the no-spread of the cookie.
Baking is more of a science than an art, so if you’re hoping for a low calorie/gluten free/keto cookie, it’s best to look up a recipe that already is built for that in mind rather than changing an existing one.
How to Make Octopus Cookies
Obviously you’re going to need to start with the baking, so use the cut-out sugar cookie recipe and get to it!
I prefer to chill my dough overnight for these, and then cut out the next day.
Also, when baking, make sure to follow instructions on chilling the dough after rolling out and then after cutting out the shapes.
Yes, it creates extra work, but it really creates the best cookies and you want the edges to look defined so that your final cookie will be even more impressive.
You’re aiming to make octopus cookies, not octopus blobs.
You can find octopus cookie cutters easily online.
Flour the cookie cutter before cutting, and you should be good to go.
After baking, let the cookies cool for a few hours at least before decorating.
Never decorate a cookie while it’s warm to the touch, as you’ll have a mess of royal icing on your hands!
How to Make Royal Icing for Octopus
The icing is the most important step in making octopus cookies, as it’s what actually creates the octopus and can cover any imperfections on the base of the cookie.
I have a great royal icing recipe that you can follow, and for this one, you don’t need to create two different consistencies.
Simply create one batch of royal icing, a 10-12 second consistency, and you can use it for both flooding and decorating.
If you’re new to decorating with royal icing, you should know that a 10-12 second consistency means that if you run a knife through the icing, it takes 10-12 seconds for the line it made to disappear.
You can have shorter or longer times, with shorter times being runnier icing and longer times being thicker icing, but I find a 10-12 second one works well for these cookies.
Once you have your batch ready, separate it into other bowls to add in your food coloring and then get it in your piping bags ready to decorate.
How to Decorate Octopus Sugar Cookies with Royal Icing
Now that you’ve got your icing and your sugar cookies, it’s time to get decorating!
First, draw an outline of the entire octopus with your royal icing.
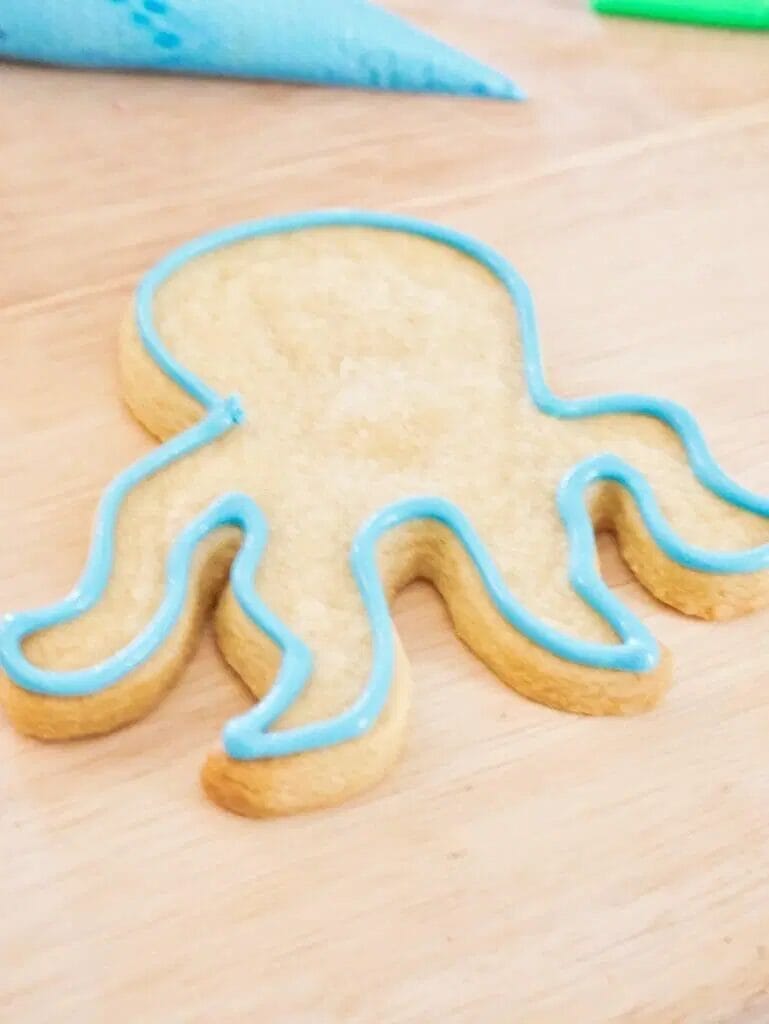
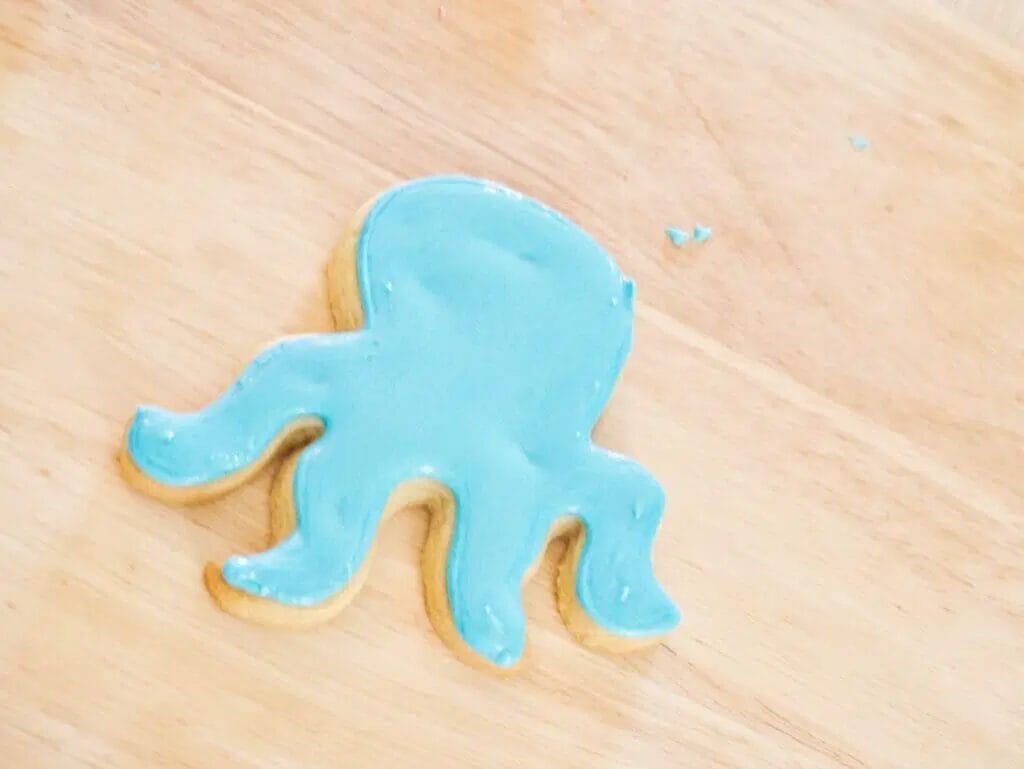
Immediately after, fill in the rest of the base with the same color.
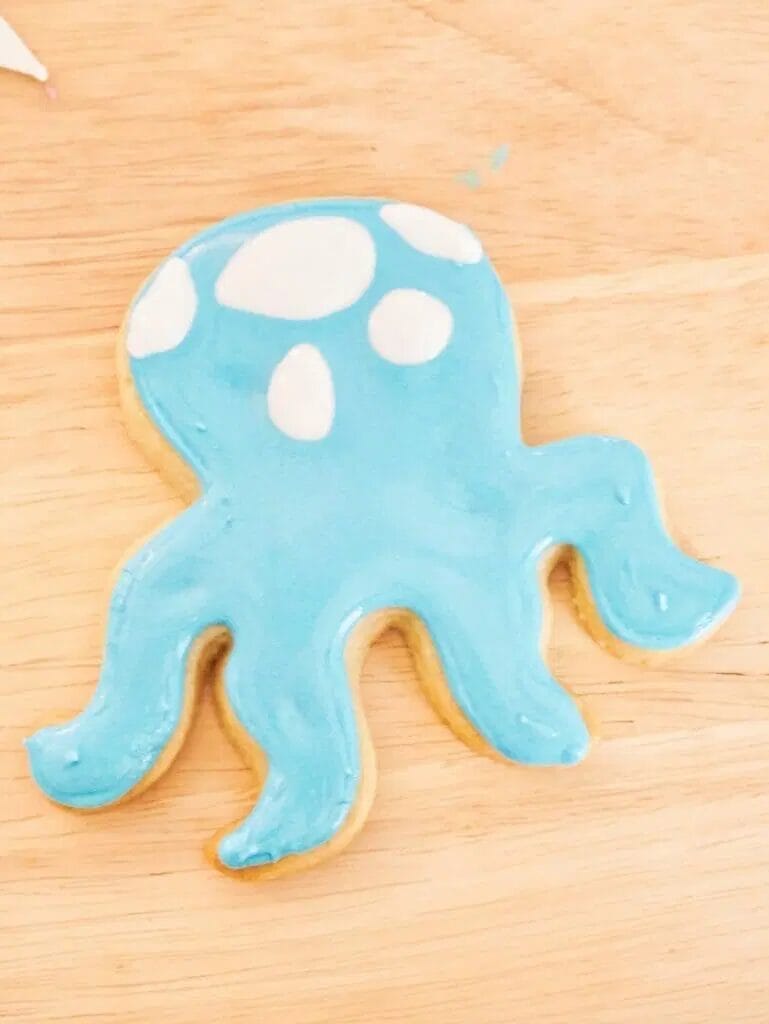
Now, to achieve the patchy look with the white, we’re going to use the “wet on wet” technique which means you add another color of icing while the main icing is still wet.
This will help them become one and mold together.
Use white icing to create some circles and ovals in a random pattern on the octopus head.
Then, let the entire base completely dry for a couple of hours.
Take the white icing again, once dry, to add detail to the tentacles, with some dots as you see fit.
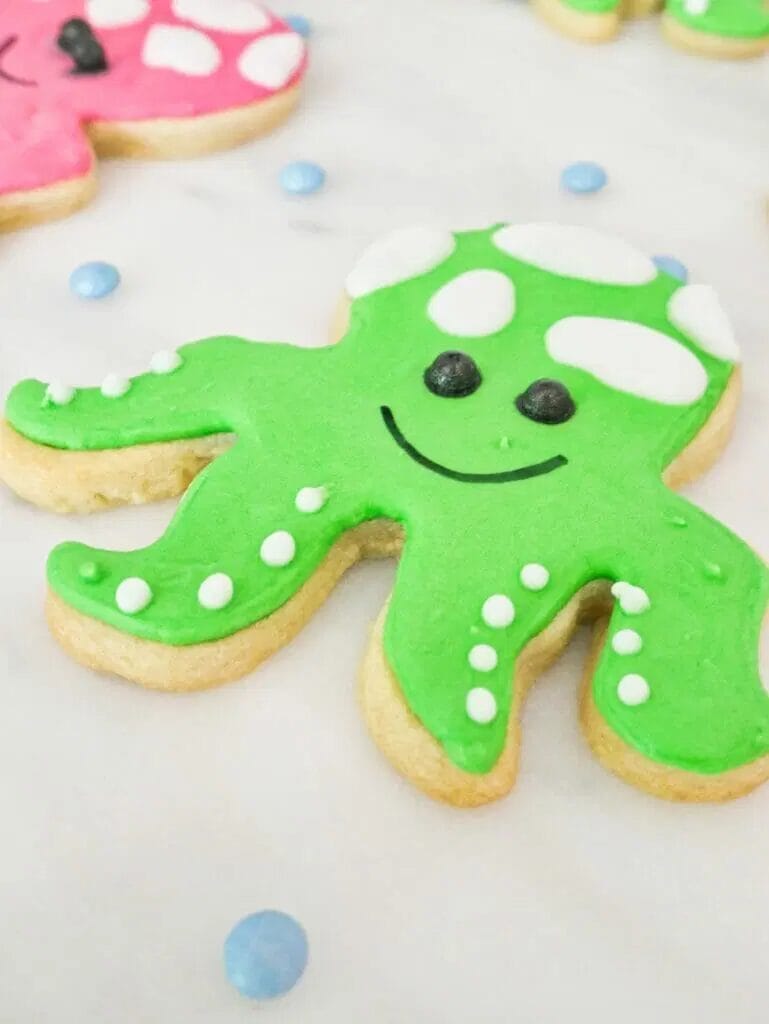
Then, finish it off by using a dot of icing to stick on the black pearl or sprinkle for the eye and wallah!
You’re swimming under the sea with your octopus cookie!