
As an Amazon Associate, I earn from qualifying purchases. In addition, I participate in several other affiliate programs that allow me to earn while I recommend products I love.
Who doesn’t love Mario?
This classic video game character, along with his other friends like Yoshi, Toad, and Luigi have captured audiences for decades – and still going strong!
That’s why these decorated Mario cookies are sure to be a hit for the Mario lover in your life.
They’re perfect for birthday parties, Christmas presents, or just for fun to try and connect with your kids and take them away from the screens.
The Mario cookies are made using sugar cookie dough (the rolled out kind, meant for shaping) and royal icing.
Using royal icing means that we can get a smooth and hard finish, which is what lets us add the details and construct the cookie.
It can take a little bit of practice to work with royal icing, but once you get the hang of it, you won’t stop!
You’ll Need…
To make these cookies, you’ll need the following tools:
- baking tray
- silicone mat for cookies – this kind is awesome
- piping bags – I prefer this brand
- food coloring (I prefer gel kind) – I use this kind (always go gel over liquid coloring for icing)
- a sharp knife
- scribe or toothpick to fix any details – this is the one I use
- edible food marker – I highly recommend this one
How to Make the Mario Cookie Bases
You can use sugar cookies or chocolate cookies for the bases, but you need to make sure you use a cut-out cookie recipe.
If you use a regular cookie recipe, it won’t be formulated to prevent the cookie from spreading, which means that you’ll end up with a blog.
I’ve made these examples with a cut-out sugar cookie recipe, linked above, but you really can decide what kind of flavor you want and work from there.
If you can find Mario cookie cutters, you can use those, but I actually hand cut these cookies, which means I created a template out of paper (or you can use cardboard), and then I used a knife to cut around it on the cookie dough.
Follow the recipe and ensure you chill the dough for long enough, as this will also help prevent the cookie from spreading in the oven.
Royal Icing Tips
While the cookies are baking, you can make the royal icing.
You will want to make one batch, and then divide it into different colors.
Follow this royal icing recipe to make the icing, and then ensure you have a honey-like consistency.
I used all the same consistency for the icing on these cookies.
For the cookies shown below, you’ll need: red, yellow, black, white, blue, brown, and ivory colored icing.
To avoid running out of a color you need, I don’t mix all of the colors at once and instead mix them as I go.
For instance, you only need the tiniest bit of blue and black for these cookies, so there is no use mixing a big batch of these colors and you’re fine to wait until the end and use what is left.
Put your icing in piping bags and get ready to decorate!
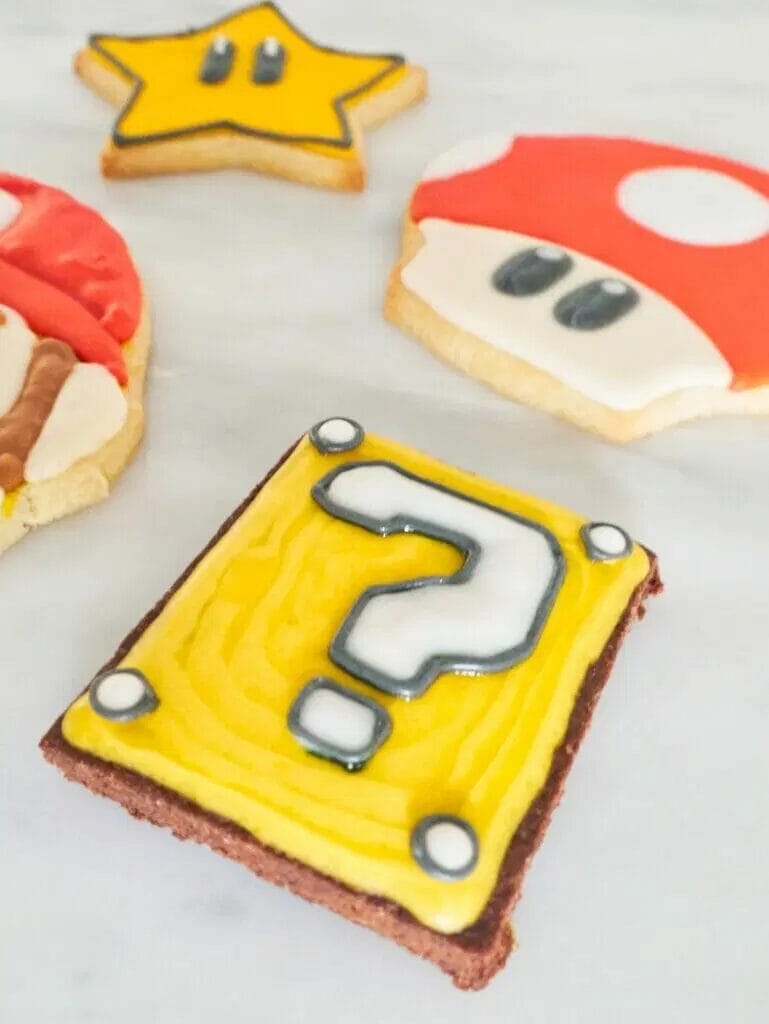
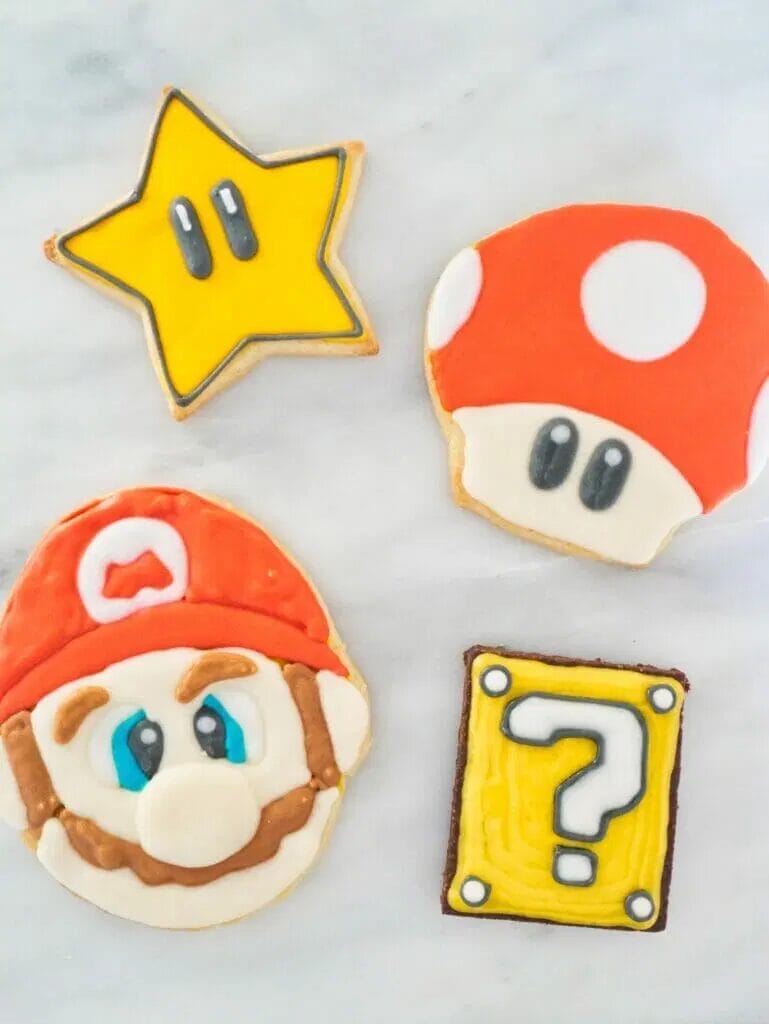
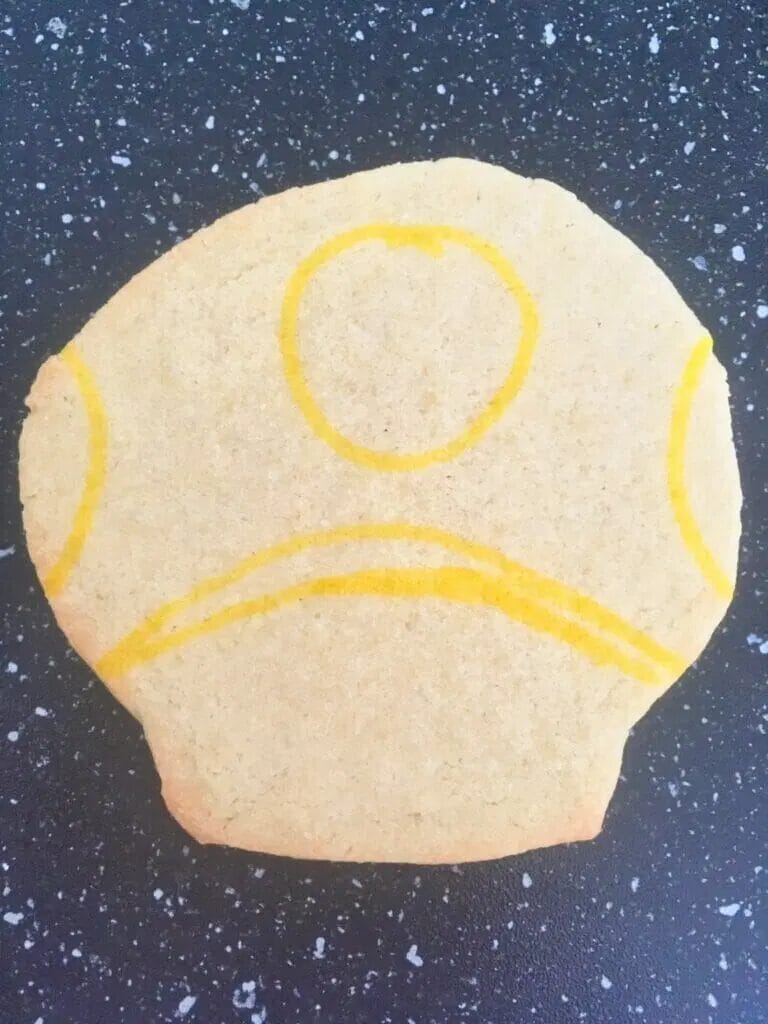
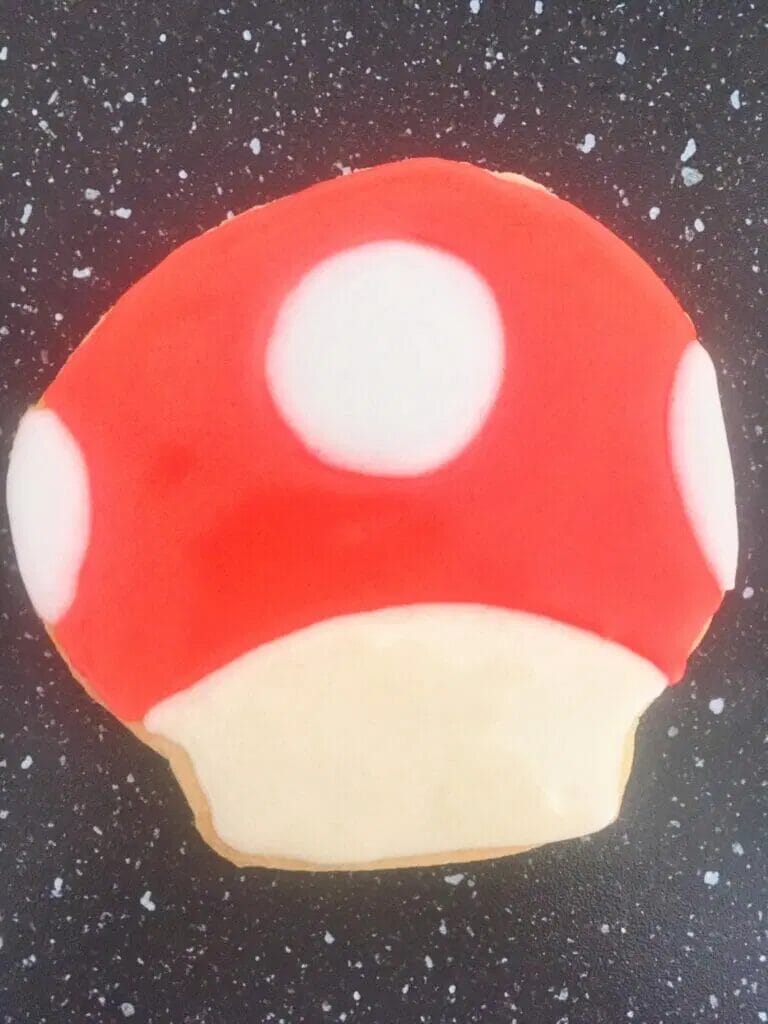
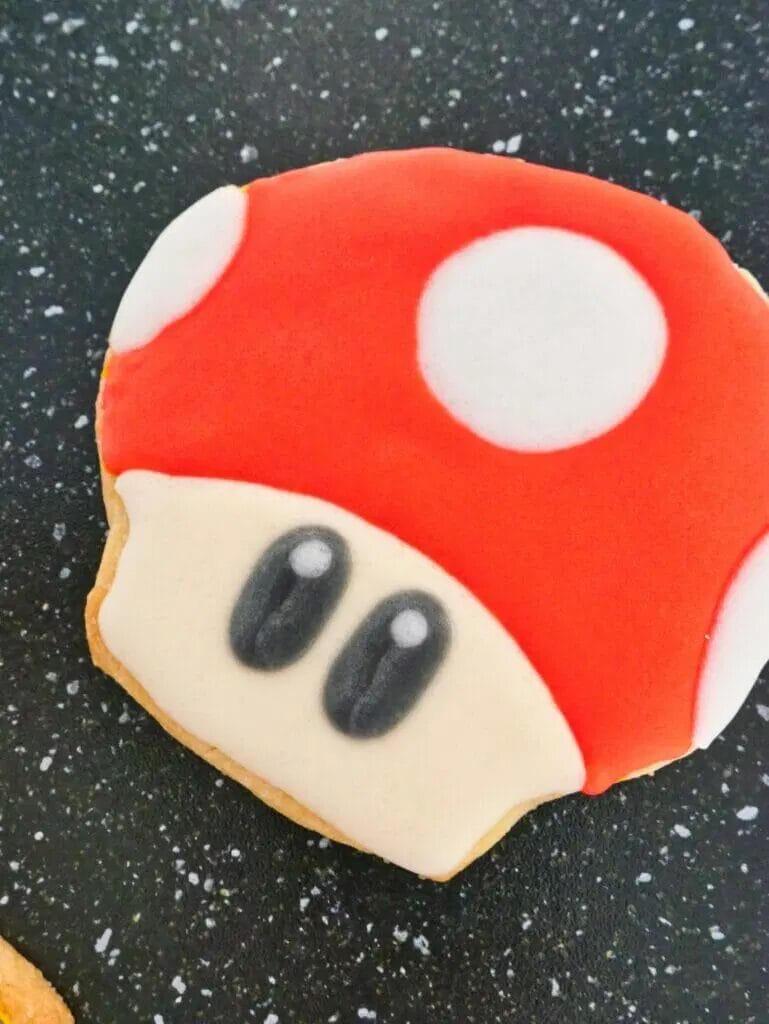
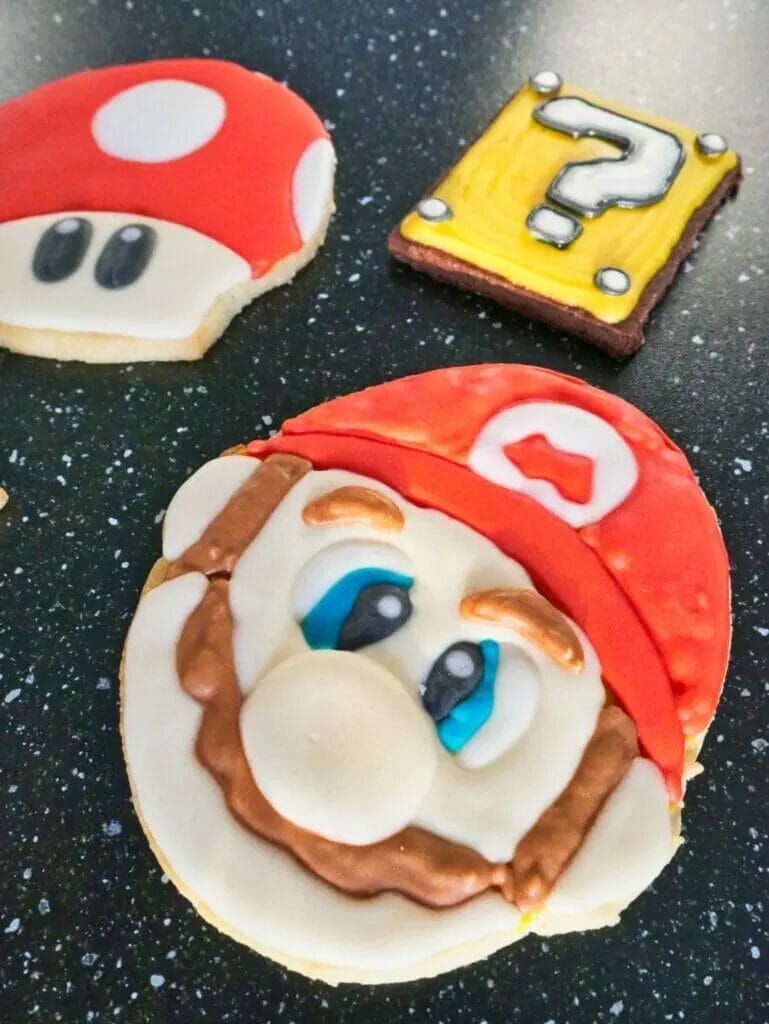
How to Decorate Toad Cookies
To start, let’s do the Toad cookies!
I use a yellow edible food marker to draw out the different sections, which means a big one at the top and a smaller section at the bottom, along with a full circle in the middle and two half circles on either side of the head.
Using red icing, outline the top of the head.
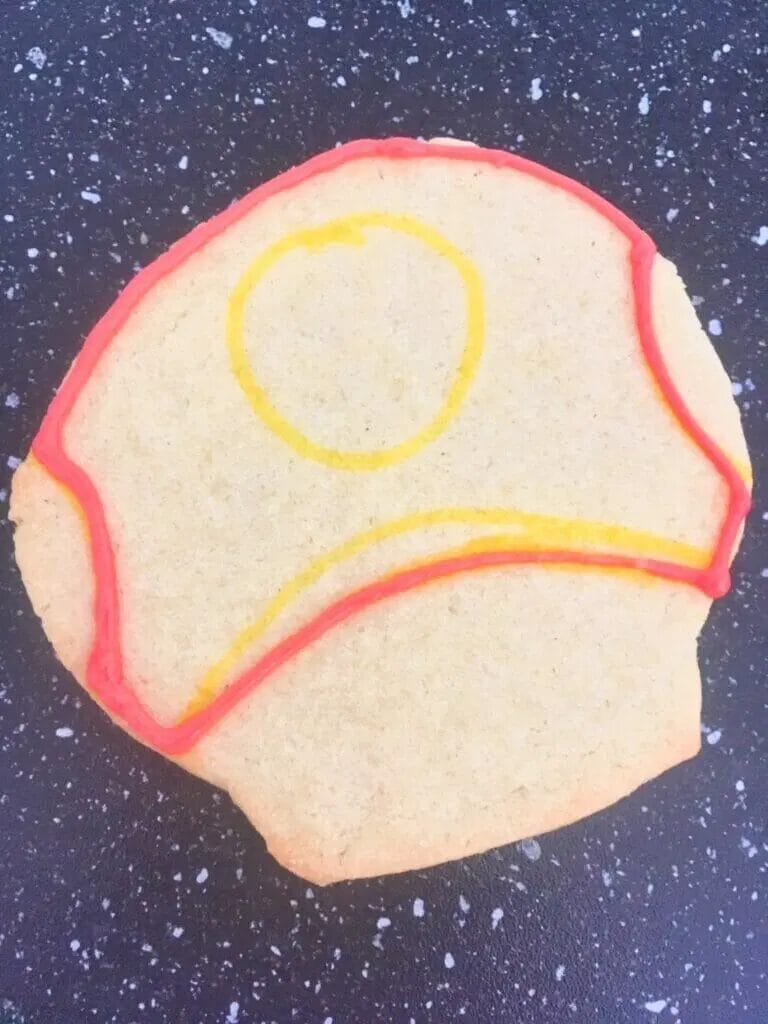
Then, outline the circle in the middle.
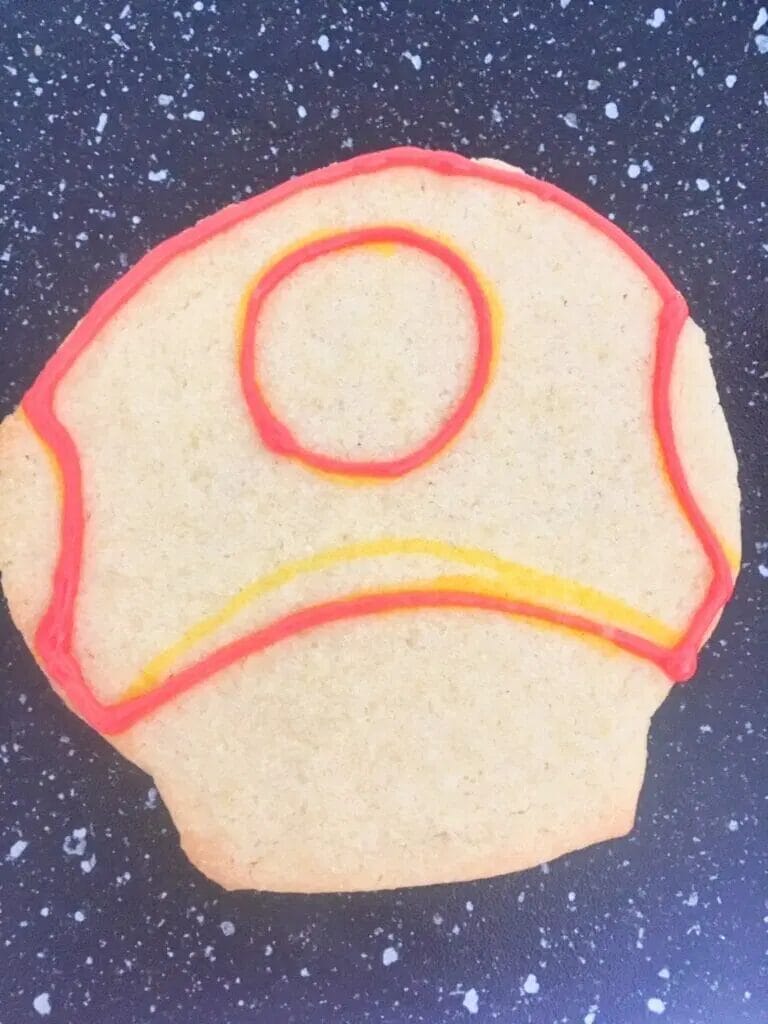
Immediately flood this entire section with red icing.

Allow to dry for 30 minutes, then fill in the half circles and circles with white icing.
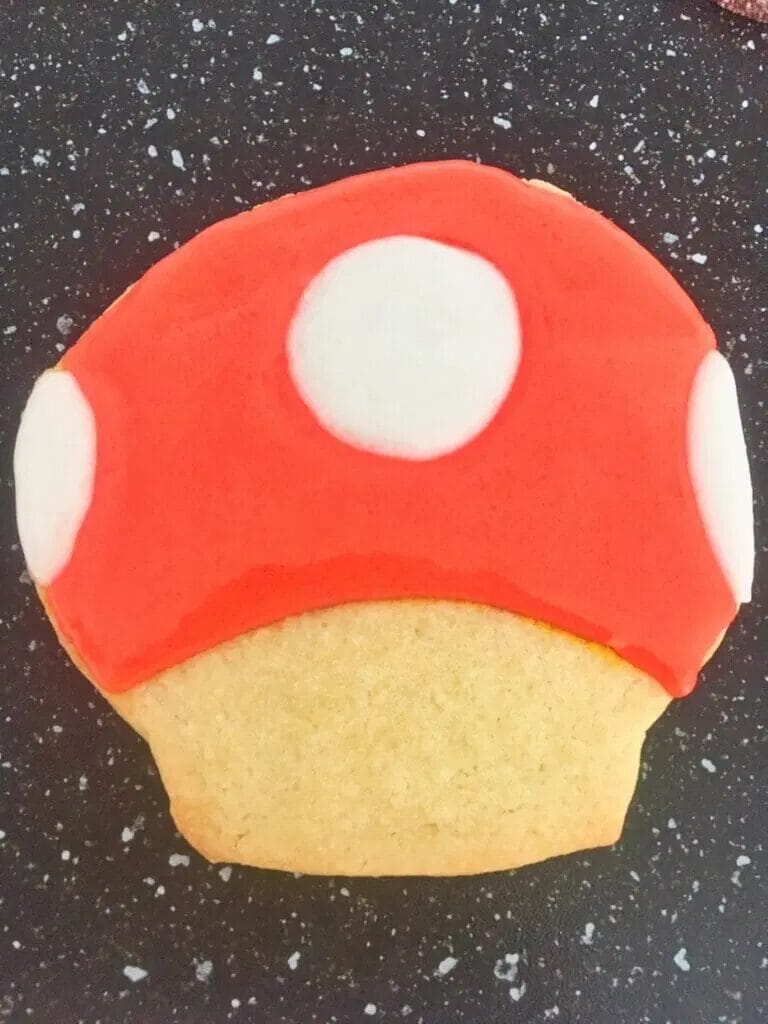
Immediately after, flood the bottom section with ivory icing.
Allow to dry for 2 to 3 hours, then pipe on two thin ovals of black icing, and immediately put a dot of white icing on each.
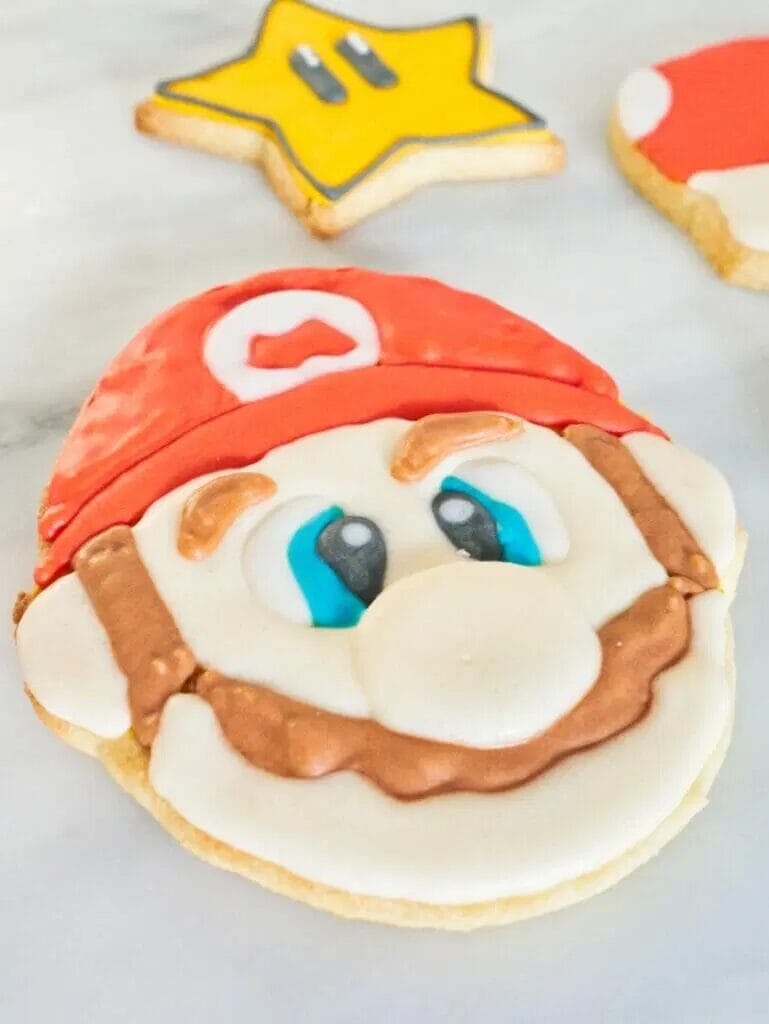
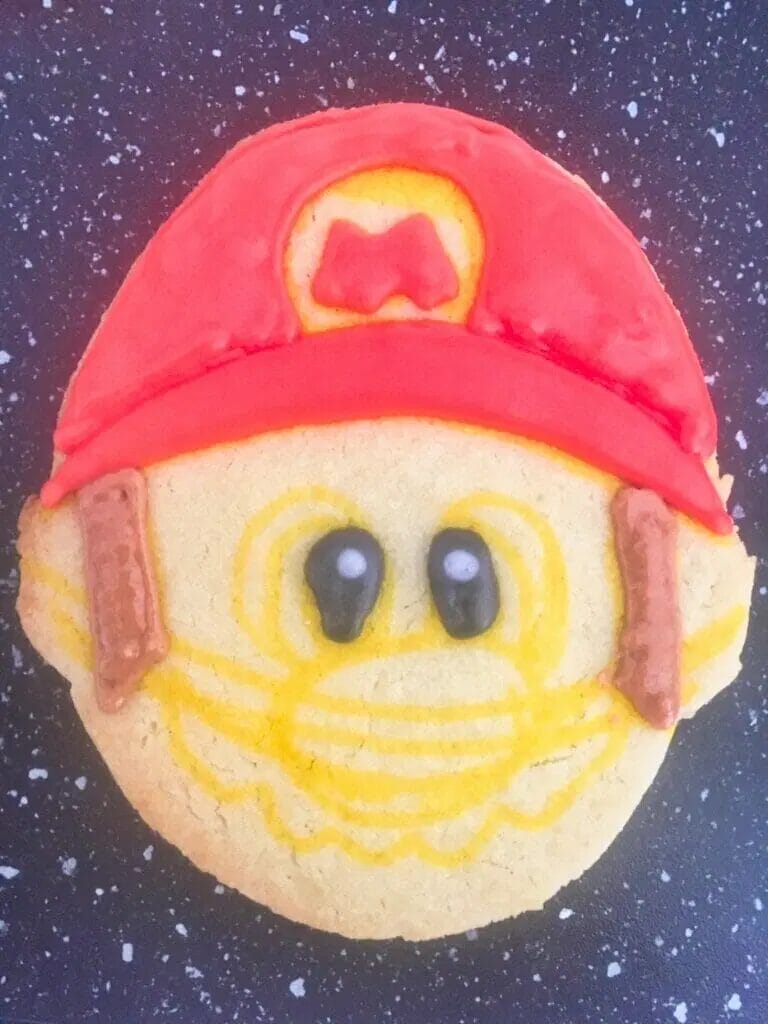
How to Decorate the Mario Cookie
This is the most technical cookie of all, but it is absolutely doable!
Broken down step-by-step, you’ll find it much less intimidating than looking at the whole cookie at once.
Using a food marker, follow the top two lines (with the M above it) to section off his hat – this includes the line that goes above his ear to above his other ear, and then a second line above that.
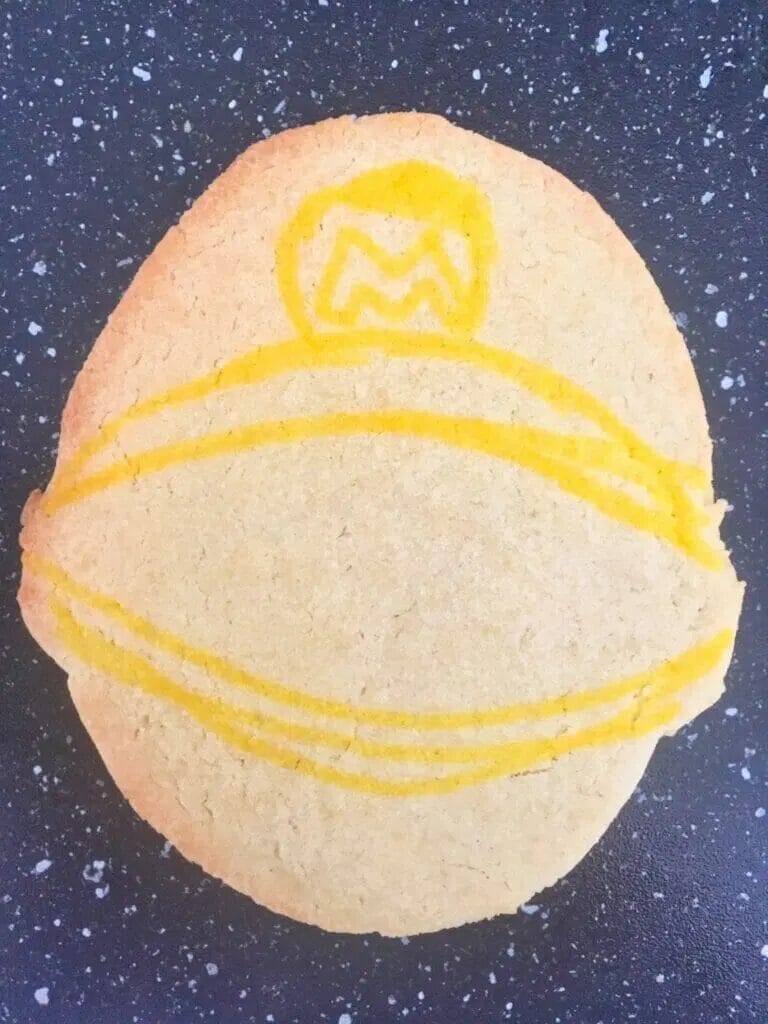
Draw the circle and the M inside of it.
First, using red icing, outline and flood the section in between those two lines.
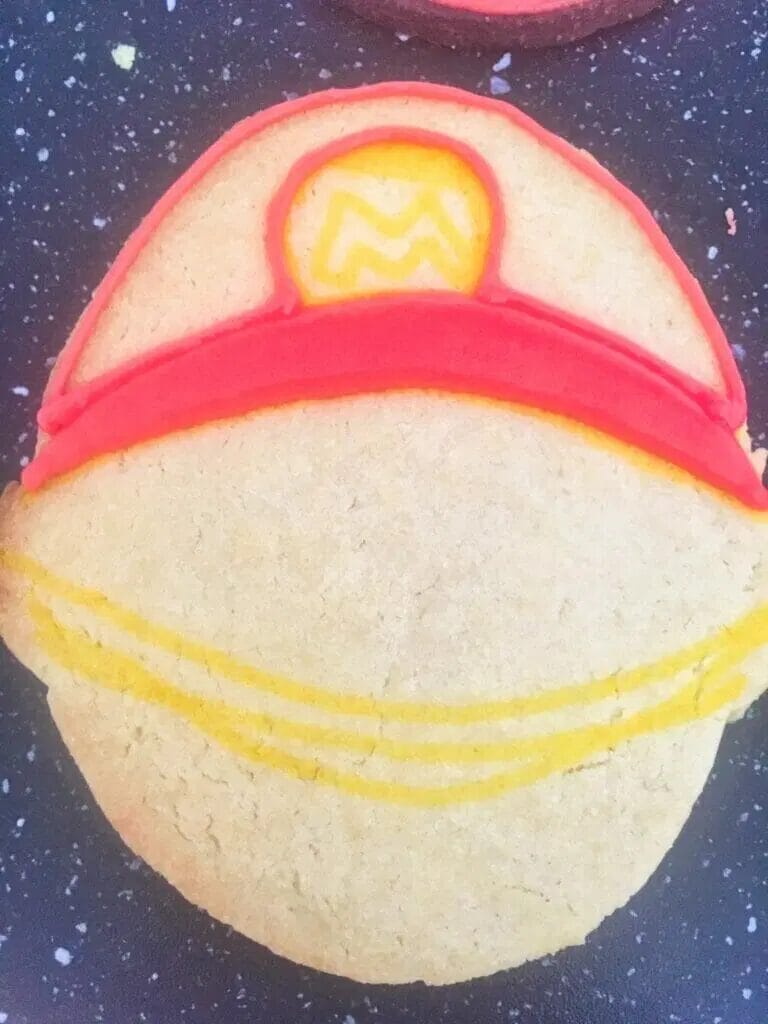
Let dry for 30 minutes.
Come back in and outline the rest of the hat in red, then immediately flood in with red.
You can also flood in the “M”.
Then, draw his sideburns on with brown icing, and draw his eyes with three section – the innermost should be black with a white dot.
Outline the shape of his mustache in brown.
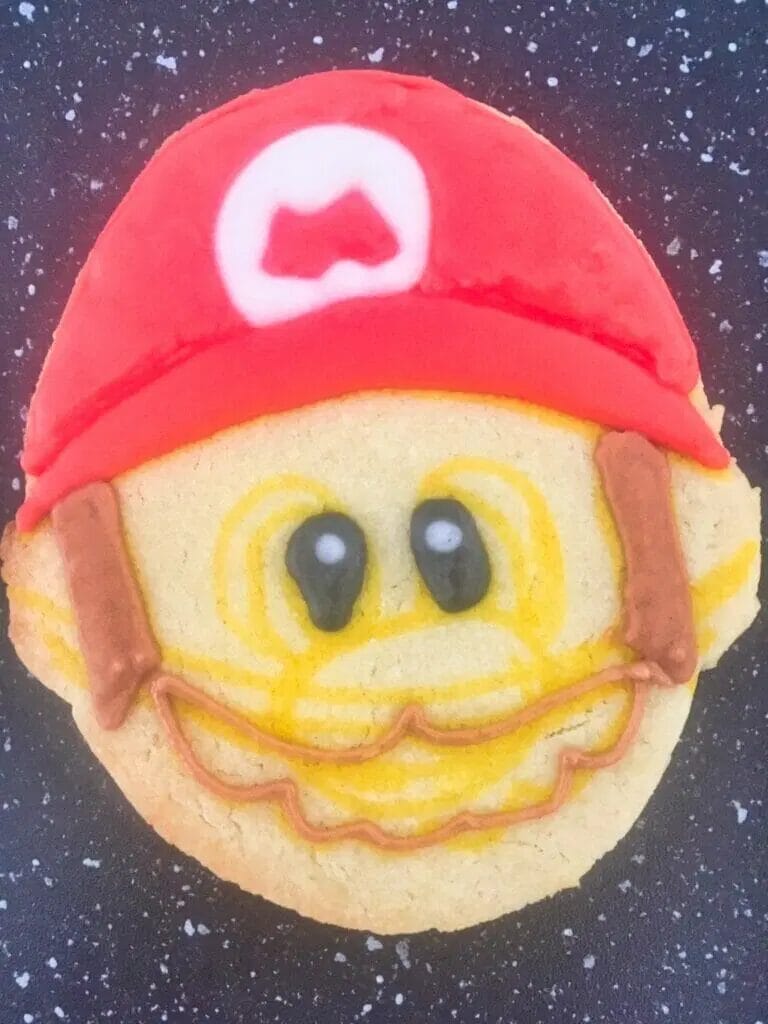
Flood in his mustache, as well as adding ivory in all of the places shown.
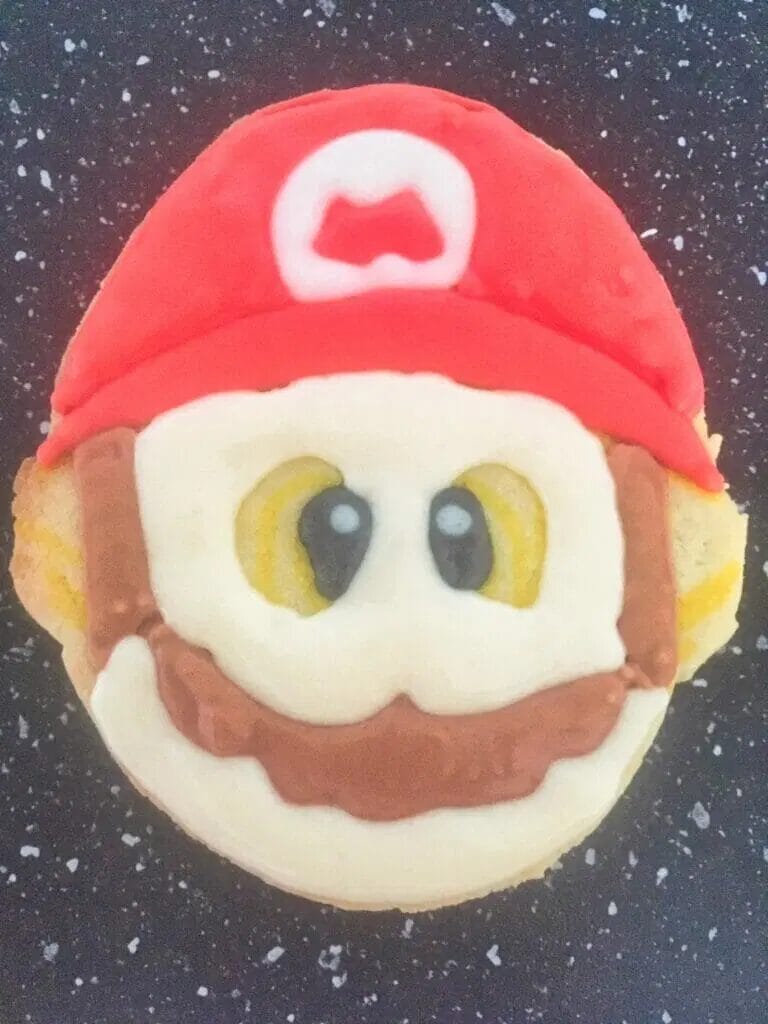
Allow to dry, then add in more ivory icing around his ears, and fill in the eye using white for the outermost part and blue for the middle part.
Let everything dry for 2 to 3 hours, then add on his eyebrows in brown and add an ivory oval over his mustache for his nose.
How to Decorate Mario Star Cookies
Decorating the star cookies are super easy, and a great option to let the kids do while you do the Mario cookie.
First, outline the star in yellow icing, then immediately flood in with yellow icing.
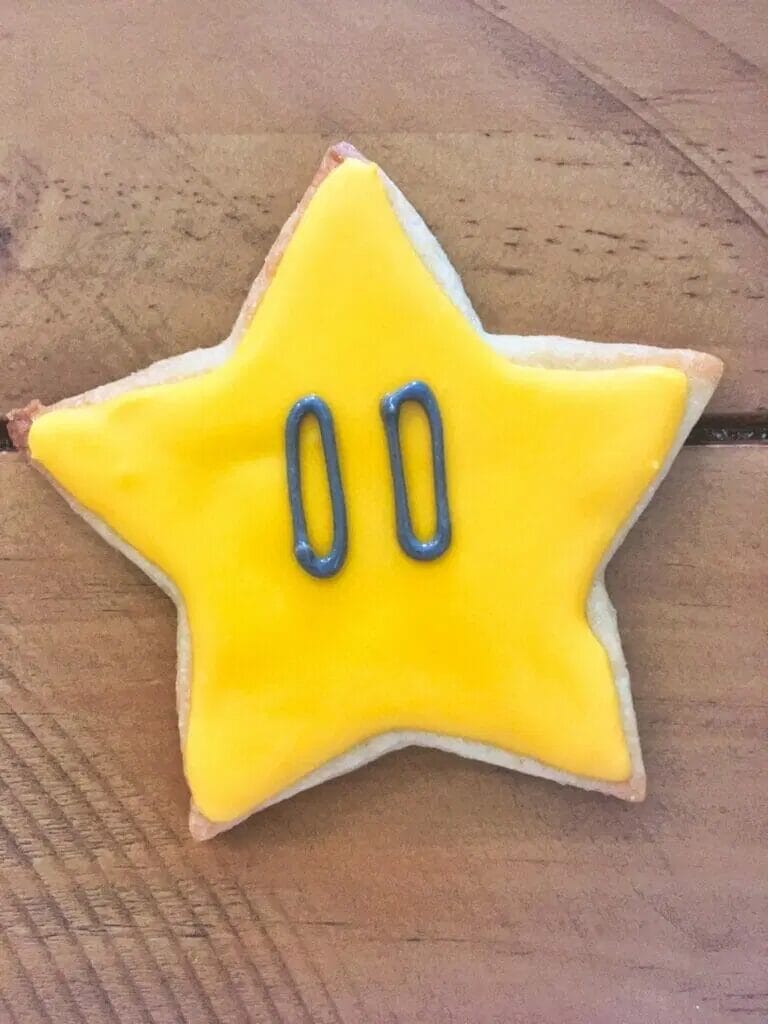
Allow to dry for 20 to 30 minutes, and then outline the star in black icing and add two black ovals for the eyes.
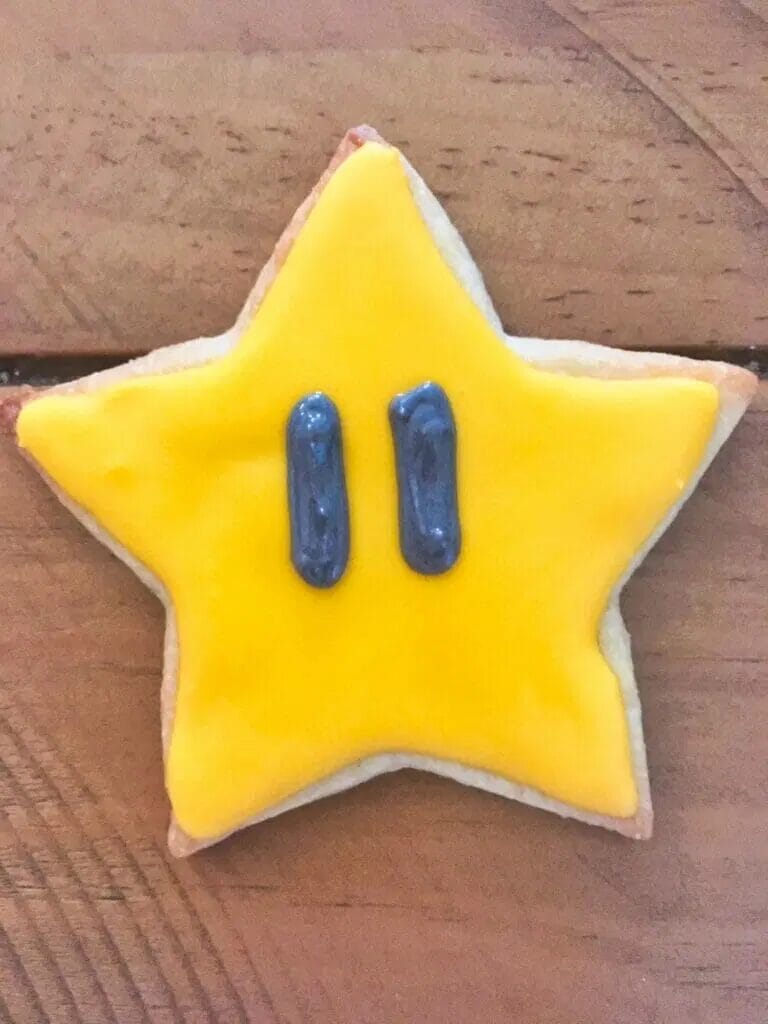
Immediately put a dot of white icing in each eye, and allow to dry for 2 to 3 hours.
