
As an Amazon Associate, I earn from qualifying purchases. In addition, I participate in several other affiliate programs that allow me to earn while I recommend products I love.
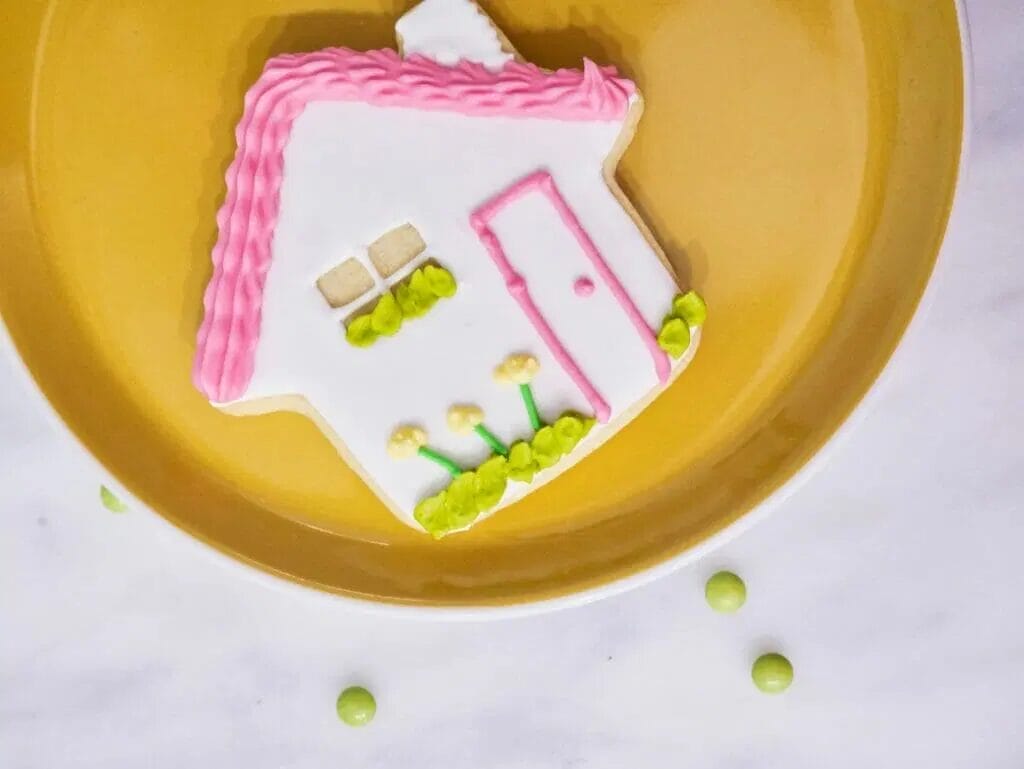
These housewarming cookies, or decorated house cookies, are perfect to greet your new neighbors or congratulate your friends or family on their new house. The sugar dough base and royal icing makes it both crunchy and chewy, and the options for decorating are endless.
When it came time to make these decorated house cookies, I hemmed and hawed about how I should decorate them to make the most out of them.
I went with a classic design with some grass and flowers out front, but you can always add festive decorations like Christmas lights, Halloween decorations, and more.
These decorated cookies are made with a really nice vanilla-flavored cookie that doesn’t spread (which we need for this to keep its shape), as well as royal icing, which you should consider using if you haven’t before!
It dries hard, unlike buttercream, so these are easy to be boxed up or wrapped up and sent as presents.
In this decorated house cookie tutorial, you’ll see how I made these house cookies, how to decorate house cookies with royal icing, and how to use the decorating tools associated with royal icing.
These housewarming cookies are…
- delicious and beautiful at the same time
- fun to use your creativity on depending on the season
- big enough that they make great gifts
- soft, but firm enough to not be crumbly
- perfect to include in your housewarming party ideas
Why Royal Icing?
Royal icing is the icing of choice for these cookies due to the detail you can get with royal icing and the fact that it dries hard.
This makes the cookies much easier to transport and move around.
If you don’t want your icing to be completely hard when you bite into it, you can add some corn syrup to it, but royal icing is a really popular icing recipe for decorated cookies and it goes well with these sugar cookies.
Ingredients and Tools You’ll Need for Decorated House Cookies
To make these decorated house cookies, you’re going to want to pull together the ingredients for the no-spread sugar cookie dough, which includes butter, granulated sugar, powdered sugar, flour, vanilla extract, eggs, baking powder, and salt.
You also need the ingredients for the royal icing, which is meringue powder, icing sugar, vanilla extract, and water.
I prefer to use meringue powder instead of egg whites as you they are safe for everyone to consume.
In terms of tools you’ll need to make these cookies, check out:
- a baking tray
- silicone baking mat – this is the best one
- house cookie cutter – I love this one
- scribe or toothpick for detailing – find it here
- leaf tip – this is the best one
- piping bag – try this brand for great results
- gel food coloring – always use gel food coloring like this when using royal icing for best results
How to Make the Cookie Dough for House Cookies
Use this sugar cookie dough recipe to make the dough for these house sugar cookies.
The important part of this recipe is that it was formulated to prevent the cookies from spreading.
If the cookies spread in the oven, suddenly you’ll find yourself with blobs of nothing instead of houses.
However, I don’t like super hard or crunchy cookies, so I made sure to use a cut-out sugar cookie recipe that can produce some really chewy and softer cookies.
If you leave it baking too long, they will definitely go hard, but if you take them out right when they are beginning to become lightly golden on the edges and let them cool while still on the baking tray for a few minutes, they will be softer once they cool.
Make sure to follow the recipe exactly, including the chilling of the dough.
Warm dough is more likely to spread, and the recipe has you chill the dough after rolling it out and after cutting out the shapes, which sounds like a lot of work, but really makes for great cookies.
You shouldn’t substiute any ingredients in this recipe.
If you’re hoping for a different cookie for your dietary needs, find a recipe that specifically suits that and then use my decorating tips.
How to Make the Royal Icing For House Cookies
Making royal icing is easy, but knowing what consistency to make it at can be hard.
In general, you’re going to want to mix the royal icing ingredients together from this royal icing recipe for a good 8 to 10 minutes before you get the kind of peaks you want, but this depends on what you’re going for.
Some people like to make two consistencies when making royal icing, one to outline and use for detailing, and one to do the “flooding” of the base.
I prefer to use one consistency for both outlining and flooding, and then a much thicker one to use for the detailing.
For the outlining and flooding, the consistency I like to use is about a 12 second consistency.
You know the consistency because if you take a knife and draw a line in the icing, it will take about 12 seconds for the line to disappear completely (seriously, count it out).
For the stiffer icing, to use for the leaves and details, you really need to make sure that the icing will stay in place and is thin enough to push out of a piping bag, but thick enough that it won’t lose its shape at all.
You’ll know it’s at this consistency because when you draw a line through it, the line never disappears.
Tips for Decorating with Royal Icing
Decorating with royal icing can be intimidating for new bakers as most people are used to using buttercream and not using piping bags, but it’s incredibly fun and easy once you get the hang of it.
Some basic tips for decorating with royal icing include making sure that you keep the tip of the piping bag about an inch or so off of the cookie and letting the icing kind of drip down instead of feeling like you are one centimeter above the cookie.
You can use disposable or reusable piping bags, but if you do use disposable ones, make sure to cut the tip really small at first if you’re going tipless to help you create those fine details.
Storage Options for House Cookies
When it’s time to store the cookies, many people wonder if you can freeze cookies decorated with royal icing.
For the novice baker, it’s best to not freeze the completed cookie, but you can freeze the sugar cookie base once you bake the sugar cookies for up to 3 months.
You can leave royal icing at room temperature if you’re decorating over a couple of days, and when you have the completed cookies, store them at room temperature in an airtight container.
How to Decorate House Cookies with Royal Icing
Decorating house cookies with royal icing is a lot easier than it looks.
Just take it step by step.
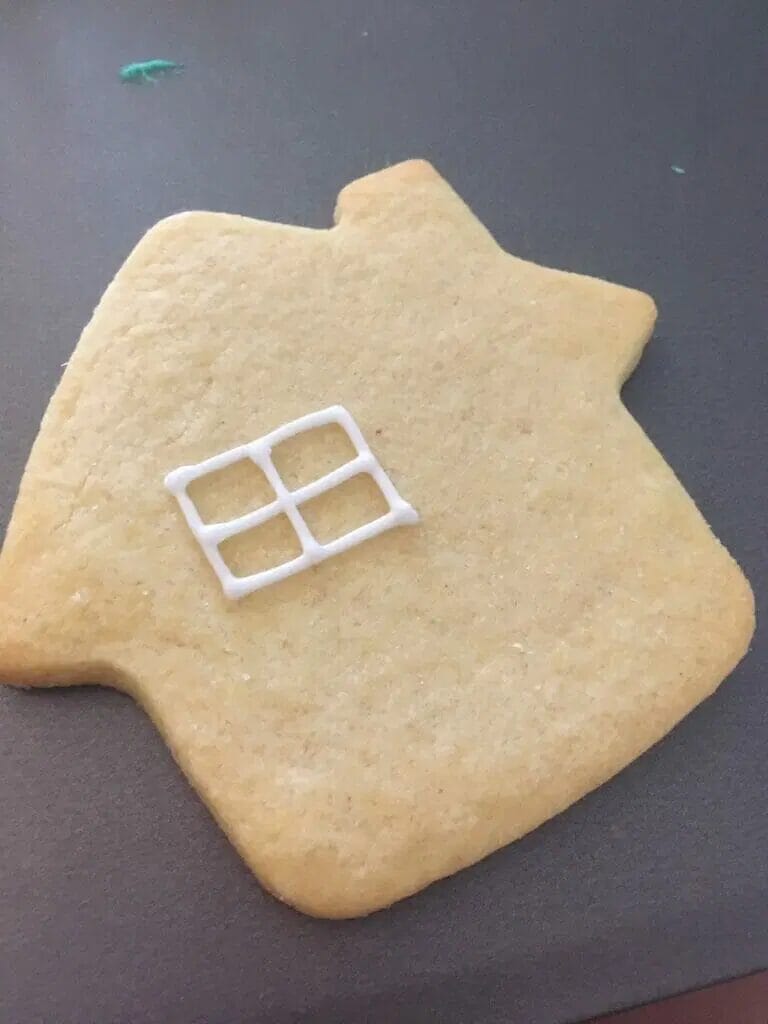
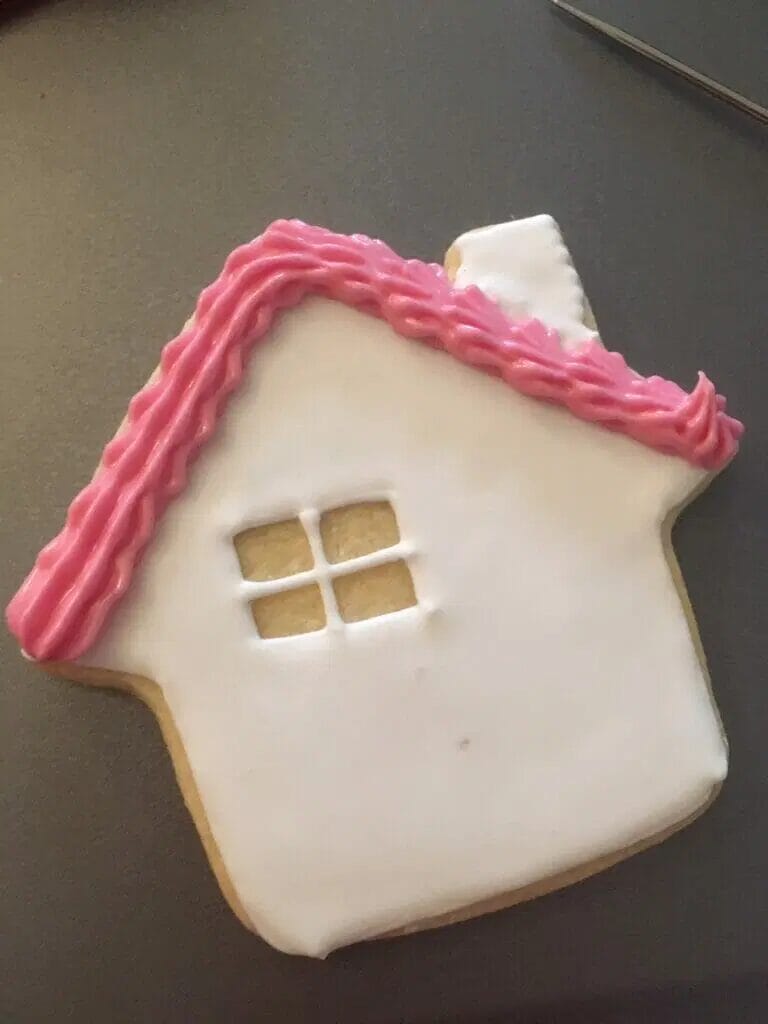
First, outline the entire house, but leave a rectangle blank for the window by outlining the rectangle within the house cookie.

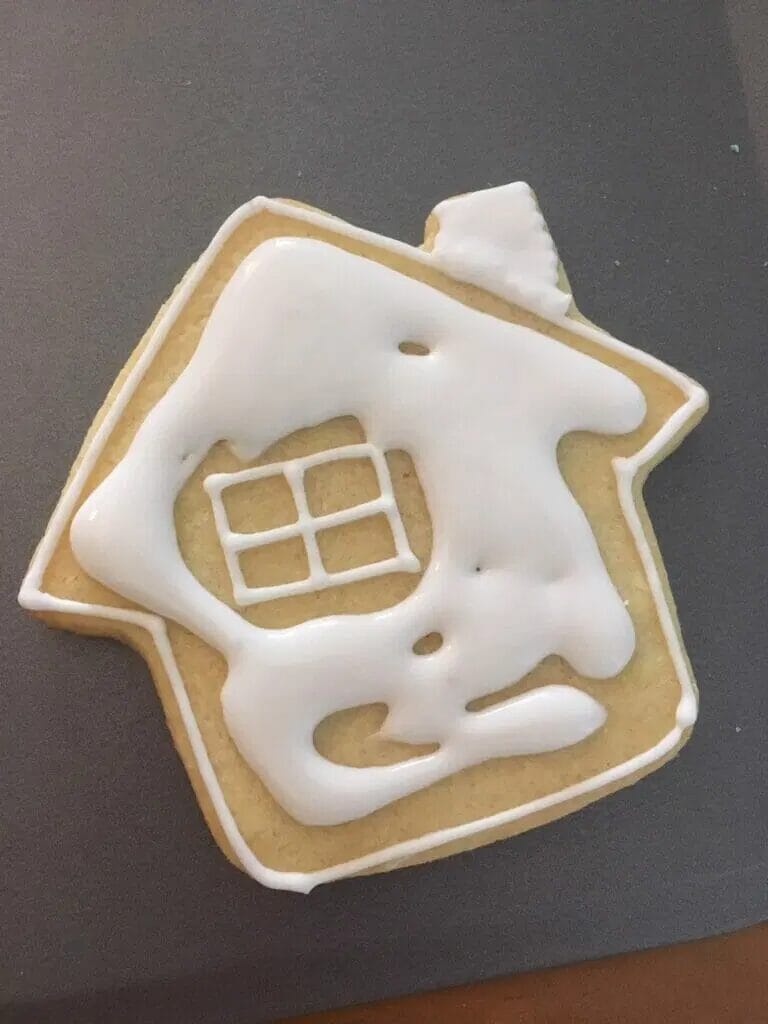
Then, immediately flood the entire cookie with white icing, making sure you don’t cover in the window.
Let this dry for 8 to 10 hours, and then you’re ready to add the details!
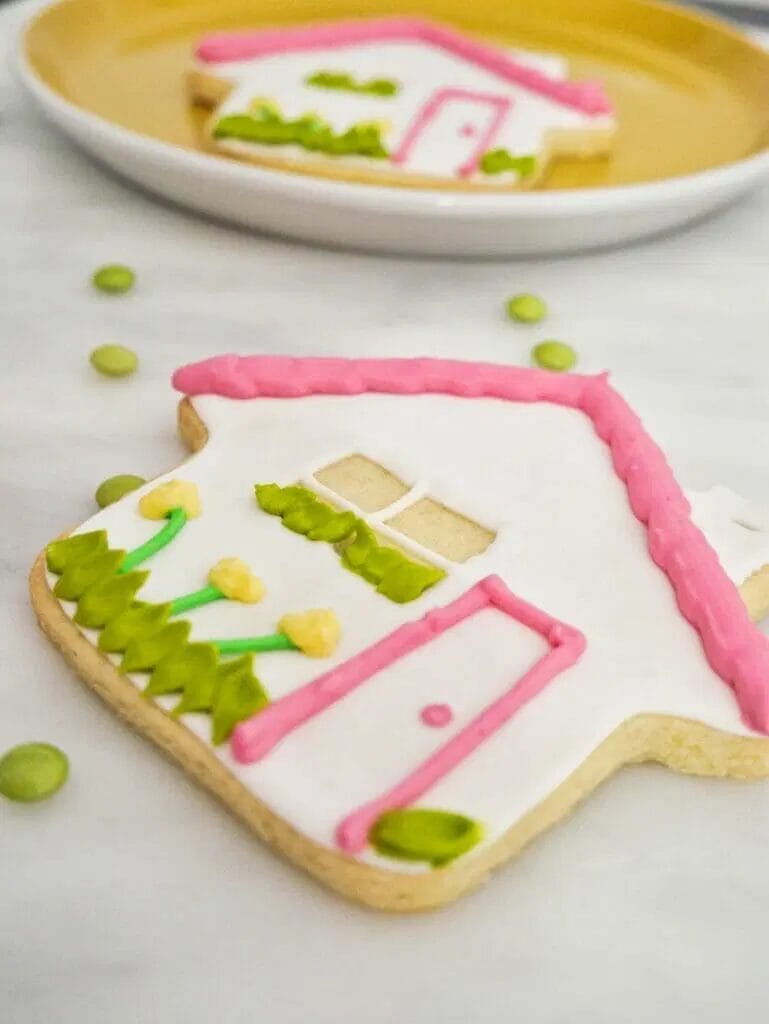
Start by drawing a line with icing from the middle of the top of the window box to the bottom, and then again from left to right.
Take a different color of icing and draw yourself a door with a dot of icing for the doorknob.
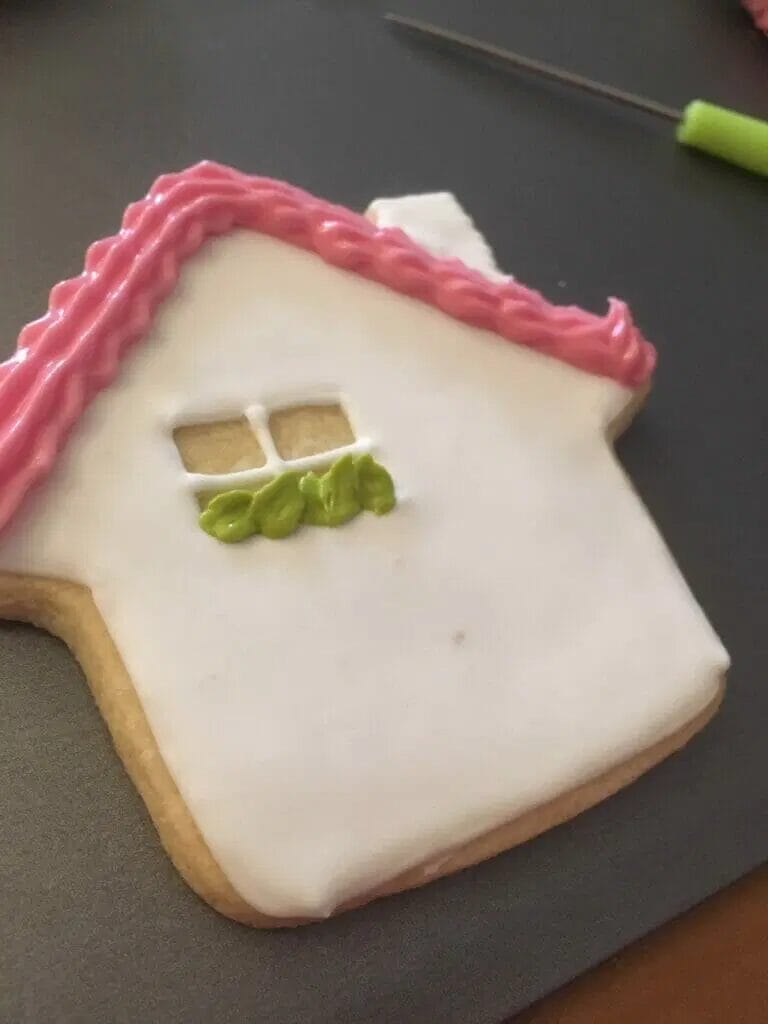
Using a fun piping tip, go along the roof edge and pipe a thick line along the roof edge.
Using a leaf tip, create leaves at the bottom of the house to make some grass, and then some more in the window box for a bit of color.
Finally, go in with some thin lines of green and a couple of dots each of yellow or another color to make flowers.
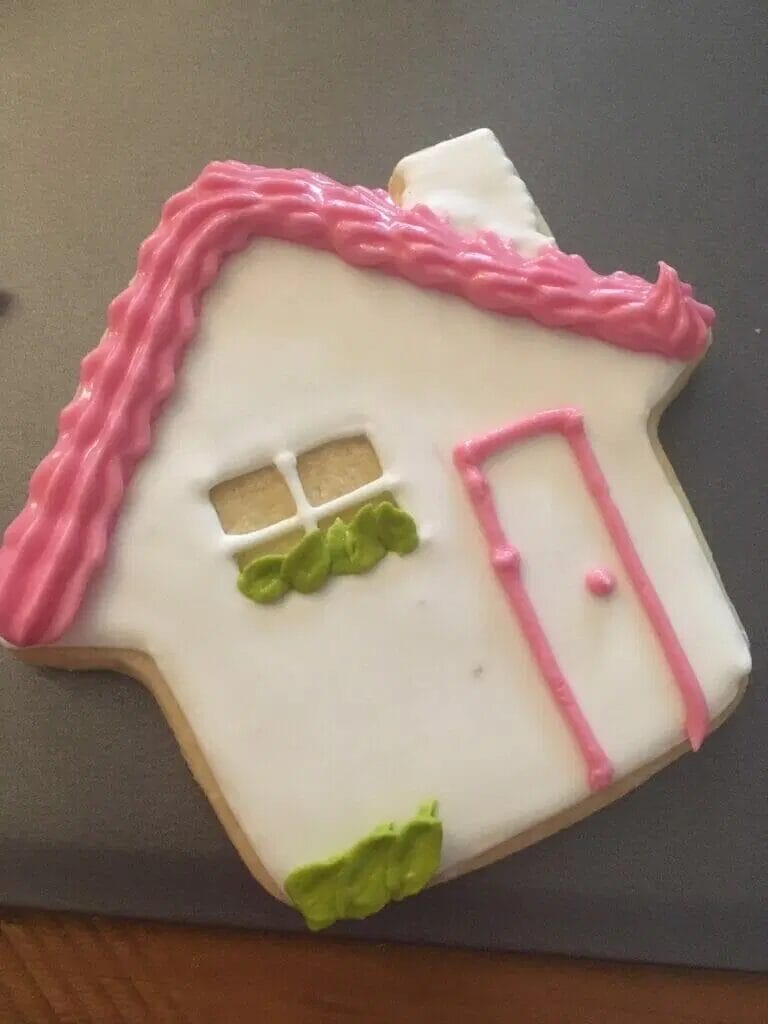
And that’s it! Cute house cookies!