
As an Amazon Associate, I earn from qualifying purchases. In addition, I participate in several other affiliate programs that allow me to earn while I recommend products I love.
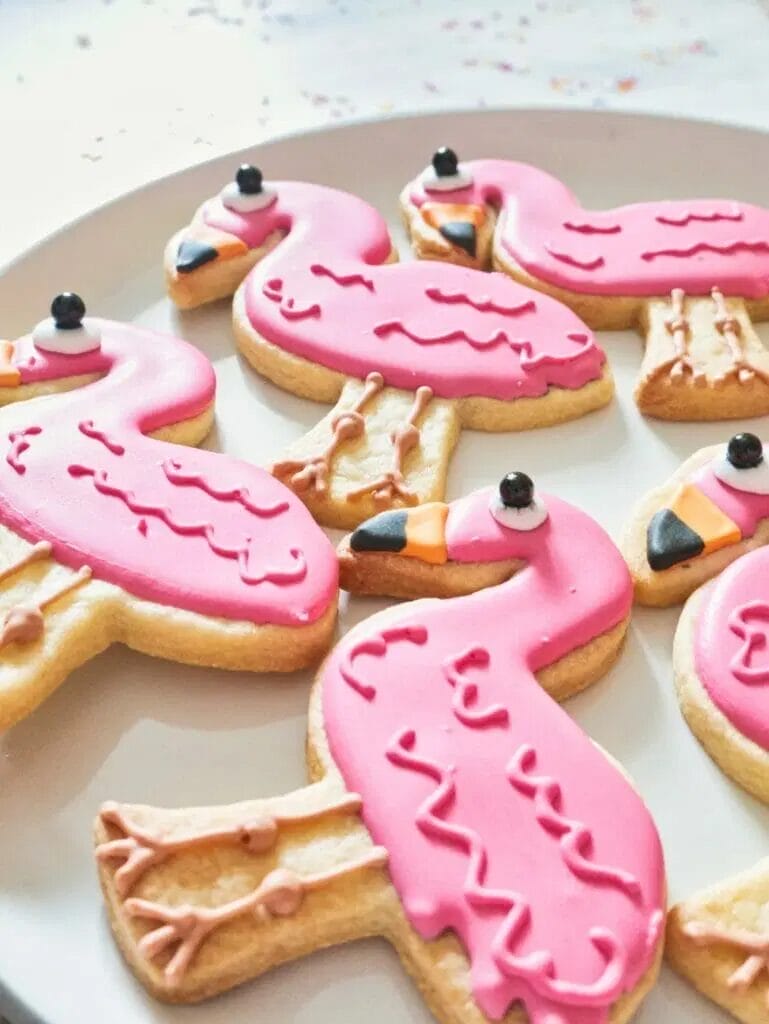
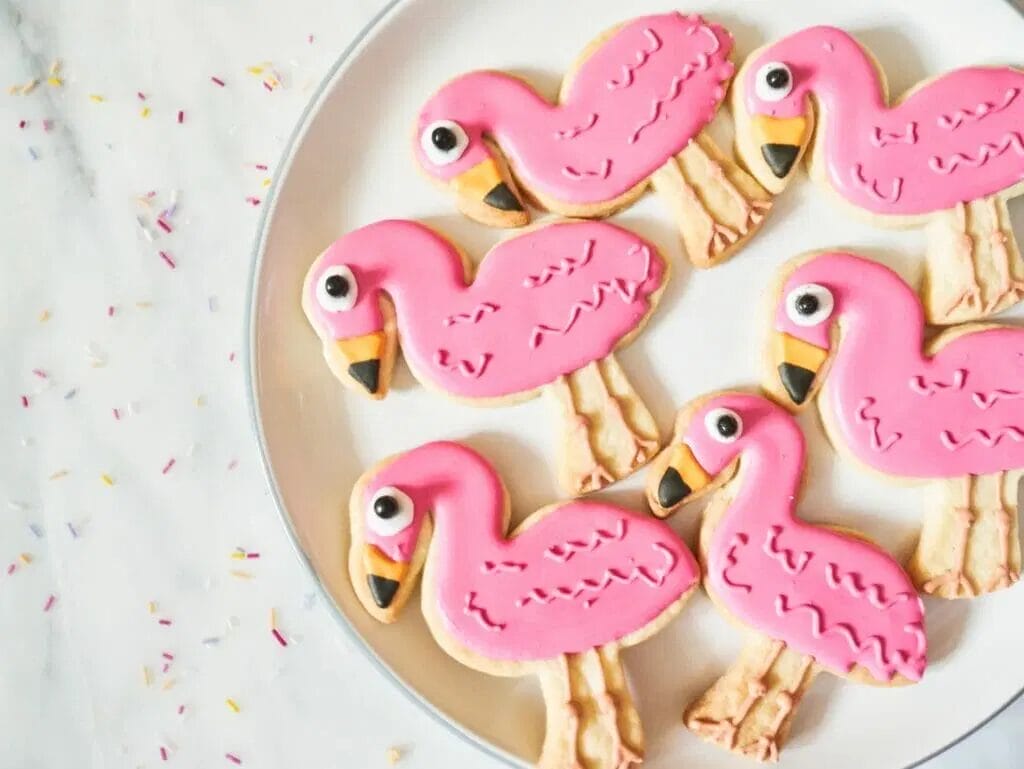
These flamingo cookies are so adorable and great for a barbecue or summer outdoor party. The cookie bases are soft, but not crumbly, delicious, and the perfect way to heap on loads of flamingo colored royal icing.
Making animal cookies isn’t always easy, as you want to get it right and often people like to do them true to life.
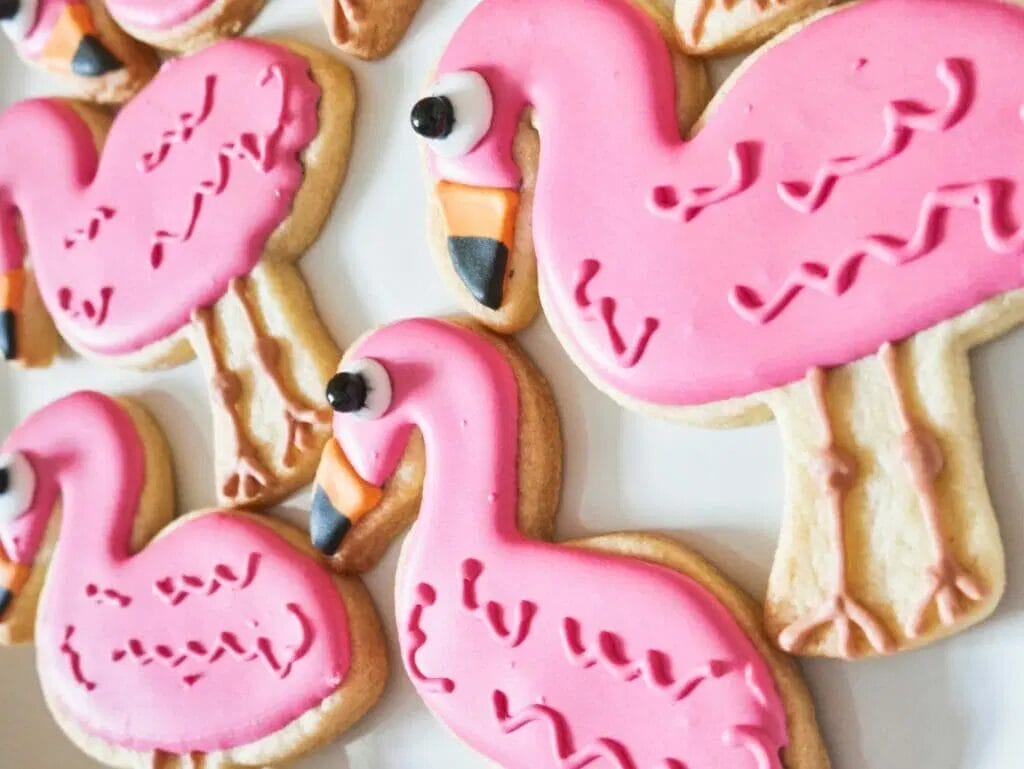
For these flamingo cookies, I really went the extra mile to make sure I used the right colors to create a cookie that closely resembled its inspiration, and I’m so happy with how they turned out.
From the orange and black beak to the adorable legs to the pink feathers, it’s got everything you want in a flamingo cookie and make for great gifts for flamingo lovers or to add on to a summer cookie set.
In this tutorial for flamingo cookies, I’m going to walk you step by step through what you will need, how to make them, and how to decorate these flamingo cookies with royal icing.
These flamingo cookies are:
- cute and fun for summer
- great for animal lovers
- beautifully detailed
- delicious with a vanilla flavoring
What You’ll Need to Make Decorated Flamingo Cookies
Making flamingo cookies requires you to put together the cut-out sugar cookie dough first and foremost.
Nothing goes ahead without the actual cookie base!
The sugar cookie dough is formulated to prevent the cookies from spreading, and I highly recommend it as I get perfectly crisp and clean edges each time.
For the dough, you can find the full list of ingredients and instructions in the cut-out sugar cookie recipe, but know that you should plan to use: powdered sugar, granulated sugar, butter, eggs, vanilla extract, flour, baking powder and salt.
You will also need to round up the ingredients for the royal icing, which is made with meringue powder, water, vanilla extract and powdered sugar.
As for the tools and colors you’ll need, I recommend:
- brown food coloring – always use gel food coloring for royal icing for best results
- orange food coloring
- pink food coloring
- edible black food marker – this is the best one
- piping bags – I use this brand
- a scribe or toothpick – this is the best one
- flamingo cookie cutter – how cute is this one?
How Do I Store Flamingo Cookies?
People often make batches of decorated cookies, which means you have to store them somewhere.
Luckily for you, cookies decorated with royal icing don’t need to be refrigerated or frozen if you make them with meringue powder instead of egg whites.
You can just store them at room temperature in an airtight container for 2 to 3 weeks.
If you do want to freeze flamingo cookies, freeze the cookies before decoration.
Freezing royal icing isn’t the best idea as the royal icing might not hold up and your decorations could go ruined.
Can I Substitute Ingredients in Flamingo Cookies
If you’re on a specific diet, you might wonder if you can make substitutions in either the cookie base or the royal icing.
Because baking is such a science, I wouldn’t recommend any sort of substitutions in these recipes.
Instead, if you want to make cookies for a specific diet, find a cookie recipe that caters to that and then follow the instructions on cutting out the flamingo cookie and decorating it.
Keep in mind, though, that you’ll want a no-spread cookie.
How to Make Flamingo Cookies
Making the flamingo cookies themselves without frosting is the first step.
You can’t make a flamingo cookie unless you’ve got a flamingo cookie base!
I use this sugar cookie cut-out recipe, which is designed to make sure that your shapes stay, well, in shape and don’t spread all over the pan.
There are lots of different techniques to make sure that your cookies don’t spread, but the main one followed in this recipe is chilling in the fridge.
This is such an essential step – don’t skip it in order to try and rush through.
You’ll regret it and ruin your batch of cookies.
Make sure that you follow the instructions clearly and combine the ingredients in the correct steps.
When it comes time to roll out the dough, you can use specific dough rolling guides that keep all of your cookies the same height, or you can use something like wooden dowels to do the same thing.
The idea is that you want to create a flat surface, not lots of valleys and peaks due to inaccurate rolling.
Use the flamingo cookie cutter to cut out the shape, flouring the cookie cutter a bit to make sure it doesn’t stick to the dough.
You’ll want to be careful with ones like these when poking the dough out, as it can be easy to get stuck in the smaller crevices like the beak.
Then, bake for 8 to 10 minutes, depending on how you want the cookies.
I like a softer and less done chewiness, which calls for about 8 minutes.
Let the cookies cool all the way before icing.
How to Make Royal Icing for Flamingo Cookies
While your cookies are cooling, it’s time to make the royal icing!
Royal icing is super simple with just 4 ingredients, but does require you to beat it for quite a few minutes to bring out the consistency you want.
When you first mix it together, it will be incredibly runny, and the further you beat it, the stiffer it will get.
What royal icing consistency you go for is a personal preference that you will develop over time while baking, but for these cookies, I used a 12 second consistency.
That means that if you dragged a knife through the icing, it would take 12 seconds for the line to disappear.
This is the consistency I used to both outline and “flood” and detail these flamingo cookies.
When using royal icing, most people like to pipe it from piping bags.
You won’t be able to just scoop it and spread it.
If you don’t have piping bags, you can use a sandwich bag with a small bit cut off of the corner.
How to Decorate Flamingo Cookies with Royal Icing
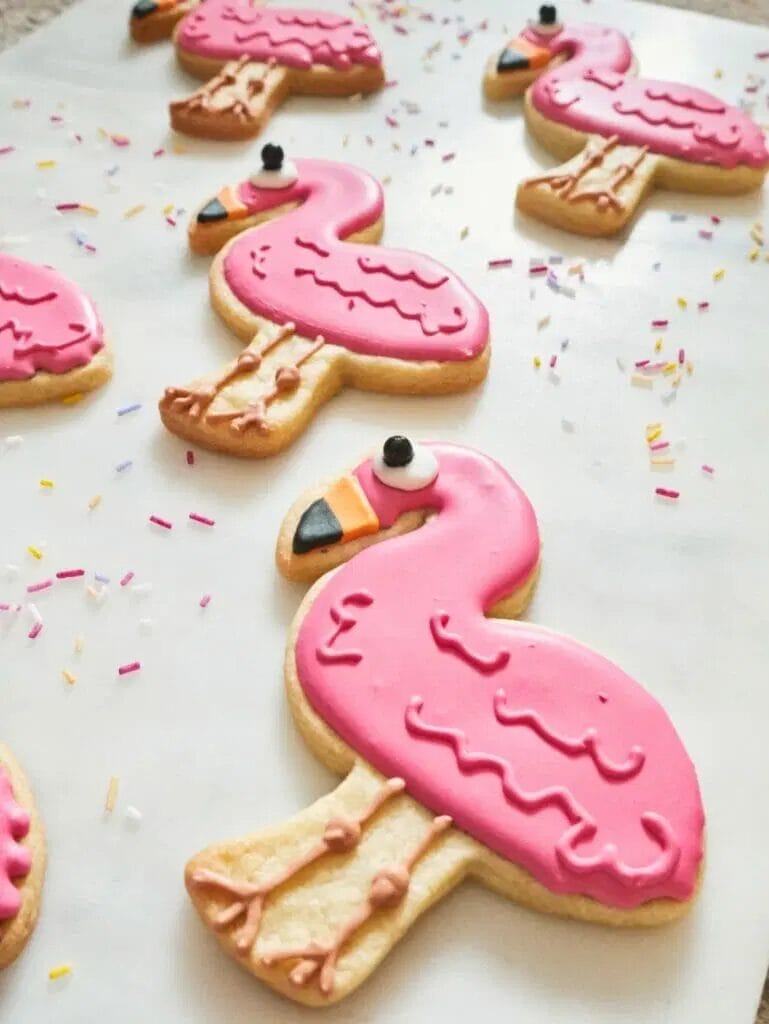
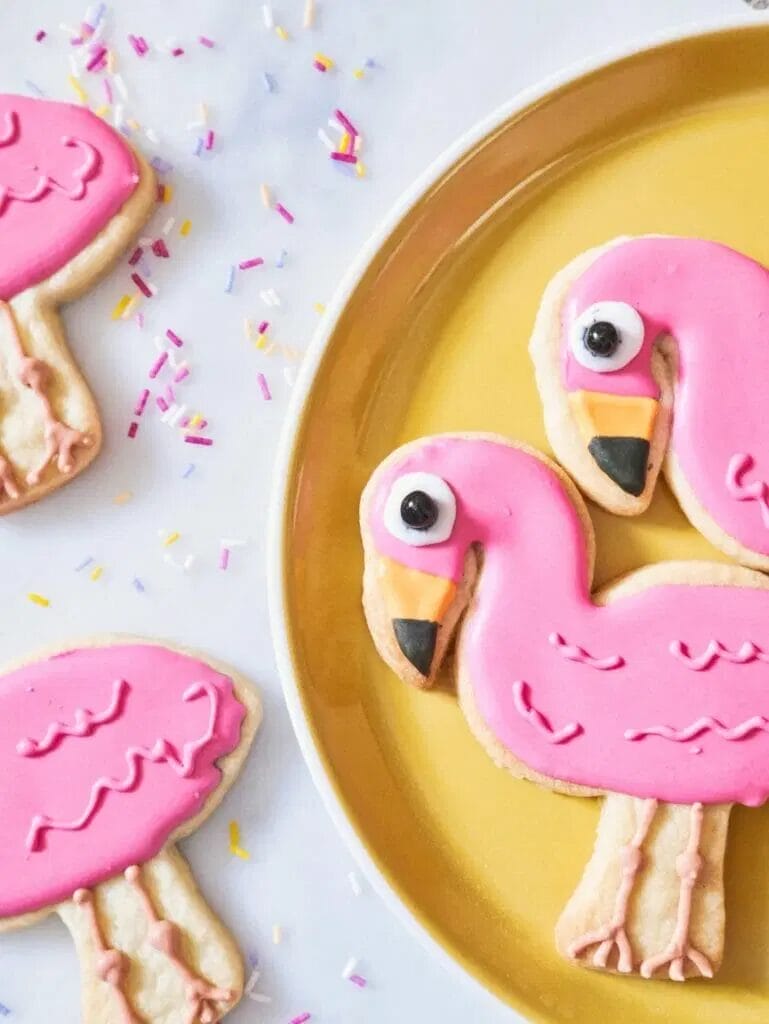
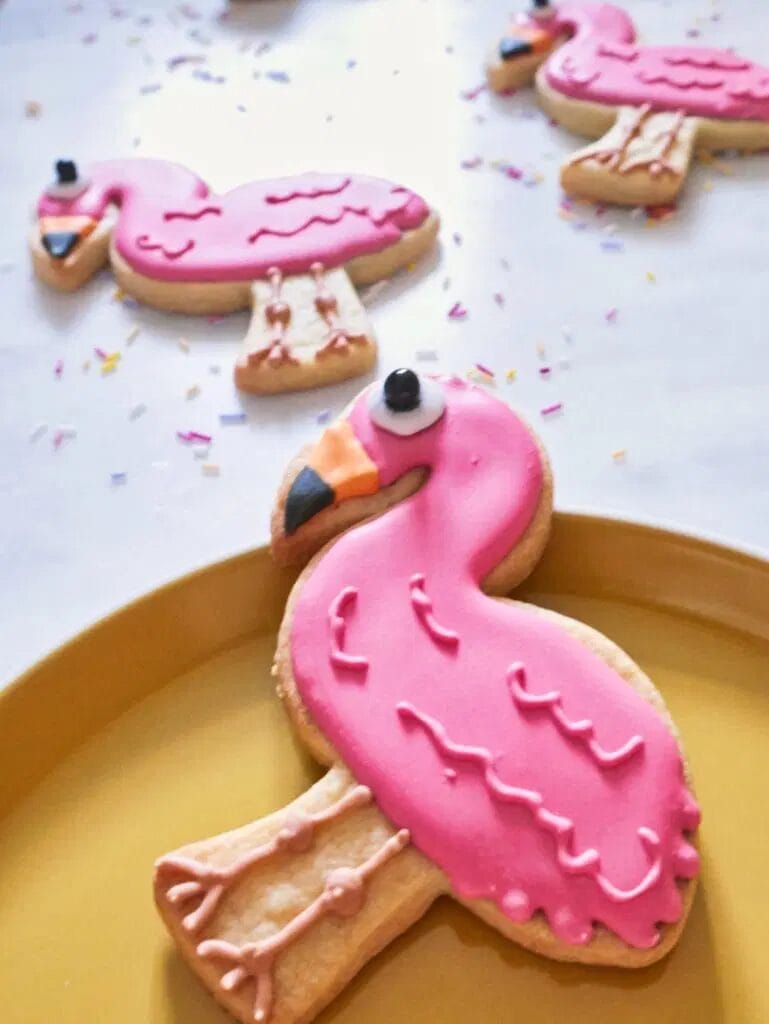
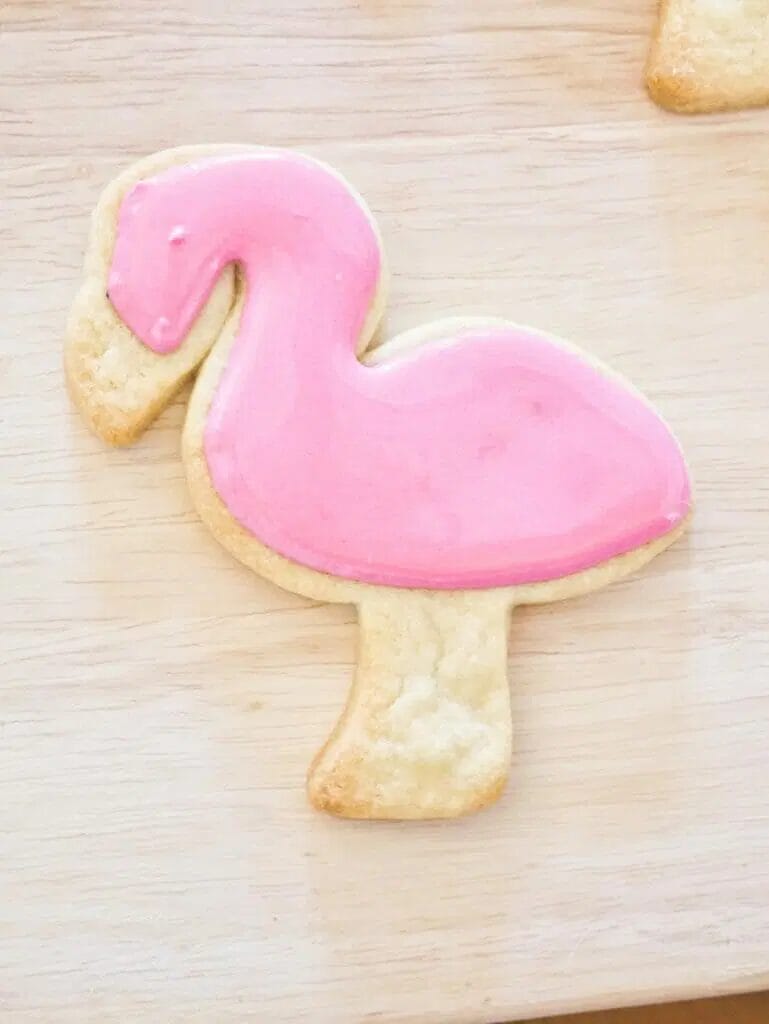
Decorating flamingo cookies is super fun and starts by outlining the flamingo body.
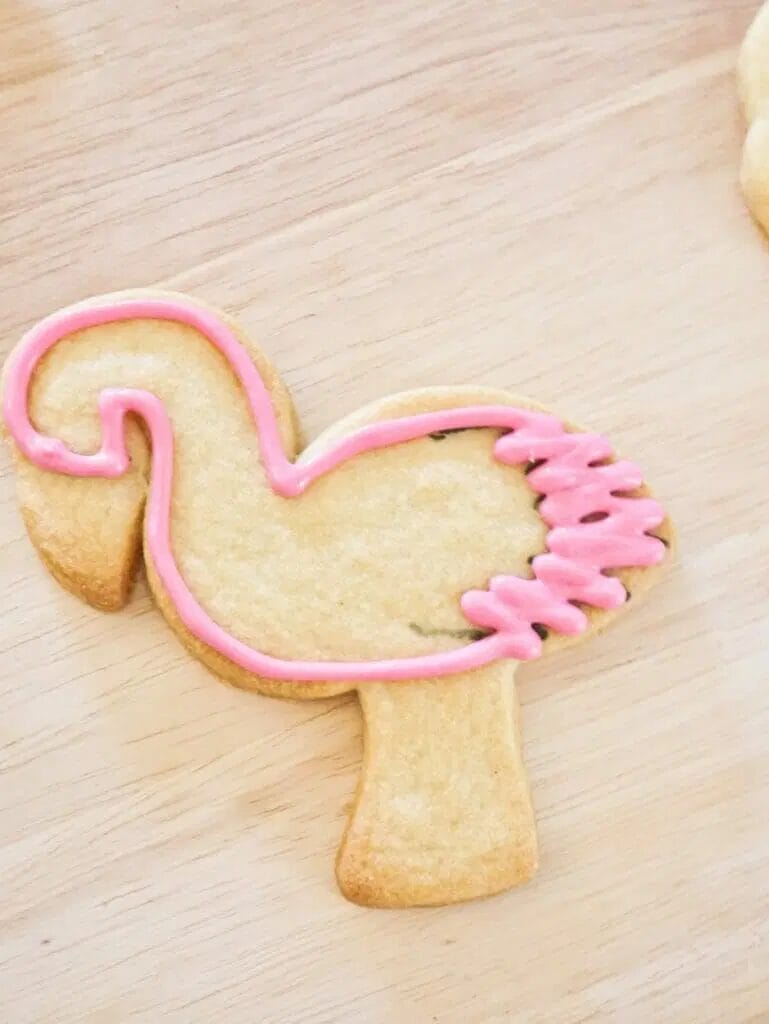
You’ll want to skip the legs, and leave a bit at the end of the beak.
Outline with pink icing, leaving a ruffly bit at the back. Immediately fill it in with pink icing and let dry for a good 30 minutes to an hour.
Then, you can pipe on the legs, making sure to do a bit more at the knees and then creating the 3 toes on each foot.
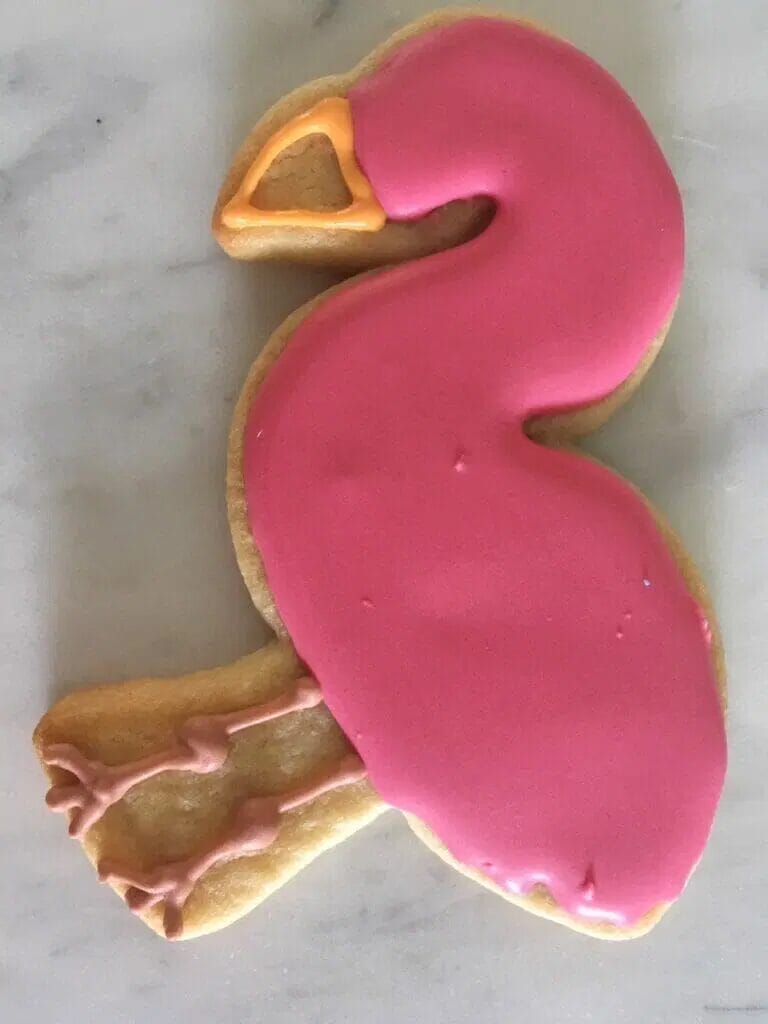
You can also, at the same time, draw on the beak with orange icing.
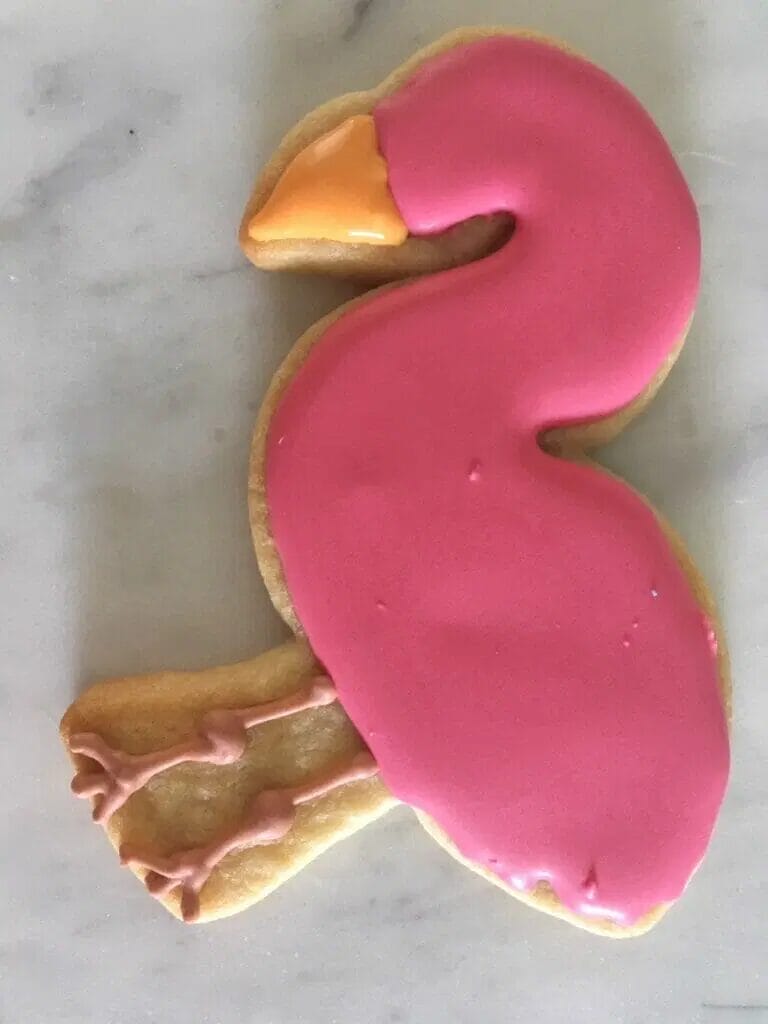
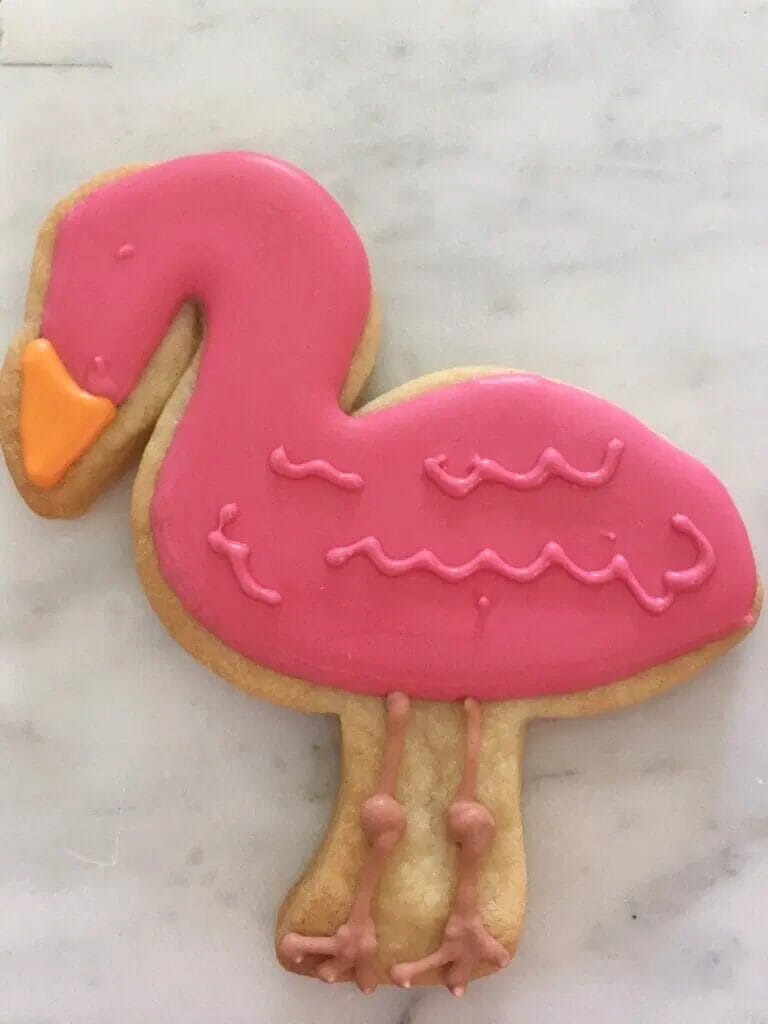
Once the orange icing sets, draw a triangle of black at the end of the beak with an edible food marker.
And to finish it off, pipe some pink squiggles on the body for some textured feathers, and add the eye.