
As an Amazon Associate, I earn from qualifying purchases. In addition, I participate in several other affiliate programs that allow me to earn while I recommend products I love.
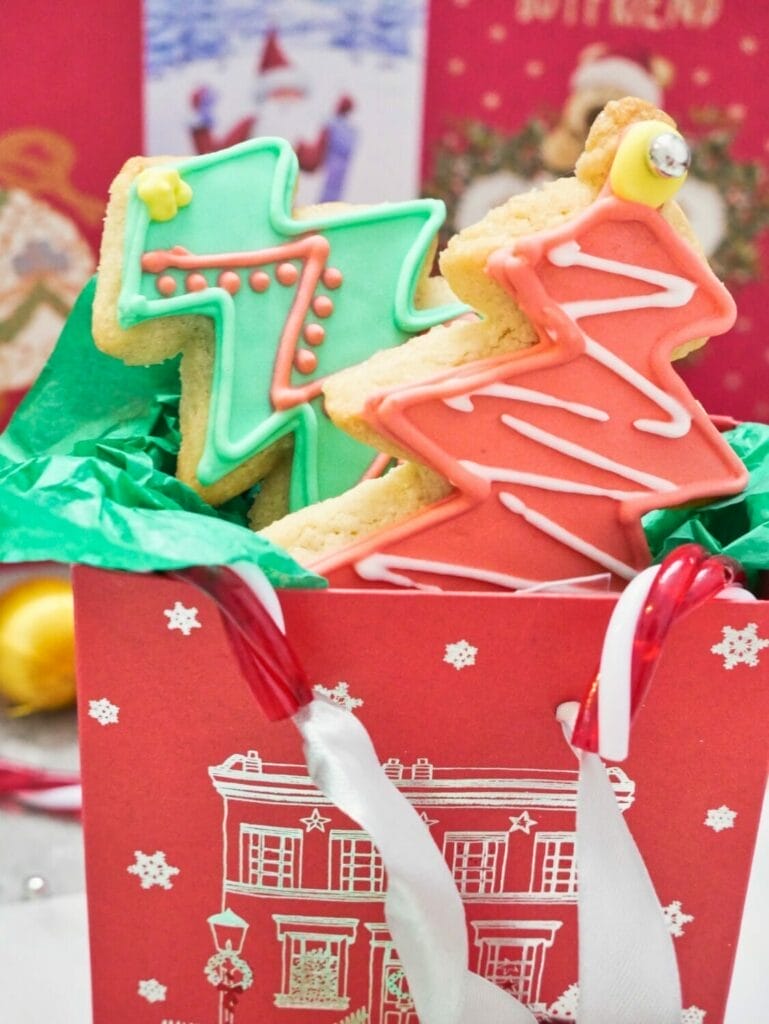
These decorated Christmas tree cookies are the perfect addition to any holiday party, with a combination of chewy sugar cookie and vanilla flavored royal icing that will help bring some yuletide cheer to your Christmas season.
There are so many different types of Christmas tree cookies that it can be easy to get lost in the mix.
You can make pretzel Christmas tree cookies, sugar Christmas tree cookies, Oreo Christmas tree cookies – the list goes on.
These decorated Christmas tree sugar cookies are a classic Christmas favorite that really lets you get detailed and creative with the frosting as you’re using royal icing, which dries for a smooth shine.
The sugar cookie base is also perfectly formulated to not spread in the oven, thus keeping your Christmas tree shape, while not being rock hard.
You can actually bite into these without fear of breaking a tooth, which I find is a problem with some decorated cookies.
In this tutorial on making Christmas tree cookies, I’ll teach you how to decorate Christmas tree cookies, how to make the sugar cookie base for Christmas tree cookies, and how to use royal icing to decorate Christmas tree cookies.
What Ingredients Do I Need to Make Christmas Tree Cookies?

These Christmas tree cookies are made using a sugar cookie base and royal icing.
To make the sugar cookies, follow the cut-out sugar cookie recipe and make sure you have: powdered sugar, granulated sugar, flour, butter, vanilla extract, baking powder, salt, and eggs.
For the royal icing, follow this royal icing recipe and gather up icing sugar, meringue powder (it’s safer for pregnant women and means the cookies can be stored at room temperature, as opposed to egg whites), water, and vanilla extract.

What Tools Do I Need for Making Christmas Tree Cookies?
To make Christmas tree cookies, you’ll need the very basics like:
- Christmas tree cookie cutter – these work great
- baking tray
- parchment paper or silicone baking mat – I use these
- piping bags – these are the best brand
- toothpick or scribe (to adjust icing if needed) – like these
- green, red, and other food coloring, I prefer gel like this one as it doesn’t add extra liquid to your icing
Making the Sugar Cookie Base for Christmas Tree Cookies
You can’t have Christmas tree cookie decorating without the sugar cookie bases!
This cut-out sugar cookie recipe is the perfect one to use to make sure you’re making Christmas tree cookies that won’t spread in the oven.
They hold together well, but aren’t crumbly or rock solid, instead having a bit of chewiness to them.
They go really well with the royal icing, and the vanilla extract gives them a nice flavor on their own.
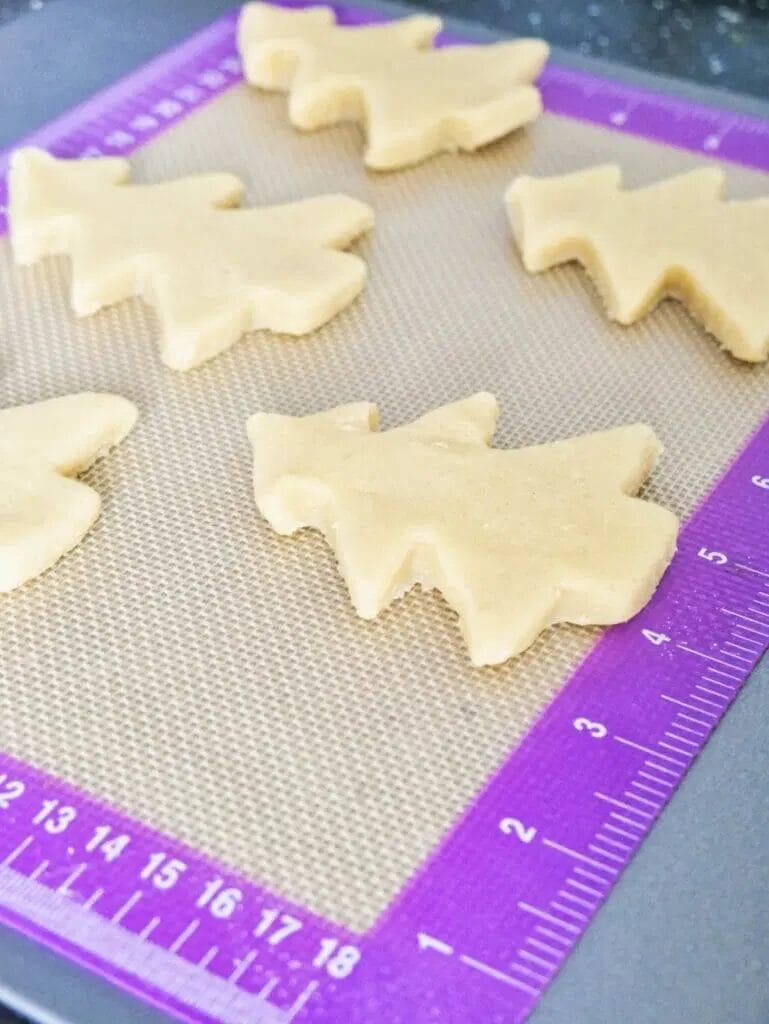
When you go to roll out the cookie dough after chilling (oh, yes, chilling is an important step which you’ll read in the recipe as it means less spread in the oven!), take your time with it as it will be hard to roll out at first.
But don’t let it sit out too long, as then you’ll be left with dough that’s hard to work with.
You also want to make sure when you’re using the cookie cutters that you’re not tugging on the dough too much, as it can cause misshapen cookies in the oven.
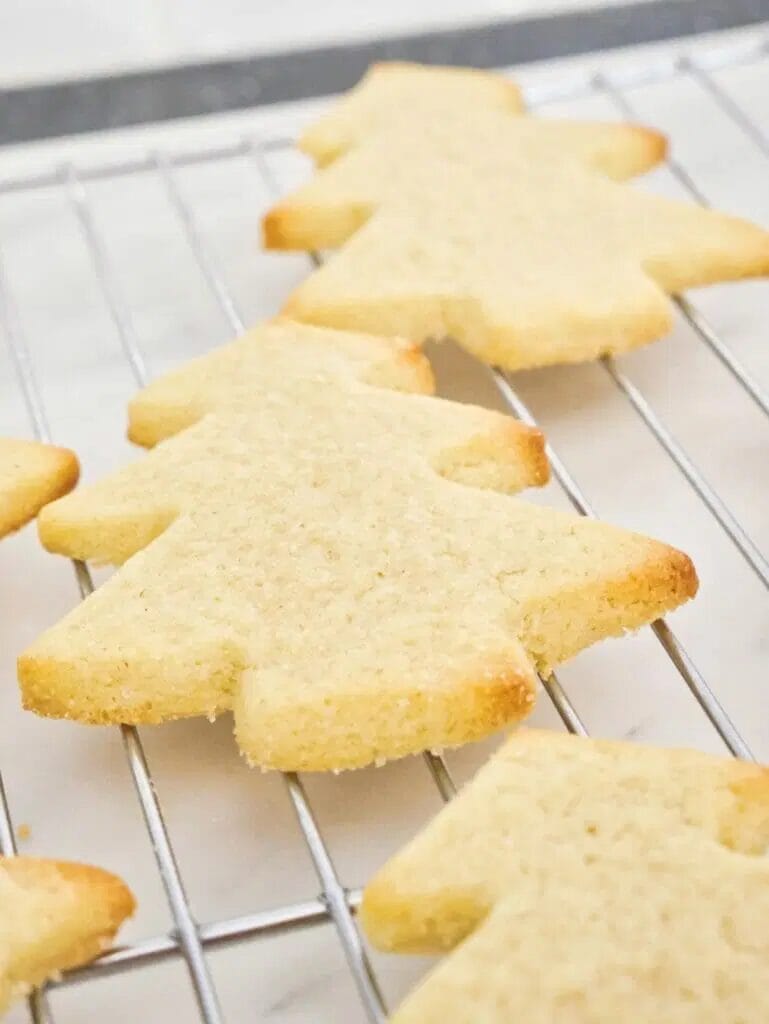
I take my cookies out just as they are turning a very slight golden on the edges.
Too late, if it’s already browning, and your cookies will be hard, and earlier than that and they won’t be done.
For my oven, this is about 8 minutes, but keep an eye on yours and keep in mind that the cookies will need to continue hardening on the baking sheet before moving to the cooling rack and will be soft and squishy right out of the oven, so don’t let them alarm you!
Making the Royal Icing for Christmas Tree Cookies
Royal icing can be intimidating to the new baker, but it doesn’t have to be!
It’s really fun to use in the piping bags, and it hardens into a smooth surface that you don’t get with other kinds of icing like buttercream.
To make the royal icing, follow this royal icing recipe and keep going with it until you reach about a 10-12 second consistency.
This means that if you drag a knife through the icing, it will take that many seconds for the line to completely disappear.
I like to use icing with one consistency, so I use this all throughout my cookie, though others make two consistencies, a thicker one like toothpaste and a thinner one like honey.
The thicker one would be used to outline and for details, and the thinner one would be used to “flood” or fill in the large areas.
Whatever you do, you can always adjust the icing by adding more powdered sugar or more water (use a spray bottle to evenly distribute it and not add too much at a time), so don’t fret!
How Can I Store the Christmas Tree Cookies?

These decorated Christmas tree cookies can be stored at room temperature in an air tight container for 2 to 3 weeks.
If you really want to make them much further ahead of time, I recommend making the bases and freezing them for up to 3 months, and then making fresh royal icing closer to the time.
You can freeze royal icing if you have put your cookies in heat sealed bags, but in general, the home baker shouldn’t attempt to freeze fully decorated cookies as you could end up with lots of coloring mishaps and cookies that don’t thaw correctly.
Can I Make Substitutions in the Christmas Tree Cookies?
For the most part, these recipes need to remain in tact in order for the right amounts of each ingredient to play their part.
Unlike in cooking, baking is a science and is formulated for your specific needs, ie, for the cookies not to spread in the oven or for the royal icing to be able to be whipped into the right consistency.
If you are on a special diet or have an allergy, I would recommend using a recipe specifically formulated for that purpose, and then using my instruction to decorate.
The one thing you can add is a peppermint flavoring to these if you want to get festive!
How to Decorate Christmas Tree Cookies

Decorating Christmas tree cookies be as true to life or as whimsical as you like.
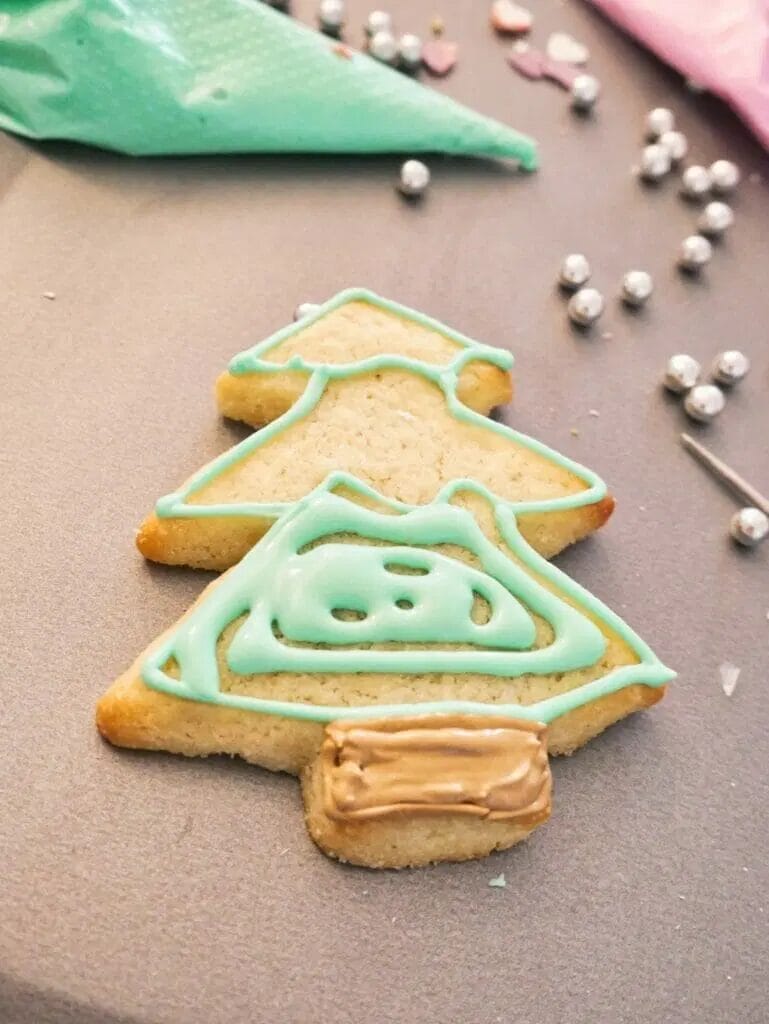
I start by outlining the green tree with green, and then immediately filling it in with green icing.

Give the cookie a little bit of a shake to get the icing to settle, and then wait 30 minutes.
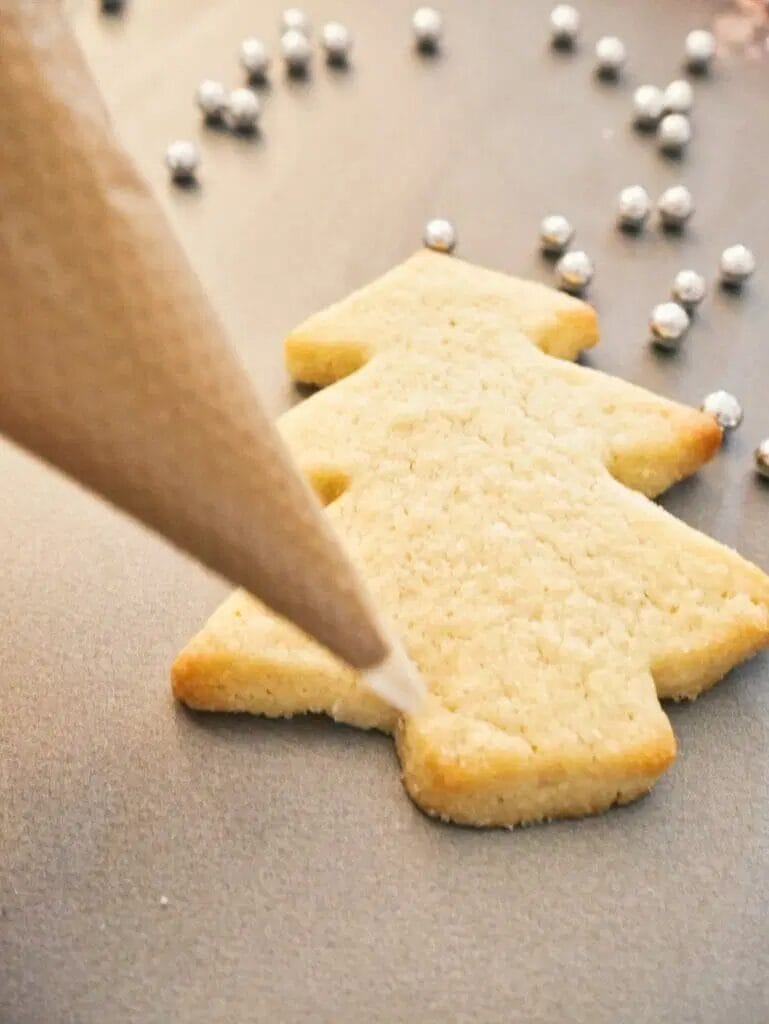
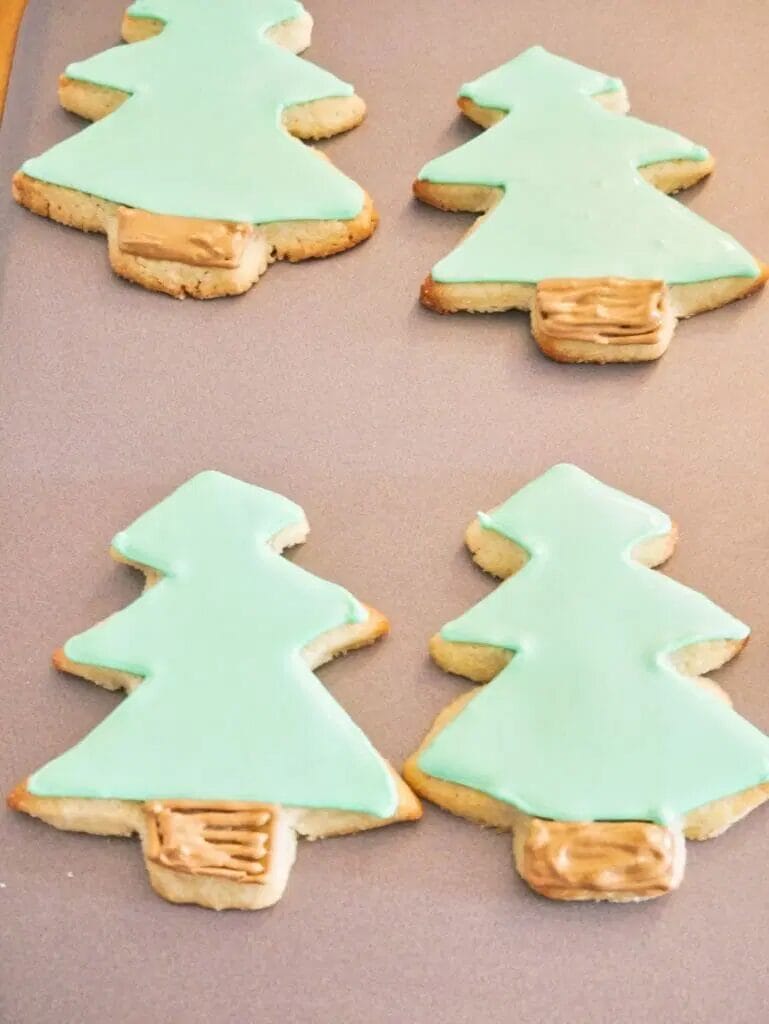
Once the green is slightly set (it won’t be dry, just hardened on the top and on the sides), outline and flood the base in brown icing.

From there, let the cookie dry for 8 to 10 hours before coming back to it and adding the detailing.
The list of things you can do to decorate a Christmas tree cookie is as large as the ways you can decorate a real Christmas tree.
Some people prefer lots of color, some just a simple garland, and some a bit more modern.

Check out some of the ideas I had, including garland with bells (silver edible pearls), some lights with dotted icing, or just a modern kind of zig zag.