
As an Amazon Associate, I earn from qualifying purchases. In addition, I participate in several other affiliate programs that allow me to earn while I recommend products I love.
These bell cookies are perfect for the holidays, and easy for kids to decorate. Made with royal icing and a delicious sugar cookie base, they are a wonderful way to bring some holiday cheer to your friends and family.
There are so many different types of Christmas cookies, it can make your head spin.
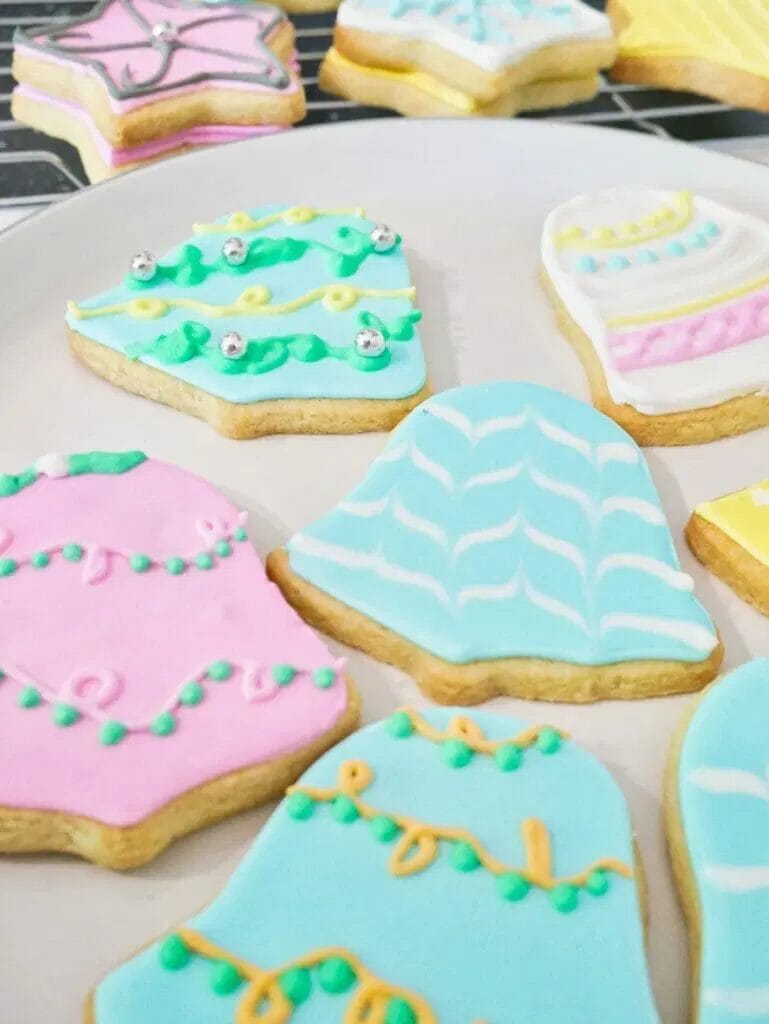
For these bell cookies, which I do as part of a holiday collection, I like how creative you can get with them and what they add to a typical Christmas cookie collection.
I’ve chosen to do mine in pastel colors, but you could also take “silver bells” to a whole new level and make them look flashy and sophisticated, or simply stick to a green and red theme – whatever works for you.
In this decorated bell cookie tutorial, I’ll teach you how to make bell cookies, how to decorate bell cookies, and how to use royal icing on bell cookies.

These bell cookies are:
- easy to make with not too many jagged edges to cut out
- made with sugar cookie dough and vanilla flavored royal icing
- fun to bring to holiday parties
- a great option for baking with kids
How to Make the Dough for Christmas Bell Cookies

These bell cookies use a cut-out sugar cookie dough, which is essential as you don’t want the dough to spread in the oven.
The combination of ingredients and the amount of time you chill the dough for is what prevents it from becoming blobs all in your oven, so follow it to the letter!
When you go to cut out the shape, put a little bit of flour on your cutter and make sure not to pull at the dough too much as you take it out as this could result in cookies that get wonky in the oven even if you can’t see it when you put them in.
And let me just repeat: follow all of the instructions for chilling the dough.
I have tried multiple ways to skip these steps for the sake of time, and really you won’t get the crisp edges you want without following them.
How to Make the Royal Icing for Bell Cookies

Royal icing is used to decorate these bell cookies, and you can use my royal icing recipe to make sure you’ve got all of the ingredients including meringue powder.
I use meringue powder as I find it easier to store and it’s safe to eat for pregnant women.
Now, typically, when you go to make royal icing, you are looking at making a consistency that is somewhere between 12 and 15 seconds, which is the time it takes for a line to disappear from your icing if you drag a knife through it.
This helps you get that icing smooth on your cookie, and simply requires you to keep mixing the icing until it stiffens up to the consistency you want it at (or you can add a bit of water to thin it out).
You can also make two different consistencies, one thinner for the “flood” and one thicker for the details and outline, but I prefer to make one and use it for everything as I find it gives the cookie a nicer finish.
Extra Tools You’ll Need for Christmas Bell Cookies
In addition to the regular ingredients you’ll need to make the dough and icing, you’ll also want some extra tools like:
- piping bags – these are the best kind
- any food coloring you want – just make sure it’s gel food coloring like this
- baking tray
- silicone baking mat – I use these and they are awesome
- a scribe or toothpick to fix any details – try this one
- edible silver balls – I love these
- bell cookie cutter – these are the best
Can I Substitute Ingredients in these Bell Cookies
These cookies are formulated to be perfectly no spread, and unlike other cookies where the shape doesn’t matter, the shape matters immensely!
I wouldn’t recommend any substitutions, as you may throw off the balance of the recipe, but if you’re hoping to make a keto cookie or a vegan cookie or something similar, use a recipe that is specifically formulated for that purpose and then use these instructions for decorating.
How to Decorate Bell Cookies
The first thing you need to do is to outline the bell cookie in the color you want the base to be.
Immediately after, flood the middle, so basically add icing in the middle until the base is covered.
Use your scribe or toothpick to pop any air bubbles and give it a little shake so that the icing settles.
If you are going to do any “wet on wet” techniques, which is an option to make polka dots, stripes, or do the marbling effect.
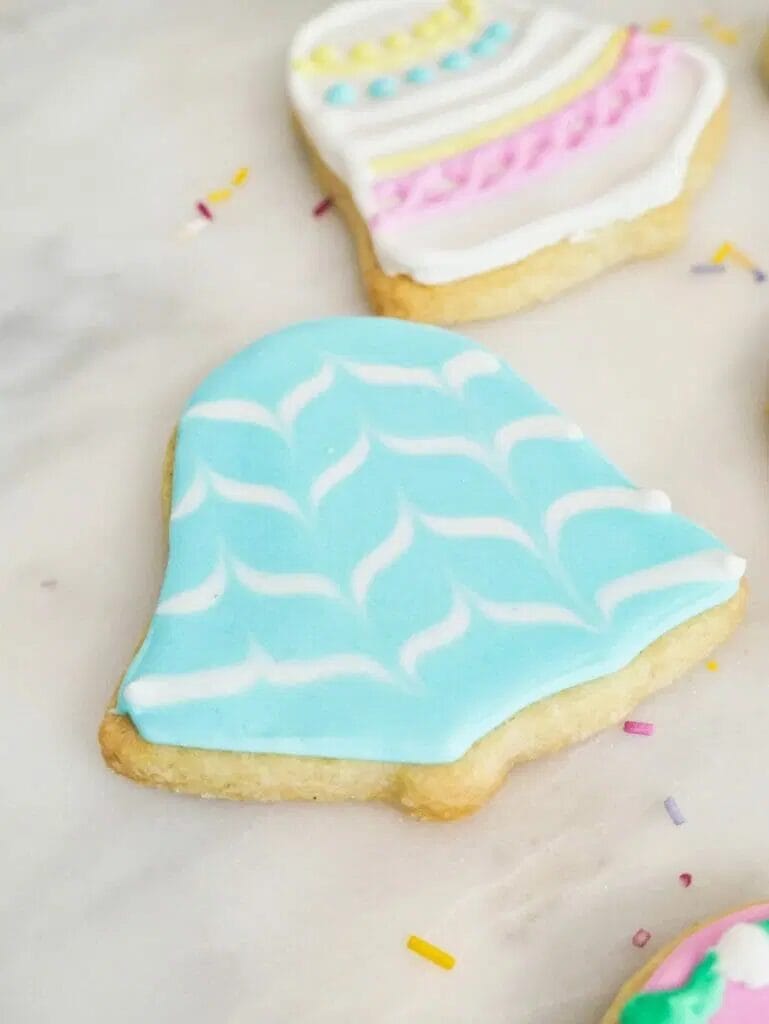
If you want to add detailing on top that doesn’t sink into the existing icing, then let the cookie dry for 8 to 10 hours and then go back in with your royal icing for detailing.
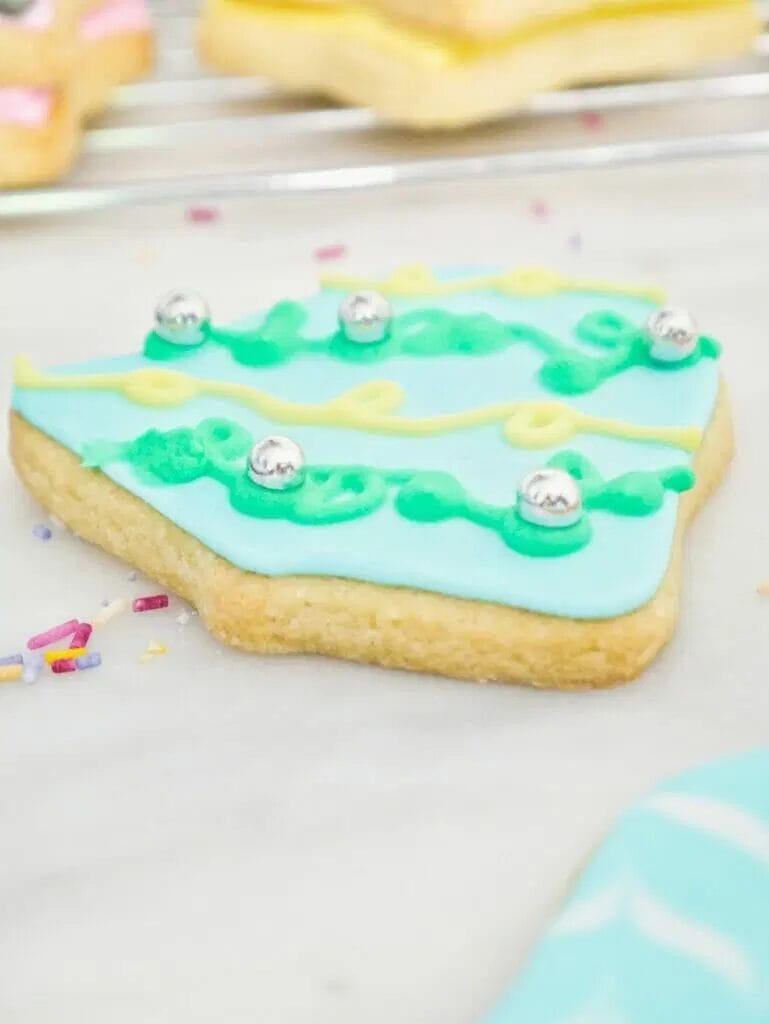
You can do any type of design you want, but below are a few options if you need some inspiration.
